
Tiling can be a great way to add a decorative touch to your home or to protect your walls from water and other damage.
However, for the tiles to be correctly installed, the surface they are being applied to must be smooth enough to ensure that they adhere properly and look great.
In this post, we will explore the level of smoothness required for tiling and how to achieve it.
Whether you are a DIY enthusiast or a professional contractor, this information will be valuable in helping you prepare your walls for tiling. Let’s get started!
So, How Smooth Does The Wall Need To Be To Tile?
In general, a wall needs to be relatively smooth to tile successfully. The level of smoothness required will depend on the type of tiles you are using and the size of the tiles.
For example, larger tiles may be more forgiving of slight imperfections in the wall surface, while smaller tiles may require a smoother surface.
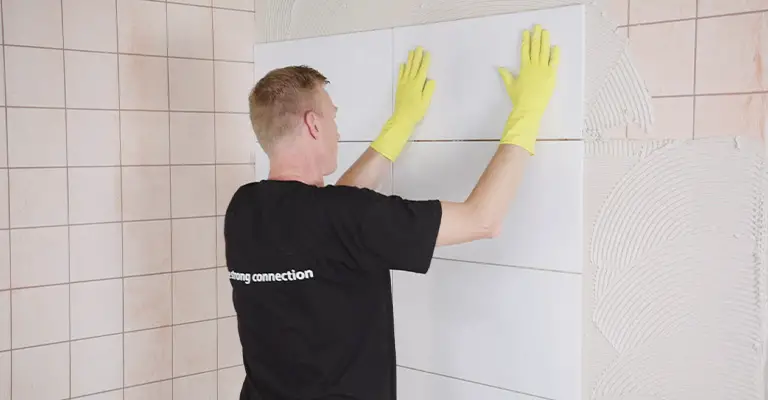
Ideally, the wall should be as smooth as possible to achieve the best possible results. If the wall is rough or uneven, it can be challenging to get the tiles to lie flat, and it may result in gaps between them or tiles that are not evenly spaced.
To ensure that your wall is smooth enough for tiling, you may need to do some preparation work before you begin.
This may include filling in any holes or cracks in the wall, sanding down rough areas, or applying a skim coat of plaster to create a smooth surface.
It is also important to ensure that the wall is clean and dry before tiling to ensure that the tiles adhere properly.
Overall, the smoother the wall is, the easier it will be to tile, and the better the final result will look. By taking the time to properly prepare the wall, you can ensure that your tiling project is a success.
Understand The Requirements Of The Surface Being Tiled

To apply tiles to any surface, you must consider the surface on which they will be applied.
All surfaces must be appropriately prepared, whether concrete, wallboard, plywood, or painted. It takes up to 30 days for new plaster to dry, and wooden surfaces should be primed before painting.
The best way to raw tile brick, block, or cement would be to render the surface and plaster it or use a cement board such as Hardie Backer, which offers waterproofing and fire resistance.
Surface Preparation
The following are some basic steps to follow before tiling a wall:
- If any screws, photo hooks, nails, or other fittings have been installed, they must be removed
- Make sure there are no loose plasters
- Take down old wallpaper
- If there are any large cracks/holes in your wall, fill them in
- You may need to sand the wall if it is not level
- Make sure all dust is removed from the walls by vacuuming and wiping them
Why Wall Preparation Is So Important
In preparation for tile installation, it is essential to achieve a flat, dry, solid, structurally sound surface firmly attached to the wall studs without any flex or movement that could damage the tile.
Certain precautions must be taken in wet areas, such as shower walls. To complete a successful tile project, you must use the correct trowel and mortar. Whatever type of tile you choose, the size and shape will affect the final look.
How To Level The Wall?
For checking for bumps on the wall, simply use a long, flat piece of timber, and slide it over the entire wall while changing your angle of vision. \
It is necessary to sand any bumps larger than 4 and 5mm to ensure that the adhesive sticks to them.
You can tolerate bumps of up to four and five millimeters. In the case of anything above, extra care must be taken.
Leveling the wall is important to ensure the adhesive won’t lose its grip. Whether you apply an adhesive to drywall, plywood, concrete, cement board, or cement board, a thick adhesive layer may not withstand the weight of tiles.
How To Prepare A Painted Or Textured Drywall For Tiling?
To begin with, remove all signs of paint that are not firmly or tightly attached. Next, fill in any cracks and holes, and use sandpaper to level out uneven areas.
Once this has been done, use a vacuum to remove any dust or heavy particles from the wall, then wipe the wall clean with a dry cloth. Using TSP (trisodium phosphate) or an ammonia-based cleaner, remove
any remaining dust, oils, or grease from the wall. It is important to let the wall dry completely before installing tiles.
How To Prepare Old Plaster For Tiling?
A freshly laid tile won’t always look good on old plaster since the wall may be too old and in poor condition to support a fresh installation.
The plaster may be suitable to tile over, or it may need to be removed and replaced with fresh plasterboard, so it is recommended that you consult a professional.
To apply tiles to plaster, we recommend Larsen Acrylic Primer, which acts as a seal on gypsum plaster or screed before cement-based adhesive application.
How To Prepare Drywall For Tiling?
It is necessary to wait up to a month for fresh plaster to set in and fasten. Once tiled, the joints do not need to be taped.
To get a good bonding effect, apply the last layer of skim coat and then sand it down to a rough texture using medium sandpaper. You should again ensure no dust or heavy particles on the surface before tiling.
To apply adhesive, vacuum the surface, wipe it with a damp cloth, and let it completely dry before applying it. In bathrooms and wet rooms, it would be recommended to use moisture-resistant plasterboard or HardieBacker.
How To Tile On Tiles?
If you want to tile over old tiles, you have two options: chisel off the entire wall or tile over the existing tiles. It will be necessary to grind down the old tiles to achieve a better surface for applying the adhesive.
Be sure to listen to the sound of each tile before you apply the new tiles over it to determine if it is hollow.
Try knocking each tile to hear the sound; you will know if it is hollow. You should remove them and fill the cavity if any exist.
Any dust or chemical products should be removed entirely from the surface before applying adhesive.
How To Tile On Wallpaper?
The shiny, smooth finish of wallpaper always makes it necessary to remove it before tiling. You will feel a raw, textured touch when holding the lining paper.
It is important to ensure the surface is moisture-free before tiling by steaming, stripping, and sanding the wallpaper. The surface should be dusted, dirt-free, and grease-free before applying adhesive.
Layout Is Important
An important aspect of the finished product is the layout. You should start in the ‘middle’ of the area to be tiled and work your way out.
As a result, your backsplash will have a center, and the sides will be uniformly shaped. Ensure the curb is leveled at the back of the sink, stove, or counter.
You may also experience uneven grout lines if you don’t level the floor before laying the bottom row of the tile.
If your tile row is uneven, you must cut it to offset the unevenness. Things get much easier once you level the top of your bottom course of tiles.
The walls of an old house may not be plumb or level (that’s what’s called character!). Consider marble, mosaic tiles, or random patterns. Using this trick, you no longer have to worry about level grout lines and square corners.
Final Tips
It is pretty easy to prepare your walls for tiling if you have the proper knowledge, mindset, patience, and tools.
Almost any surface and texture can be tiled, but it is vital to prepare the walls before you begin.
If you are going to level the bathroom, kitchen, and/or hallway walls before you begin, you should do so first. There could be complications if this is not done.
Additionally, ensure your walls are free of moisture, dust, and grease before tiling. With this method, the adhesive will adhere properly and last for a long time (if the product is good).


