
In the morning, you wake up and go to the bathroom to shower. You turn on the faucet, but it doesn’t work. The water just runs out of your hand and down the drain. The shower knob got stripped, and you’re not sure how to fix it?
Most people might think that this is an impossible task for them. But with a little DIY know-how, you can easily replace the stripped knob with a new one.
There are many ways to do this. But before you start, make sure that you have all the necessary tools in your toolbox.
A stripped shower knob can be fixed with a screwdriver and some pliers or by replacing it with a new one. But, of course, if you don’t want to buy one, you can always get someone else to fix it for you.
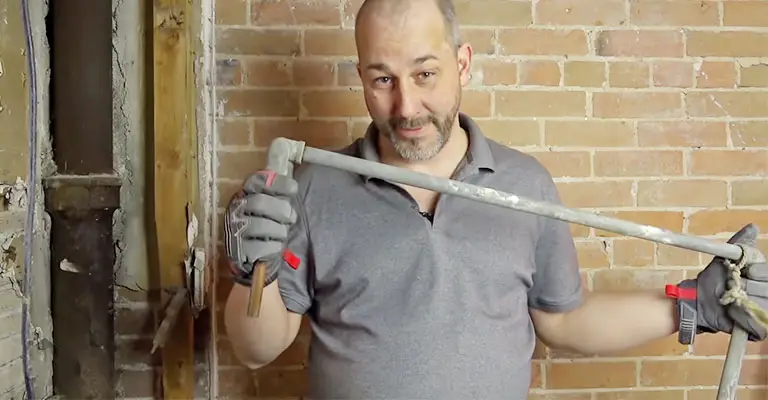
Fixing A Stripped Shower Knob With Easy DIY Steps
“Is my faucet knob broken?” may be the question that runs through your mind if your shower faucet handles go off or the showerhead drips long after you’ve taken a shower.
When a faucet handle spins, it can be extremely annoying, especially since it happens quite often. However, there is a possibility that the problem lies with the shower valve cartridge, not the shower knob.
Wear and tear on the faucet cartridge usually cause a spinning faucet handle. To control the flow of water, the cartridge connects to the handle.
It is common for the handle to feel loose or simply spin when the cartridge is stripped. In just about 20 minutes, you can fix the problem with a few screwdrivers and a wrench.
Replacement of the shower valve cartridge is the best way to fix a faulty single-handle knob on a bathtub or shower.
In addition, you can fix your shower faucet for a long time by removing and replacing the old cartridge. This article will guide you on how to fix a stripped shower knob.
Step 1: Disconnect The Water Supply
Depending on the style of your shower, there may be two fixtures’ shutoff valves behind it. If so, close both valves and then open the faucet to relieve pressure.
The main water shutoff valve should be used if no shutoff valves are in place. Then open another faucet, preferably at a lower level than the shower you are working on, to release pressure in the system.
Step 2: Set Up Your Work Area
To prevent screws or small parts from getting lost, cover the drain with a drop cloth when working in the shower or sink.
Here is a topic that you might be interested in: How To Plumb A Dishwasher Without A Sink?
Step 3: Remove The Escutcheon Plate And Shower Knob
In most cases, a screw is located behind a cap on the front of a single-handle shower knob. The screw can be loosened by prying the cap off with a flathead screwdriver and then turning the screw counterclockwise.
A hex key (also called an Allen wrench) or a flathead or Phillips screwdriver may be needed depending on the faucet’s brand and model.
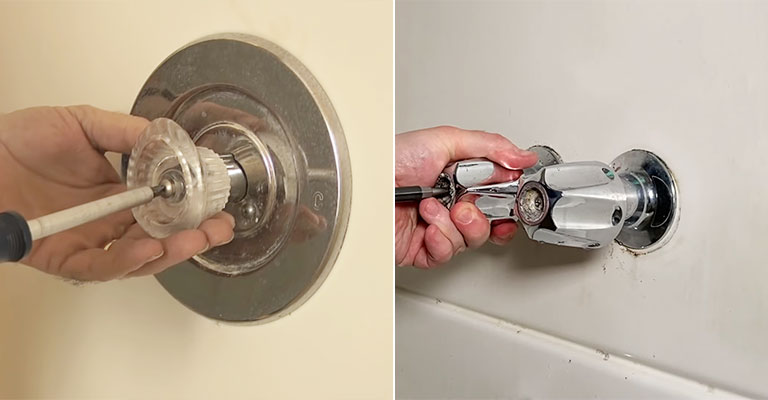
Using a faucet handle puller may even be necessary if the knob is stuck tight. Additional screws will be needed to remove the faceplate, also known as the escutcheon plate.
When you score the caulking where the plate meets the shower wall, keep in mind that the plate will be caulked. Then, again, you can pry the plate from the wall with your flathead screwdriver, revealing the cartridge behind it.
Step 4: Take Out The Cartridge
In the faucet valve, there is a replaceable cartridge. With a small screwdriver, remove the retaining clip at the top of the cartridge.
You will need this clip for reinstallation. By grasping the front of the cartridge with pliers and pulling it directly out, most cartridges can be removed.

Cartridges may require the use of a cartridge pulling wrench in some circumstances but know that these will vary from manufacturer to manufacturer.
Step 5: Replace The Cartridge With An Identical One
Shower faucets come in many shapes and sizes, each with its own valves that are not interchangeable between brands and models.
Make sure you find an exact replacement for your old cartridge by bringing it with you to the hardware store.
Step 6: Put In The New Cartridge
Make sure the cartridge is inserted into the faucet valve body and use the included lubricant if necessary. To secure the cartridge, place the retaining clip in place.
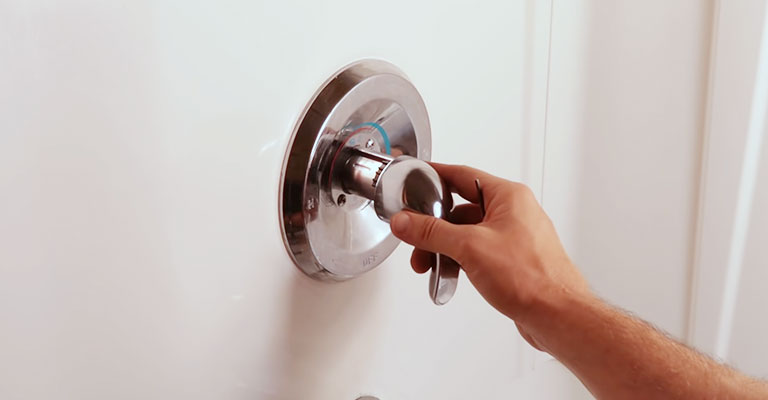
Step 7: Assemble The Faucet Again
If you removed the escutcheon plate, you must reinstall it. The handle should be reinstalled and secured with its screw, and the cap should be added.
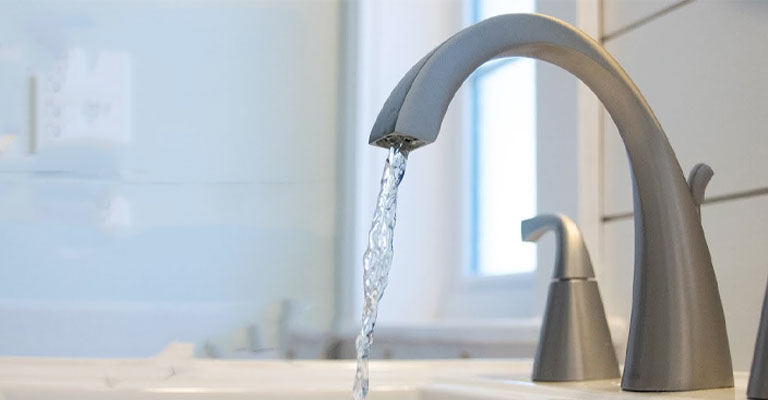
Step 8: Restore The Supply Of Water
You can test your new cartridge by turning on the faucet and checking for leaks after turning the water supply back on.
You Might Want To Try A Quick Fix First
If you need to repair your shower faucet, you have several options. In some cases, hard water deposits may cause mineral deposits to build up behind the faucet knob. However, it’s a problem that can be solved.
You can turn off the water by closing the shower shutoff valve (if available) or turning off the main water valve at your house.
The pressure in the shower lines can be relieved by opening the shower faucet. Drop cloths can be used to prevent small items from getting lost down the drain.
The valve cartridge can be found behind the shower handle and cover plate (if necessary).
The steps below will guide you through the process of removing the cartridge. Leave it to soak in a mixture of water and vinegar for several hours after clearing away any loose debris with a soft-bristled brush.
The cartridge should be inserted back into the valve, and the nut should be tightened. Then, turn the water back on after reinstalling the shower handle and cover plate (if applicable). You may be able to solve your problem by doing this.
Take A Temporary Approach
To fix a stripped shower knob, you may have to replace the cartridge altogether if cleaning the cartridge does not work. Use this stopgap measure while you prepare for the repair to keep the shower running.
Ensure the water is turned off and a rag is placed over the drain. After removing the handle and cover plate, check the grooves where the handle is attached to the valve.
You can temporarily enhance the grip of the handle with thread-seal tape, also known as Teflon tape or plumber’s tape if they are worn but still visible. Screw the knob back into place after you wrap the plumber’s tape around the cartridge’s ridged end.
Using this remedy will give you time to gather your plumbing kit and the supplies you’ll need to repair the shower faucet.
You may be able to go several months without a drip, but eventually, you will have to make a permanent repair to prevent future plumbing problems.
Speaking of plumbing kit, you should keep a one in your home anyway since there are bunch of things that need regular maintenance. For example, if your washing machines drains into the sink or you need to fix a water heater drain valve.
What Is The Reason For My Shower Handle Turning Over And Over Again?
In most cases, it is caused by wear and tear on the faucet stem or cartridge. Water flow is controlled by the cartridge and handle working together. It feels loose or just spins on the end when the stem is stripped.
What Is The Best Way To Fix A Faucet Handle That Turns All The Way Around?
The faucet stem, also known as the faucet cartridge, can wear and tear over time, causing spinning faucet handles. To replace this part, you must remove the faucet from the sink and insert the new cartridge.
What Should I Do If My Shower Knob Won’t Turn Off?
First, try the simplest hack to fix a stuck shower faucet. If the screw on the handle is too loose, try tightening it.
Your immediate goal should be to stop the water flow before tightening anything. Turn off the water supply completely to accomplish this.
Note From The Author:
Make sure the notch on the back of the faucet knob and the notch on the cartridge are clean. The knob may be useless and cause the faucet to leak if it has become rusted or stripped.
Alternatively, you can wrap the worn grooves with plumber’s tape for a temporary fix or soak the valve in vinegar for a quick fix to remove limescale buildup. However, it may be better to replace the valve cartridge altogether.
The replacement cartridge for your shower faucet repair will depend on the manufacturer, so you should determine which one you will need before you begin.
You can find an exact match for your old cartridge by taking it to the hardware store after removing it.
The Bottom Line
Replacing the handle is the best option if the handle can’t be repaired. Alternatively, you can order one online from a plumbing parts outlet or the manufacturer if you have the time.
Contact your local plumber if your shower knob is too difficult for DIY repair, and replacement of the knobs is not an option.


