
Hanging exterior lights on stucco can add a beautiful touch to a home’s exterior, but it’s important to take the necessary precautions to avoid damaging it.
Stucco is a type of plaster made of cement, sand, and lime that is commonly used as a durable exterior finish for buildings.
It is a porous material, so it is essential to use the right tools and techniques when hanging lights to avoid causing any damage. This article will discuss some of the best practices for hanging exterior lights on stucco.
The Best Practices For Installing Exterior Lights On Stucco

The best practices for hanging exterior lights on stucco include the following:
Use The Right Tools:
It is important to use the right tools to avoid damaging the stucco. For example, use a drill with a masonry bit to make holes in the light fixtures.
Choose The Right Light Fixtures:
When choosing light fixtures, look for ones that are designed specifically for stucco surfaces.
These fixtures often have special mounting brackets designed to distribute the weight of the light evenly across the stucco, reducing the risk of cracking or other damage.
Avoid Hanging Heavy Lights:
To prevent damaging the stucco, avoid hanging heavy lights that could put too much weight on the surface. Instead, choose lightweight fixtures that are easy to install and won’t put too much strain on the stucco.
Use Anchors:
To help distribute the weight of the light fixtures and prevent them from pulling out of the stucco, use anchors to secure them in place. Anchors can be made of plastic or metal and inserted into the holes drilled for the light fixtures.
Follow The Manufacturer’s Instructions:
When installing light fixtures on stucco, it’s important to follow the manufacturer’s instructions carefully. These instructions will provide detailed guidance on properly installing the fixtures and avoiding damaging the stucco.
How To Install An Exterior Light Fixture On Stucco?
To install an exterior light fixture on stucco, follow these steps:
1. Choose The Right Location:
Before installing the light fixture, choose the best location for it on the stucco surface. Consider the placement of other lights and the overall design of the exterior of your home.
2. Mark The Location:
Once you have chosen the location for the light fixture, use a pencil or other marker to mark the spot on the stucco where the light will be installed.
3. Drill The Hole:
Using a drill with a masonry bit, carefully drill a hole at the marked location for the light fixture. The hole size will depend on the type of light fixture you are installing, so refer to the manufacturer’s instructions for guidance.
4. Install The Anchors:
If necessary, insert anchors into the hole to help distribute the weight of the light fixture and prevent it from pulling out of the stucco.
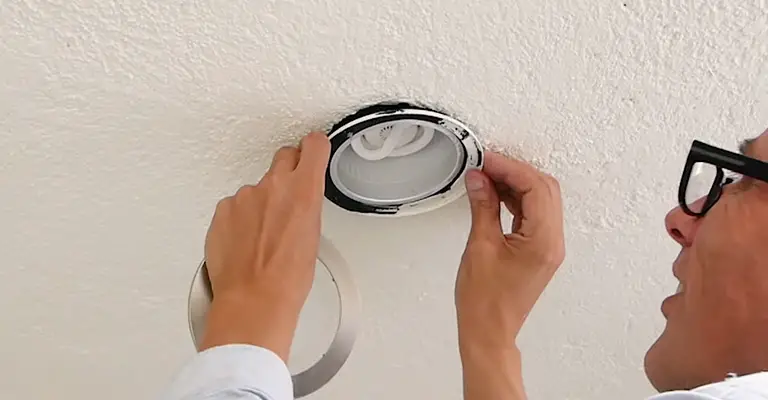
5. Install The Light Fixture:
Following the manufacturer’s instructions, attach the light fixture to the stucco using the appropriate mounting hardware. Make sure the light is securely attached and positioned correctly.
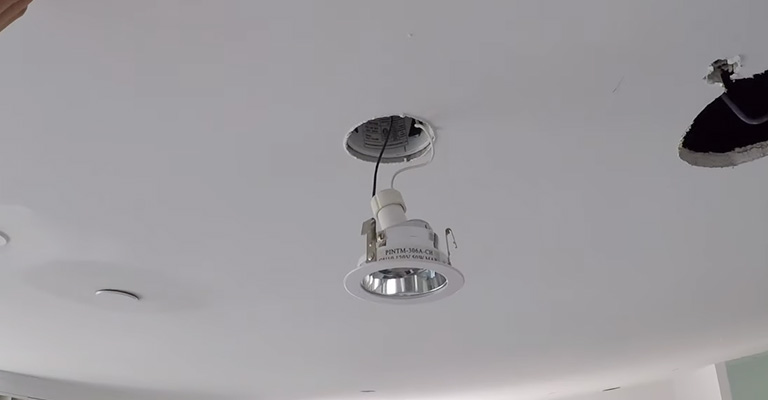
6. Connect The Wiring:
If necessary, connect the wiring for the light fixture according to the manufacturer’s instructions. Be sure to turn off the power to the circuit before working on the wiring.
7. Test The Light:
Once the light fixture is installed and the wiring is connected, turn the power back on and test the light to ensure it is working correctly. Adjust the light as necessary to achieve the desired effect.
Alternative Way to Mount External Light Fixtures on Existing Stucco
The exterior light fixtures on your home can enhance its outdoor appearance and add character to it. There is a wide variety of styles and sizes to choose from.
In addition to adding extra security, they can also light up areas around your house that would otherwise be dark. It is easy to install an exterior light fixture on a stucco wall.
Things You’ll Need
- Screwdriver
- Torpedo level
- Wire strippers
- Wire nuts
- Caulk Gun
- Tube of Exterior Silicone Caulk
- Electrical tape
Step 1
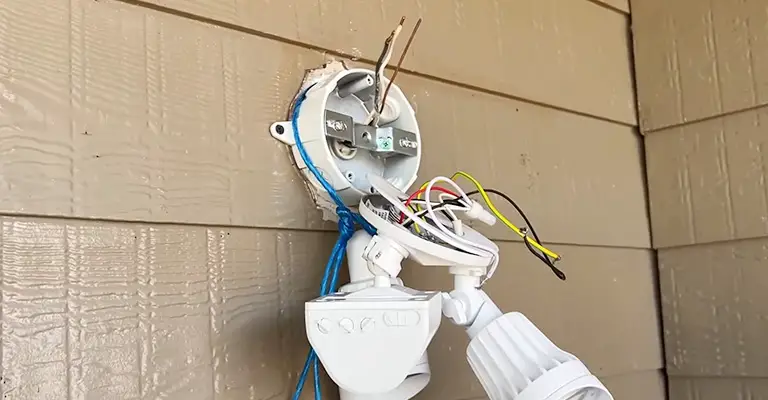
Ensure that the service panel (breaker box) is off and that the power is off to the fixture junction box. Using a non-contact voltage tester, verify that all wires in the junction box are disconnected.
Organize the wiring in the box by separating it. To have a junction box professionally installed, contact a licensed electrical contractor if there is not one already present.
To prevent a fire hazard, all exterior electrical fixtures should be mounted to junction boxes.
Step 2
Stripping the wire ends prepares the new fixture for hanging.
Step 3
The mounting bracket for the new light fixture must be attached to the existing electrical junction box with the screws provided.
To ensure the fixture is level, place a torpedo level across the screw studs attached to the bracket.
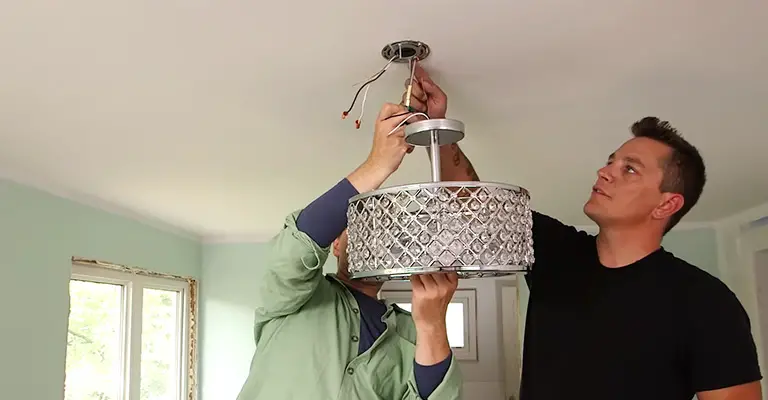
Step 4
Use wire nuts to connect the new light fixture wires to the junction box’s corresponding wires. Make sure you follow the wiring directions for your specific fixture.
Ensure the wire nuts are securely connected by wrapping them with electrical tape. Make sure all of the wirings have been pushed into the junction box with care.
Step 5
Feed the screw studs through the appropriate holes and secure the nuts to fix the light fixture to the wall.
Step 6
Using exterior silicone caulk, seal the gap between the fixture and the stucco wall. Apply caulk with your fingertip and smooth it, ensuring that the bead fills both walls and fixtures. The silicone ensures a watertight fixture since stucco does not have a uniformly flat surface.
Tips for Holiday Home Decorating On Stucco
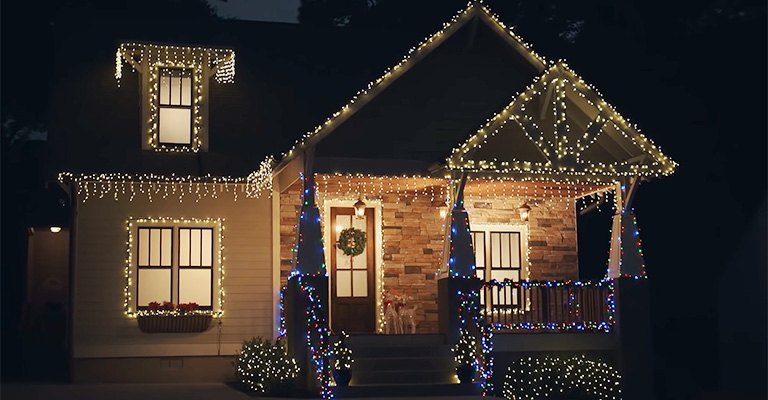
The desert has a different feel when it comes to holiday decorating. During the summer, we don’t get the white snow, we have to travel north to find (natural) pine trees, and the temperature is usually 70 to 85 degrees.
There are still plenty of people who want to get in the holiday spirit, though! Find out how to decorate your real estate development in the following article.
Using adhesive hooks or a hammer and nail is the easiest way to hang lights in a house with wood framing and drywall. Stucco, however, is a common building material in Tucson and other Southwest regions.
Cement and sand are the main ingredients of stucco, a tough material. You can take a few different approaches when hanging decoration lights on stucco.
Mounting Clips
If you have an exterior stucco wall, you can also attach clips to it to hang lights. Clips like these will remain up year-round, even after the lights are taken down, but will make hanging more convenient.
- Determine where you’ll hang the lights (where each clip will go).
- Apply a little bit of adhesive to the correct spot using a caulking gun.
- Install the mounting clip onto the adhesive and stick it to the wall until it is firmly attached.
- After the adhesive has dried and can bear weight, hang your lights up.
Hot Glue
Use hot glue for attaching cords to walls when hanging lights outside or inside your stucco home. If you require an extension cord, ensure the hot glue gun is loaded and connected to an outlet.
Stick the light string to the wall, then add hot glue over it. Keep the string close to the cord but avoid direct contact. Make sure you hold the glue in place for about 30 seconds.
Cactus Light Decorations
Throughout the southern Arizona cities and communities, you’ll see plenty of cacti strung up with lights. If you would like to do the same thing in your home, here are some tips:
Be sure to wear gloves that will protect you from needles and spines. The right tools are essential: Setting up a ladder next to a saguaro is sometimes difficult due to its many arms. Setting up lights will be easier if you have a teaching tool.
Consider alternatives to stringing lights around a cactus: Net lights are easier to set up than lights strung around it. Another option would be to set up a holiday spotlight, which is probably the easiest and safest.
The first thing to remember (especially if you’re new to Arizona) is that while many people elsewhere in the country cut their trees down, cutting down a saguaro is a felony. If you don’t want a real tree, try a tree farm or buy a fake one.
Hanging Other Holiday Decorations
It may not be necessary to hang clips on walls for interior decorating since they will remain there. Especially if you plan to hang another decoration after the holidays, screws and anchors might be your best bet.
- Make a pencil mark on the wall where you will place your screws.
- Make sure the masonry bit on the drill is just a little longer than the anchor’s length, and then drill into the stucco.
- Incorporate the anchor into the hole after you have filled it with silicone caulk. Make sure it’s flush with the wall by gently hammering it.
- Make sure the anchors are screwed into corrosion-resistant screws.
- You can now hang your decoration.
For larger and heavier objects, you might need to do more work. You should consult a professional for anchor installation if you have synthetic stucco in your home.
HOA Restrictions
A homeowner’s association (HOA) is often set up in real estate developments, and these HOAs usually have rules about how your house should look from the outside.
To make sure you are following your HOA’s guidelines, it is best to consult them before decorating for the holidays.
Final Words
Inspect the lightbulb housing and ensure it protects it from moisture. Electricians are the best to consult if you have questions about electrical wiring procedures.


