
Wiring a dimmer switch can be a valuable and convenient way to control the lighting in your home. It allows you to adjust the brightness of a light fixture and turn it on and off.
If you have a dimmer switch with 3 wires, it can be a bit more challenging to install than a switch with fewer wires. However, with the right tools and knowledge, wiring a dimmer switch with 3 wires is a task you can do yourself.
This guide will walk you through how to wire a dimmer switch with three wires, including what materials you will need and how to make the connections safely.
Whether you are looking to upgrade your home lighting or want more control over your lighting, this guide will provide you with the information you need to successfully install a dimmer switch with three wires.
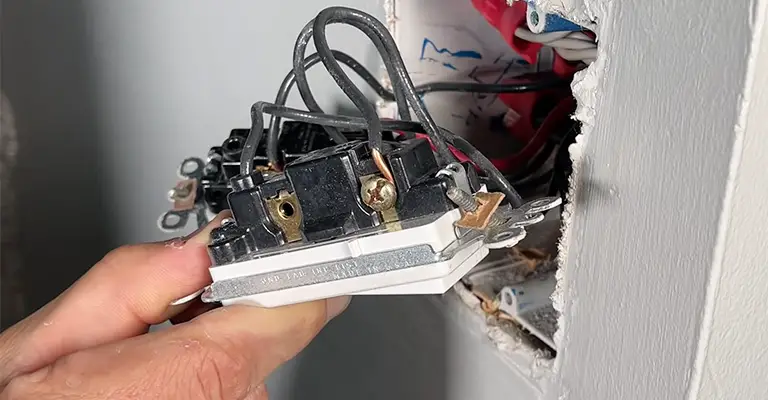
Wiring A Dimmer Switch With 3 Wires

To wire a dimmer switch with three wires, you will need the following materials:
- A dimmer switch with three wires
- Wire stripper tool
- Electrical tape
- Screwdriver
Here is a step-by-step guide on how to wire a dimmer switch with three wires:
- Turn off the power to the circuit that you will be working on by switching off the circuit breaker or removing the fuse for that circuit.
- Using the wire stripper tool, strip about 1/2 inch of insulation from the ends of the wires.
- Locate the two wires that provide power to the light fixture. These are usually black or red wires.
- Connect one of these wires to the dimmer switch’s “line” wire, usually black or red. Use a wire nut to secure and wrap the connection with electrical tape.
- Connect the other power wire to the dimmer switch’s “load” wire, usually the white or gray wire. Again, use a wire nut to secure the connection and wrap the connection with electrical tape.
- Locate the third wire, which is the ground wire. This wire is usually green or bare copper. Connect the ground wire to the dimmer switch’s ground terminal, usually marked with a green or bare copper wire. Secure the connection with a wire nut and wrap it with electrical tape.
- Install the dimmer switch into the electrical box and secure it with the screws provided.
- Turn the power back on to the circuit and test the dimmer switch to ensure it works properly.
It is important to follow these steps carefully and ensure all connections are secure to avoid any potential electrical hazards.
If you are not comfortable or experienced with electrical work, it is recommended that you hire a licensed electrician to install the dimmer switch for you.
What Are The 3 Wires On A Dimmer Switch?
An electrical outlet with three wires is referred to as a dimmer switch. Hot wires go to dimmer units via the white wire.
Returning power to the source is accomplished with the black or brown wire. Most likely, the third wire connects to the ground.
Red wires return light energy to the ballast or light, while black ones are hot leads for the ballast or light. A white stripe on the traveler wiring in the wall connects the black wire to it.
The red wire serves as the ground. To connect it to the dimmer, connect it to the bottom center wire.
The ground wire is recommended to be capped or attached to the box. There will usually be a red mark on the wall to indicate the hot lead.
Black or white wires connect traveler wires in the ceiling and wall. The darker wire of the two serves as the common terminal.
Most of the time, it is black or dark brass. There are two purposes for the common terminal, depending on its location.
Initially, it accepts the black power cable and connects it to the black power cable from the light fixture. The light will be turned off when this is connected to either the white or yellow wire.
How To Wire A Dimming Switch?
The three wires in a dimmer switch are the hot (black), ground (green), and the earth (white).
Typically, the hot and ground leads are black insulated or bare green copper. Your ground wire must be connected to the dimmer’s bottom center wire.
As well as being protected, this wire will also have a plastic wire cap to ensure that the connection remains tight and secure. Connecting the hot lead to the red lead on the wall will be done with the red wire.
Wires with white stripes (traveler or neutral) are connected to the black strand. A dimmer switch usually has three black, red, and white wires. In this case, the red wire represents the negative return.
You should connect this wire to a neutral ground. The wire can be connected to a different dimmer if you don’t own one designed for low-voltage lighting. If you hire an electrician, you can check the wiring of a dimmer switch.
The three red wires of a three-way dimmer switch can be connected to switches. In this case, the black and red wires are connected to the dimmer’s “travelers.”
The white wire is connected to the wall’s “ground” wire. The black wire is connected to the remaining traveler wire throughout the wall. White and black wires control a fixture’s brightness.
Why Does My Light Switch Have 3 Wires?
There is a single pole switch connecting the three wires to the light. The switch is not set up in a three-way loop. Connect both black wires and tie them to the same terminal.
Both white and bare copper wires go into the same terminal when using a single-pole light switch. A three-way switch cannot operate if the other two wires are not attached to the same terminal.
Usually, the first wire is the “load” wire, which goes to the green screw of the switch. It is common to have two other wires. The green terminal should be attached to the light fixture in most cases.
Besides the black wire, there are two white and red wires. It is recommended to tie all three wires together with a wire nut. You can then test to see which one is the hottest.
You must connect the green wire from the light switch to the common screw on the other switch. Lighting fixtures are directly wired with black wires.
The red and white wires in the correct box should go to the load; in the left box, they should go to the right box.
Catching white and bare copper wires with wire nuts are recommended. Separating the red and white wires is not recommended. Check to make sure the black and white wires are connected, however.
How Does a 3-Way Dimming Switch Work?
For a 3-wire dimmer switch to work, two wires must be connected: a red and black wire. There are two wires in the wall: the red ones go into the ground, and the black ones go into the traveler’s (white) wiring.
There is a connection between the white and black wires in the wall. There are parallel connections between the black and white wires, so they do not interfere.
There are three terminals on 3-Way dimmer switches, two on each side and one on the other.
The white wire supplies power to the dimmer, while the black wire returns power to the light. There is probably a taped-up version of the red wire on the third wire, which is ground.
Using a dimmer switch, you can adjust the intensity of the ballast, which is the light bulb. Therefore, the switch turns off the light and sends power to the ballast connected to the circuit.
In this case, the white wire is the power supply for the dimmer, and the black wire is the power supply for the light. The ground is the third wire, which is probably just a taped-up variation of the red wire.
By flipping the switch, you switch power to the ballast over the dimmed hotline when you want to dim the light. Controlling the ballast intensity without interfering with the rest of the circuit is possible in this manner.
How Many Wires Does a Dimming Switch Have?
It is common for single-pole dimmer switches to have three wires. Wires in older homes require special care if installed, so take extra care if you live in one.
You should hire an electrician to install the box because the dimensions have changed.
If you’re going to work on the wiring, make sure you turn off the electricity at the main fuse box first. You will be able to prevent electric shocks with this method. It is common for light switches to have two wires, one on each side.
There are two ground wires, one bare copper and one green. Lastly, two copper wires should be connected with screws. Attach the wires to the dimmer with needle-nose pliers, and then tighten the screws on the other side.
It is also possible to remove the wires using a pair of pliers using the dimmer’s wire connector. A dimmer comes with three wires: a hot wire, a return wire, and an earth wire. It usually looks like a red wire taped up to the ground.
A low-voltage light is the only type of light that the dimmer will work with. Low-voltage dimmer switches can only control low-voltage lights, so high-voltage dimmer switches won’t work.
It’s essential to pay attention to the wire connections of a dimmer when you’re buying it. Getting a professional electrician to repair or replace them if you notice that one or more are damaged or broken is the best course of action.
How Are Dimmers Wired Differently?
What are the different wiring methods used on different types of dimmer switches? Most dimming switches have a ground wire, a switched lead, and a white ground wire.
Usually, dimmer switches connect the three wires with wire connectors rather than screw terminals. Usually, dimmer switches are either one-way or two-way. It is common for dimmer switches to have three wires.
In this case, the red wire goes to the light source, and the black wire goes to the L1 terminal on the dimmer. Copper is usually used as the ground screw for the red wire.
The white wiring is connected to the L1 terminal of the dimmer, while the black wiring is connected to the L2 terminal of the dimmer. Previously, there was a black wire for the neutral lead, but now there is a green one.
Green ground screws and wires are usually found on newer dimmer switches. For the fixture to be properly grounded, it is necessary to have this grounding source. Bare copper wires are attached to the ground in houses with plastic-sheathed cables.
A grounding source may not be available in older houses. To replace old dimmers, checking the home’s wiring is essential. Before installing the new switches, ensure the electricity is turned off at the main fuse box.
The first thing you need to understand about dimmers is the difference between them and standard switches. In series circuits, light switches are control elements. The wire goes to the terminal no matter which way it is connected.
There is no difference between a three-way switch and a four-way switch in terms of wire quality. The way they’re connected distinguishes the two types of switches.
Final Words
When a dimmer switch comes with three wires, it indicates a Three-Way switching position, so it could be connected to a starlight or hallway light on the other end. The most important thing would be to get the common wires right, and traveler wires are less important.


