
White painted trim adds a timeless and elegant touch to any room, enhancing its visual appeal and creating a clean, polished look.
However, the small nail holes left behind from installing or reattaching trim pieces can detract from that pristine finish over time.
The good news is that filling nail holes in white painted trim is a straightforward DIY task that can restore the trim’s flawless appearance.
Recommended Products:
1. Wood Fillers
2. Putty Knife
3. Latex Gloves
What Do You Fill Nail Holes In White Trim?
I ran out of wood filler last week as I filled nail holes in plank ceilings, crown molding, baseboards, window casings, and all trim molding I’ve been installing.
Then I found something new – or at least new to me – when I went to pick them up. We’re talking about white wood filler here!
If you’re interested, it also comes in quite a few wood colors. This is one of the most extraordinary things I’ve seen in a while.
This product feels like a wall spackle but dries very hard when applied. I love it!
Whenever you make compound mitered cuts on your crown molding, it molds wonderfully to hide those imperfections.
I smoosh it into the nail holes with my finger, ensuring it completely fills them. No cracks or shrinkage occur.
It’s fantastic to be able to just touch up the white filler on molding when you are filling holes in molding that you painted before installation.
It is necessary to prime first or to apply two or three coats of brown wood filler to completely cover the brown.
Filling Nail Holes In White Trim | Step By Step
Installing baseboards, door or window trim, or crown molding always leaves nail holes and sometimes screw holes that need to be filled.
Probably, these holes were caused by finish nails, power brad nailers or even tinier pinprick holes.
These nail holes can be quickly filled before painting, staining, or other trim finishes are applied. Only a few tools are required for this project, but the results will help your project look really professional.
How to Choose a Wood Filler
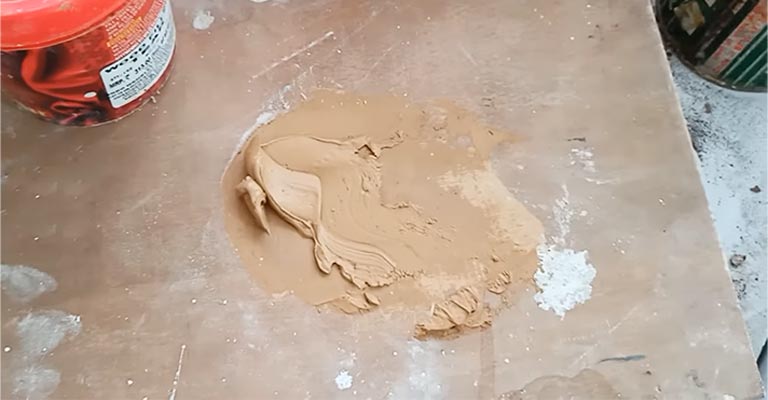
Wood filler is used to fill in all nail, brad, and screw holes in trim. Wood fillers come in two forms: water-based and solvent-based. Generally, water-based wood fillers are sufficient for interior applications.
Solvent-Based Fillers
Cleaning up solvent-based fillers is difficult if you leave them to dry. Solvent-based fillers are sticky and oily.
Unlike crumbly water-based fillers, solvent-based fillers are rock-hard and much more robust when dry. The best wood fillers are solvent-based and ideal for exterior wood, such as door casings, window trims, and sidings.
- Thick and dense
- Difficult to sand
- Can be left as-is but best when painted
- Interiors or exteriors
- Strong and hard
Water-Based Fillers
The consistency of water-based fillers is creamy, and they are easy to apply and remove. In contrast, you do not need a solid filler for interior nail holes. A water-based filler will also be supported by primer and paint, providing stability.
- Thin and light
- Easy to sand
- Best when painted over
- Best for interiors
- Weak and crumbly
Wood Filler Colors
Considering that it will be painted, you can use any wood filler colour for wood trim. To match the natural wood coloring of the trim, select a color-matched filler that blends with stain and/or clear sealant.
Wood fillers are available in a few different colors to match common types of wood. To produce custom colors, you can also purchase kits with colorants and a filler base.
What You’ll Need
- Putty knife
- Clean cloth
- Latex gloves
- Water-based wood filler
- 180- or 220-grit sandpaper
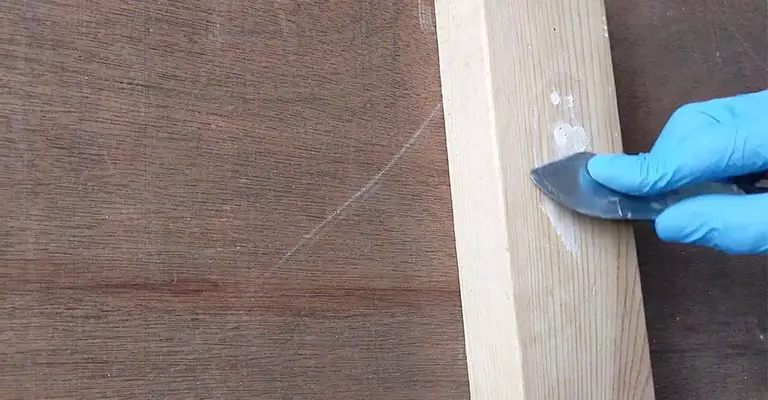
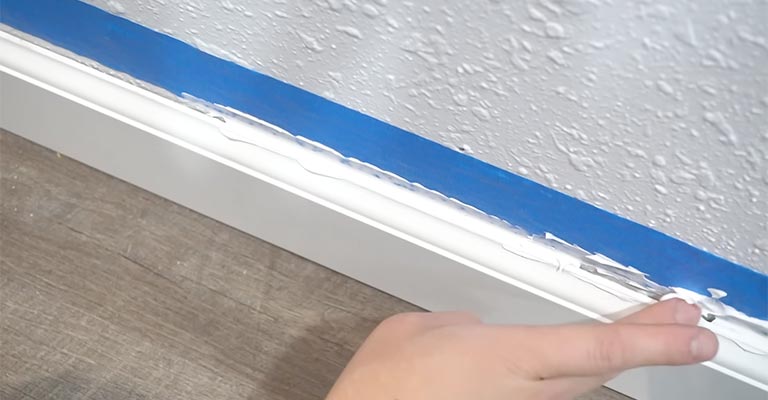
Step 1: Apply the Filler With Your Finger
The nail holes are usually too small to be filled with a finger, so it’s best to use yours. Your index finger should be covered with a small amount of filler.
Using a quick swipe of the filler, press it into the hole. To fill the hole, repeat as necessary. The best way to fill the hole is to overfill it slightly, leaving a slight, smooth ridge surrounding it.
It is recommended that you wear latex or nitrile gloves when spreading solvent-based wood fillers because you cannot clean them off your fingers with them.
Tip
Always keep a damp cloth nearby when applying water-based filler with your fingers. To ensure consistent application, occasionally wipe it off your finger after applying drying filler.
You should avoid pressing excess partially dried filler into the holes. You may be unable to adhere partially dried filler well to the wood’s surface.
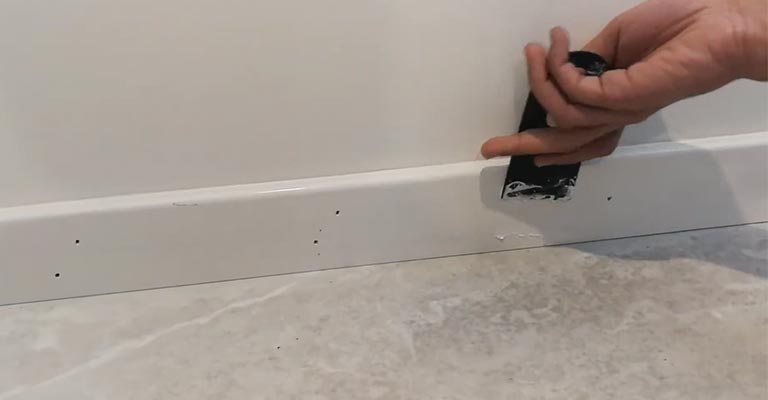
Step 2: Apply the Filler With a Putty Knife (Optional)

A putty knife may be needed if the hole is deeper or larger than the normal size on flat surfaces.
A putty knife is better than your finger for filling larger areas and creating flat finished surfaces, such as if you installed trim with screws or used a hammer to dimple the wood when driving a nail.
Scoop up a small quantity of filler using the knife edge, press it into the hole, and smooth it off.
Tip
To prevent wood filler from hardening fast, it is recommended that the lid be closed between applications.
The filler will develop a hard film within just a minute or two. You must discard this hard section because it cannot be used.
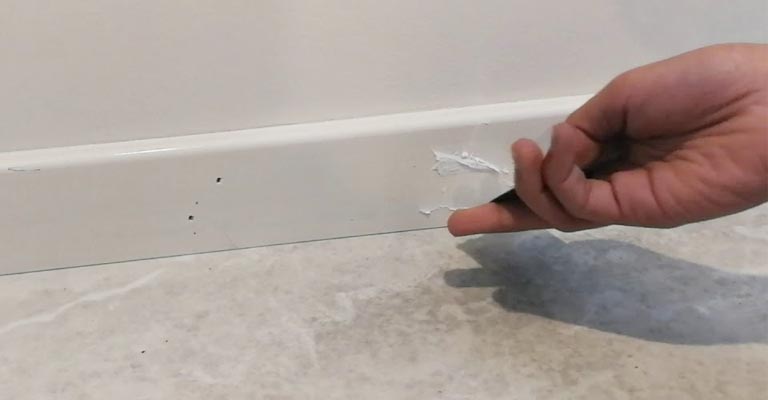
Step 3: Sand Water-Based Filler With Your Finger
Using a crumbly water-based filler can act as sandpaper because your finger can act as an abrasive. Sand off crumbles and protrusions with your fingers after the filler has dried for about 15 minutes.
A clean cotton glove is an effective tool for sanding. When solvent-based wood filler dries, its surface cannot be sanded down manually.
Step 4: Finish With Sandpaper
You almost don’t need to use actual sandpaper with filler that you’ve sanded with your finger.
There is no doubt that sandpaper will give you a better finish. You can use 180-grit or 220-grit (extra-fine) sandpaper to gently smooth out the filler.
In this process, you’re just smoothing out the filled area and removing the excess filler from its surroundings. You don’t have to remove any wood.
Step 5: Remove the Sanding Dust
With a clean cloth or a tack cloth, clean the surface. A soft tack cloth should remove wax rather than rub it hard. As soon as the surface has been dusted off, it can be primed, painted, stained, or sealed.
Filling Nail Holes vs. Leaving Them Open
Carpenters who install trim are often called finish carpenters because of the polished finish of their work. Whenever you install trim yourself, you should take the same care and refinement as when hiring a pro.
Keeping the nails that hold the trim in place concealed by the trim is one trick to achieving a finished look. You can only accomplish that by filling up the nail holes.
The typical error of painting over nail holes is to rely solely on paint to conceal them. The paint may appear to cover well when it is applied, but I’m sure the holes will be visible when it dries as tiny dimples.
A filler is essential when you are staining or clear-sealing wood. Also, since the stain or sealer won’t conceal the filler, it’s necessary to match the filler with good color.
The Bottom Line
It seems that the only way to get no nail holes is to putty the wall, mask everything, and spray everything.
This is the only way I know to get it not to flash… you’ll still see some after the finish coat unless you have a lot of time on your hands. They drive me insane whenever I visit a house, and I’m forced to deal with them.


