Pergolas are a popular addition to many outdoor spaces, providing shade and a comfortable area to relax and entertain.
Installing an outdoor ceiling fan on a pergola can be a great way to enhance the comfort and functionality of this space, allowing you to cool down on hot days and keep the air moving.
However, installing an outdoor ceiling fan on a pergola can be challenging, especially for those new to DIY projects.
Installing Outdoor Ceiling Fan Pergola | Step By Step
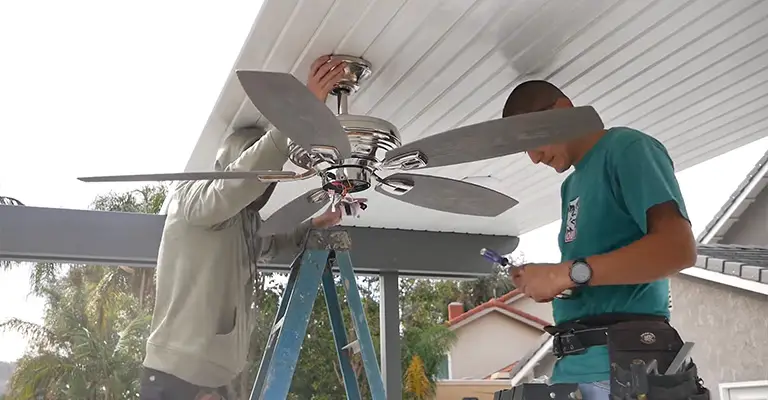
Temperatures around the world are indeed hotter now than they have been in the past 1,000 years. Even though that’s a wide variety, you’ll probably find that it’s warmer now than it was back then.
Radiators and air conditioners make it easy to regulate the temperatures inside. Having fewer options outside is a disadvantage.
The heat may be keeping you from spending time in your backyard, so you need an outdoor ceiling fan. Our instructions below will show you how to install it in your pergola.
1. Choose A Wet-Rated Fan

The first step is to decide which ceiling fan you should install in your pergola. Rain, snow, and other elements will inevitably affect your ceiling fan since it will be placed outside.
Ceiling fans that are rated for wet conditions are best. Rain, snow, and ice will be unable to damage it due to its design and all-weather blades. This means you can also clean them with a hose without worrying about harming them.
Don’t confuse wet-rated outdoor fans with damp-rated ones, though. They are also suitable for outdoor use, but they shouldn’t be directly exposed to moisture.
Direct rainfall can damage damp-railed models, but they can withstand moisture in damp areas.
In selecting a pergola fan, the rating shouldn’t be your only consideration. Choosing a fan with a light requires you to ensure that the fan is also suitable for outdoor use.
You may need a download for high-ceilinged areas to extend your fan closer to your living area. A flush mount model may be the best option depending on your ceiling height.
Additionally, the fan blades can be varied in size. To choose the right fan size, you should consider the size of the area you intend to cool. Observe that the blade sizes are calculated from the tip of one blade to the tip of the opposite blade.
2. Use a Board to Cover the Fan Base
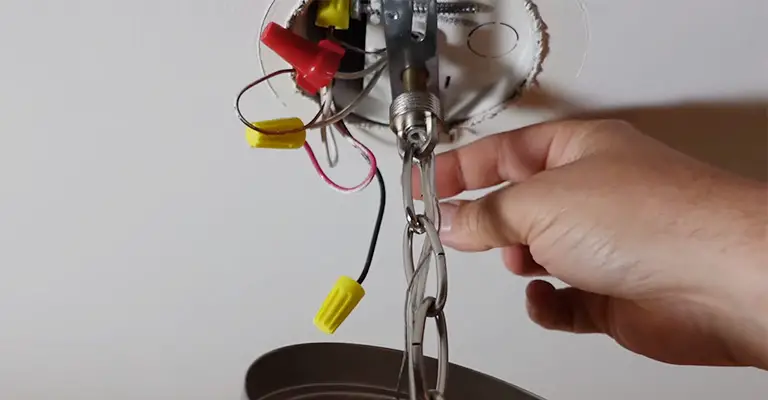
It is possible to install a wet-rated fan correctly even if you buy a wet-rated one. The fan’s canopy should never be exposed, which is a common mistake many people make.
It is common for homeowners to use a board that has a junction box already built into it. As a result, the fan flushes to the bottom without getting water in contact with the wiring.
Mounting the junction box to a board is also possible, after which you will attach the fan to the box. However, this sometimes leaves a gap between the fan canopy and the box.
A flush mount fan, however, would not be compatible with this method. Typically, the motor housing of such fans serves as both the canopy and the motor housing.
If you want to prevent water from coming in from above, cut a board that is just larger than the base of the flush-mounted fan. This will create a much larger opening.
There can be serious consequences when improper installations are made. Your pergola ceiling fan will be ruined at best if the water gets into the motor. If not handled properly, it can result in a fire or a short circuit.
3. Attach the Wires
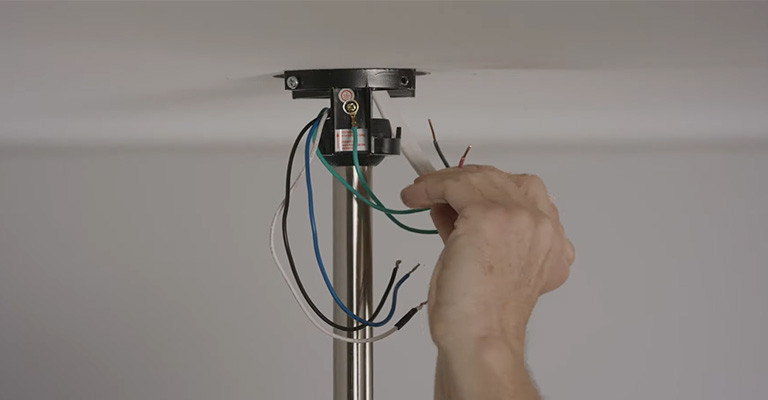
Once you have determined the center of your pergola, you can proceed to the next step. You will need exact measurements to transfer the measurements to the PVC conduit.
During installation, the wires will be inserted inside the PVC and into the junction box and board. Tightening the wires to the awning frame is possible using wire ties. Apply glue to the pipe to attach it to the junction box.
If an area of your structure has hollows, you can run wires through them as well. It will minimize the impact on the overall aesthetics of your pergola by hiding the wires. Your wires will also be protected by this method.
In some pergolas, the wiring from a light fixture is already present. If this is the case, the wiring from your fan can be connected to the existing wiring. Explicitly expose the wiring by removing the lighting.
The best thing to do if you don’t have much experience with electrical wires is to hire an electrician.
4. Place the Board Between the Pergola Slats

You should place the board between the slats of your pergola so as to maintain a pleasing aesthetic. Additionally, this is the best approach for stability and structure. Maintain a subtle appearance by choosing a board the same color as your structure.
The board’s dimensions aren’t that important, so you can fit them in your space. You must only widen it enough to cover the fan’s junction box and base.
It is necessary to drill through the frame and the box. Slide the bolts through the holes by using lock washers and nuts. In addition to mounting the board to the awning, you can also use mounts.
5. Install the Support Brace
As soon as you have the wiring and the junction box figured out, you need to mount the fan installation bracket. The box must be attached to the frame by means of screws.
Whenever you are replacing an existing fan, you should remove the mounting bracket of the old one and replace it with the one that came with the new fan.
If the previous brace wasn’t strong enough to support the new fan, the screws might not line up correctly with the canopy of the new fan. If it is going to become loose, use lock washers and strong bolts.
6. Set Up the Pergola Ceiling Fan
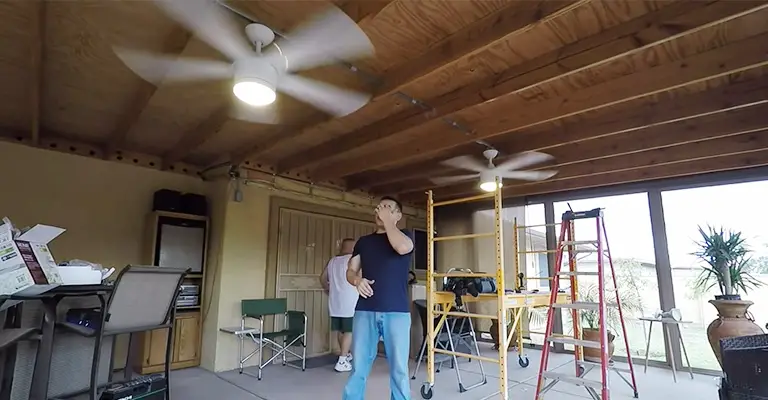
Getting the fan installed is the next step. You’ll need to attach the wires to connect the fan to the electrical box. You’ll need to strip the wires, trim them back, and then match them to the appropriate colors.
Ensure that the whole fan is installed into the board once the wires are installed. The blades are generally recommended after the fan’s base has been mounted and all wiring connections have been made.
It is sometimes easier to install the blades before connecting the wiring to the fan, but this can lead to bent blade holders.
As a result of this, you may end up with a wobbly ceiling fan. To avoid this problem, installing the blades after the motor is already running and wired to the ceiling is recommended.
To find out if the fan works, turn it on. It will bring a cool breeze if it does, so enjoy it. In addition to keeping you cool, it also keeps mosquitoes away with a combination of wind and sweat.
Reasons to Add an Outdoor Ceiling Fan to Your Pergola
These five benefits show how outdoor ceiling fans and technologies can benefit your outdoor living when added to your pergola or gazebo.
Convenient Operation
The remote controls make it easy to operate and adjust the fan speed and direction at any time. With a ceiling fan, you can change its direction in summer and winter to increase comfort and reduce energy costs.
Enhanced Design Style
It is possible to create a one-of-a-kind design statement with thoughtfully chosen outdoor gazebo fans or pergola ceiling fans.
As we can choose from so many styles, ceiling fans not only function but also enhance and complement the design of outdoor living spaces.
Improved Outdoor Lighting
It’s nice to relax outside in the evening when the weather is nice. Include an outdoor ceiling fan with lights in your lighting design to ensure the space is usable at all times.
You can create the perfect evening atmosphere in your gazebo with an outdoor ceiling fan with lights.
Enhanced Pest Control
Defend yourself against pesky bugs. You can use a pergola ceiling fan to prevent insects from interrupting your relaxing afternoon when you don’t want the smell of insect repellent to spoil your dinner or lounging.
Because many bugs are weak fliers, you can prevent them from getting near you with a running fan.
Final Words
An outdoor fan can be easily installed on a pergola or gazebo – and is definitely worth the time and effort. The use of gazebo fans can provide a more durable, powerful means of air circulation than portable fans.
The durable features of a gazebo or pergola fans are built to withstand damp or wet conditions, unlike portable fans that require batteries or plugs.
For professional installation of junction boxes, hire a certified electrician if you are not comfortable working with electricity or if none already exists.


