Attaching shelves to metal wall studs can be a bit trickier than attaching them to wooden studs, but with the right tools and techniques, it can be done easily.
Metal studs are commonly used in commercial and industrial construction, as well as some residential applications. They are lightweight, strong, and fire-resistant, making them a great option for certain types of walls.
However, attaching shelves to metal studs requires special hardware, such as metal stud anchors or toggle bolts.
In this guide, we will walk you through the process of attaching shelves to metal wall studs, including the tools and materials you will need, as well as tips and tricks for ensuring a secure and stable installation.
Attaching Shelves To Metal Wall Studs | Step By Step

Stuffers made of metal can be recycled, making them an environmentally friendly building material.
Nevertheless, homeowners who are used to hanging shelves and decorations from wood studs may have problems with the thin-gauge metal studs.
In contrast to wood studs, metal studs aren’t thick enough to support significant weight and hold threads.
As a result, another fastener is necessary that relies on the strength of the whole stud rather than the metal’s thickness.
Step 1
If you are hanging a shelf on the wall, find the studs using a stud finder.
Step 2
A metal stud will be detected as the stud finder is moved along the wall.
Step 3
You should place a pencil mark on the wall for the location of the first stud.
Step 4
You will need to measure over 16 inches from the stud location in order to mark another stud.
You should then slide the stud finder over the spot you marked to guarantee that a stud is located there. You will find other metal studs on 16-inch centers if you find another stud.
Step 5
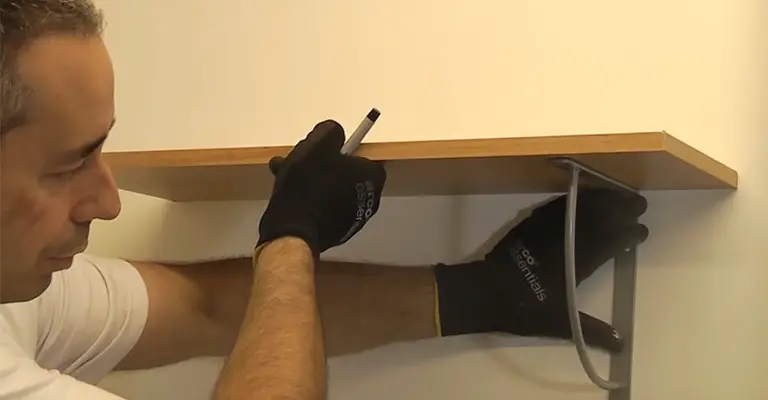
Place the mounting bracket on the stud where you wish to mount the wall shelf. In this case, you will still use the same style anchor as you would if the other wall bracket were not on a stud.
Step 6
Make marks on the wall where the shelf bracket holes should be placed.
Step 7
Protect your eyes with safety glasses.
Step 8
The drill must be equipped with a drill bit that measures 3/16th of an inch.
Step 9
Mark the locations of the wall shelf brackets and drill a 3/16th-inch hole every time.
Step 10
You should exchange the 3/16th-inch drill bit for a 1/2-inch drill bit. With the 1/2-inch drill bit, increase the diameter of every pilot hole that is 3/16th-inch.
Make sure you do not let the drill bit “walk” while you are drilling. It is often used to describe when a drill bit moves away from where intended to drill.
Step 11
Make sure the toggle bolt is facing from floor to ceiling. You should insert the toggle bolt into the hole as you lay it toward you.
Step 12
Put the holding plate against the drywall and pull the toggle tightly against the wall. Make sure all toggle bolts are inserted into the 1/2-inch holes.
Step 13
Adjust the mounting holes in the wall shelf to match the installed toggle bolts.
Step 14
Through the shelf-mounting bracket and into the toggle bolt, insert a 1/4-inch bolt supplied with the toggle bolts. At each location where the mounting is to be done, perform this step.
Step 15
Make sure that one toggle bolt is tightened with the Phillips screwdriver.
Step 16
You will need to place the level across the shelf. It is necessary to adjust the shelf as necessary to ensure that it is level.
Step 17
The shelf needs to be secured to the wall with toggle bolts tightened all the way.
Tip
For brackets with screw holes that are too large for bolts, use metal washers to prevent bolt heads from slipping.
Once the bolt wings are removed, slip one or two metal washers onto each bolt and onto the bolt heads. Using your fingers, push the bolts through the screw holes in the brackets and twist the wings back on.
Final Words
The advantages of metal studs are that they are lighter, less expensive, and keep straight. Shelf brackets are mounted to wall studs with screws in conventional construction for hanging shelves on a wall.
There is a better chance of success with toggle bolts than screws that have metal studs. For bracket screws, select bolts with a diameter larger than that of the screw holes; the bolts should be at least 2-1/2 inches long.


