
Adding a subpanel to your electrical system can be a practical solution for distributing power to various circuits in your home or expanding your electrical capacity.
Whether you’re planning to set up a subpanel in your garage, basement, or a new addition, it’s essential to understand the process of feeding power from your main electrical panel.
In this comprehensive guide, we’ll walk you through the steps and considerations involved in connecting a subpanel to your main panel safely and efficiently.
How to Feed a Subpanel From a Main Panel?
Having an understanding of how a subpanel feeds off a main panel is useful, especially since it doesn’t require as much technical expertise as installing a subpanel from scratch.
You likely already have it installed, with the underground PVC conduit in good working order, and ready to feed through the main breakers.
Gather These Things Before Starting:
- Right-sized feeder wires
- Feeder circuit breaker for the subpanel (optional)
- Voltmeter or multimeter
- Fish tape
- Electric tape
- Clips and straps
- Hammer
- Wire Strippers
- Insulated gloves
1. Make Sure You Have Everything You Need
Technically, feeding a subpanel means wiring it, so you must be comfortable doing that, and you must understand the local Code requirements for this project, particularly those regarding wiring.
Consider the following factors:
- Ensure the feeder wire’s current rating won’t be exceeded by the total load and draw.
- The feeder wires and the feeder breaker on the main panel should always be the same size. It is essential that both are capable of handling the load they are expected to carry.
- It is recommended that a 60 amp breaker be used in the case of a 200 amp subpanel connected to a 100 amp service with a 6 AWG wire already in place. Only the wires are protected by the breaker!
- When the main breaker in the main panel matches the feeder wires, you don’t need a separate feeder breaker for the sub panel.
- For sizing, refer to Table 310.15(B)(16) (https://conduit.site/tables/table-310.15-b-16.php).
- Sub feed breakers are branch breakers on main panels that are intended to handle higher amp ratings than the subpanel feed breakers.
2. Provide A Breaker In The Main Panel For Feeding The Subpanel
Using the current rating of the subpanel feeder wire, rate your breaker based on the conduits and wires that are already in place and meet your expected load.
It is important to note that a 100A service panel does not mean a 60A breaker cannot be used on it. Don’t forget to match the conductor with the breaker.
As a feeder, if you’re going with 60A, make sure you use the proper cable size or, to be precise, use copper wire or aluminum wire of 6-gauge or 4-gauge.
Wiring a 100-amp sub panel from a 200 amp main panel and feeding it with a 100A breaker is no different. For this, 4-gauge copper or 2-gauge aluminum would be required.
The sub feed panel size does not have to match the size of the breaker feeding it, so long as its current rating is less than or equal to that of the breaker. In the case of a panel that uses 50 amps of adjusted load, the breaker should be rated accordingly.
3. Set Up Your Wires Properly
In your electrical sub panel wiring diagram, double-check the wiring run to accommodate the feed.
An underground feeder panel and subpanel can be diagnosed using a multimeter if you’re having problems with the feeder wires.
Want to know how to pull wires for installation, replacement, and upsizing? Whether you’re doing a rewire or installing a subpanel in a detached garage, learning these things is important.
As long as the shed is located more than 100 feet from the main service panel, voltage drop becomes a big factor in wiring a subpanel.
Furthermore, if the subpanel is located within a different structure than the one housing the main panel, grounding rods must be installed. Wiring diagrams for 220v sub panels indicate whether rods are required.
Ultimately, routing and running the wires are entirely different topics, which may require trenching, conduit laying, and subpanel installation. In this case, you might want to practice installing a subpanel in a garage.
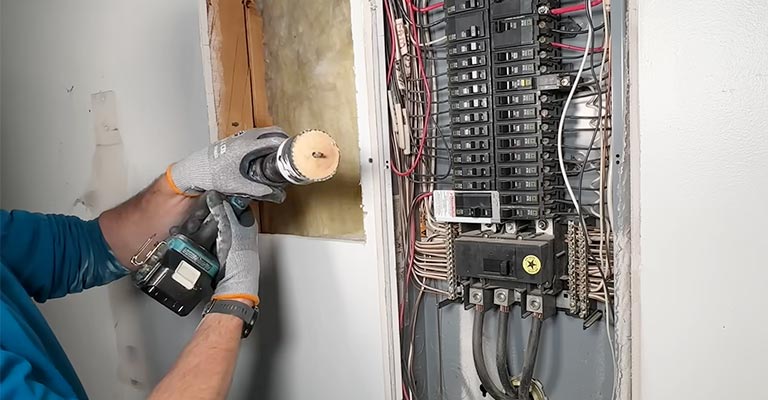
4. Insert The Wires Into The Conduit
I assume you’re doing a new wiring job or are rewiring an existing system.
When you’ve already confirmed that the existing feeder wire is still good, and that the sub panel connections are ready, you can skip this step.
You can make the task a breeze by following these foolproof tips:
If you’re experiencing too much resistance while pulling wire, use the appropriate lubricant. You should only use those that are designed to pull polymer coated conductors.
Coordination with another person is necessary. The feeder should be the one who pulls, and the puller should be the one who feeds. Utilize a radio or communicate using a phone/smartphone if the run is extra long.
No matter whether the subpanel is installed in an isolated building or within the main building, just pull enough wire to reach it.
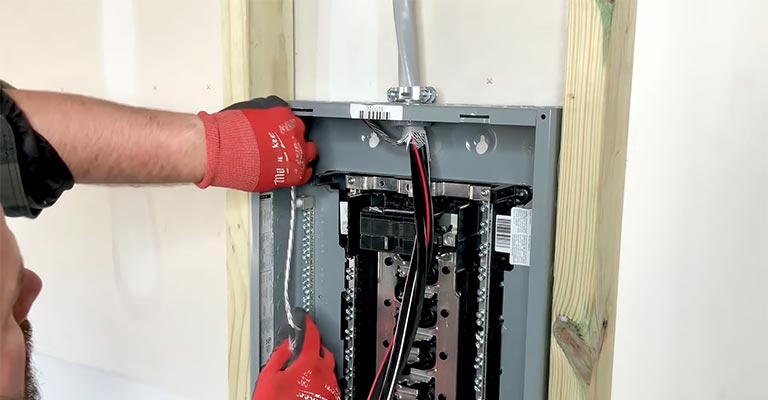
5. Start Feeding
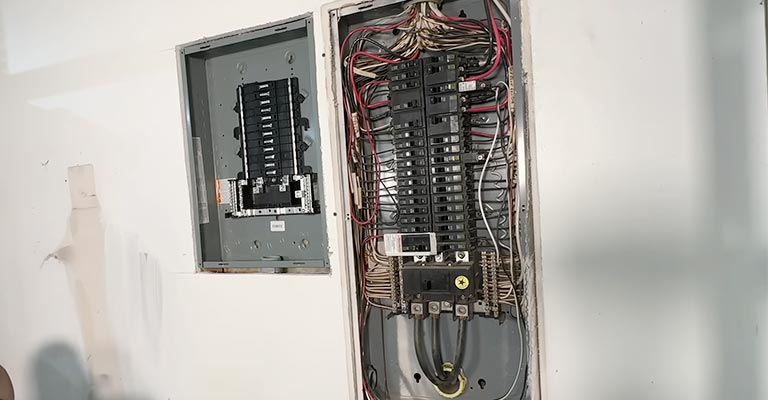
You’ve been working towards this moment: the feeding process itself. A subpanel can be added to a service with a capacity of 200 amps or a smaller one with a capacity of 100 amps.
Wiring is the same. Don your insulated gloves before you begin. Turn off the main panel before you begin.
Check the knockouts on the subpanel for convenient wire entry. Make sure you knock out the holes in which the wires will enter with a hammer before positioning the cables.
To avoid clutter, bundle your wires together with clips and straps.
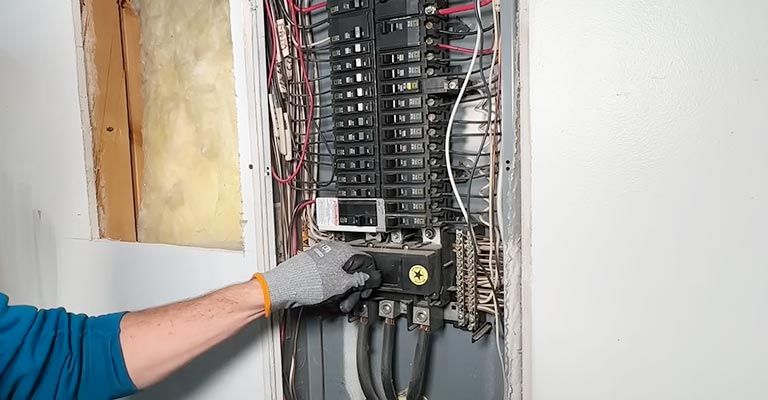
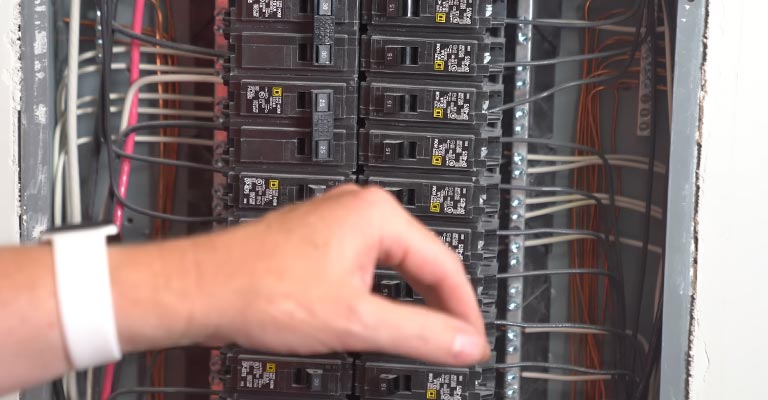
6. Attach The Wires To The Correct Terminals
Use the appropriate tool to strip the wires.
Separate the neutral wire (white) from the ground wire (green). The ground bar should be attached to the first, while the neutral bus bar should be attached to the second. To the hot bus bars, the hot wires (black and red) are connected.
Your chosen subpanel should be torqued according to the recommendations.
You simply need to screw the ground bar in place if it hasn’t been installed yet. This part is usually included in sub-panel kits.
Additionally, I assume your detached subpanel already has a grounding rod. It won’t be necessary to use the rod if it’s in the same building as the main panel.
If you don’t want to do it yourself, you should hire an electrician, and I also suggest you have him or her take care of the grounding, since many DIY tutorials online tend to violate the NEC.
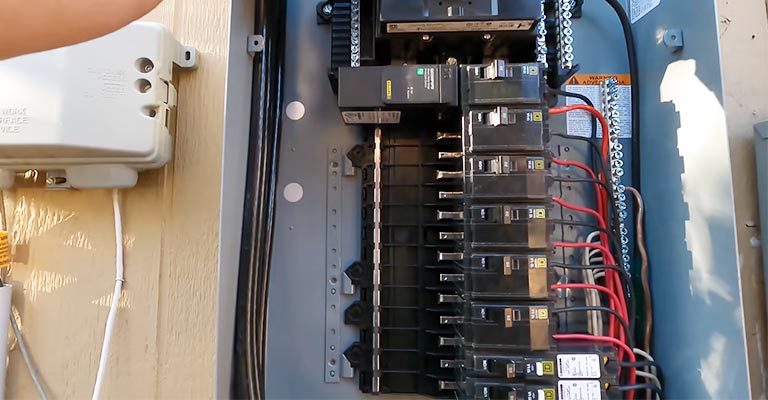
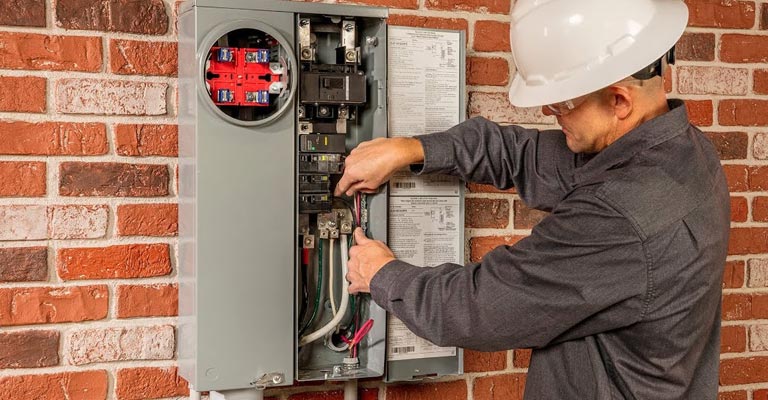
7. Install The Feeder Breaker
Once all the wiring has been completed, go to the main panel. Feeder breakers are usually double poles, so you will need to attach black and red wires to them.
Feeder breakers are not necessary if the main breakers on the service panel are large enough to protect feeder wires.
Instead of having a separate branch breaker, you can attach them to the lugs (e.g. sub feed lugs). The next section will explain these lugs.
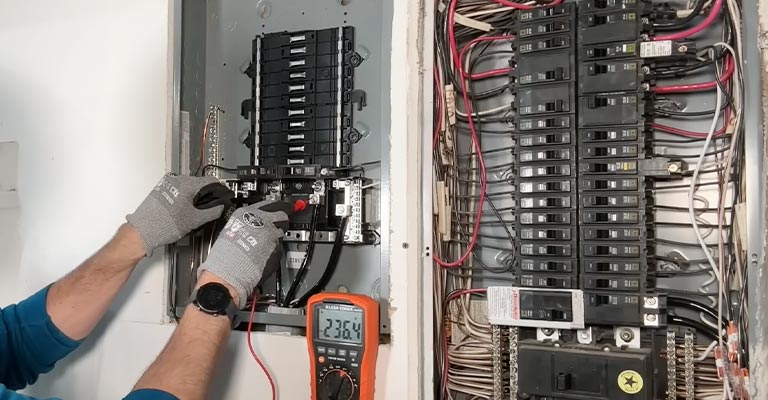
The only thing left to do is to turn on the breaker. Use a voltmeter or multimeter to check the subpanel for power supply.
Suggested Solutions for Multi-Feed Setups
Using sub feed lugs may be a good idea if you’re doing a multi-feed setup. In this case, the first box can “sub feed” the second box via those lugs, effectively daisy chaining the panels.
A feed-through lug, which has a similar arrangement downstream, is another option.
Main breaker protection is provided for feed-through lugs, while feeder breaker protection is provided for sub feed lugs.
It is true that most of these setups are rare, as they are typically only found in commercial and industrial settings. In addition, feeder tap rules in the NEC are considered one of the more challenging guidelines.
In order to determine whether they are right for your property, you should first speak to an electrician about them.
FAQs
What Is The Maximum Distance Between A Subpanel And The Main Panel?
The front clearance of all panels must be at least 36 inches. As far as the distance between subpanels and main panels is concerned, there is no set rule. Distances of up to 500 feet are involved in some projects.
Even so, running wires that long is not really practical, since you’ll likely experience serious voltage drops.
Is My Main Panel Capable Of Handling A Subpanel?
With all the other loads on the main panel taken into account, the main panel should still be able to handle the additional load of the subpanel.
In any case, you can always upgrade the main panel to supply the subpanel with enough power.
It’s for this reason that I recommend property owners always use a high-amp main panel (at least 200A) from the start in order to maximize efficiency and take advantage of GFCIs.
Can You Run A 100 Amp Sub Panel Off A 200 Amp Main Panel?
It is important to match the breaker’s size with the wire size, which should be at least 4 AWG copper or 2 AWG aluminum, since the subpanel requires a 100A breaker at most.
When determining the right size wire, always take the breaker’s amp rating into account instead of the panels’ total amps.
Final Words
Listed below are all the steps you need to take:
- Make sure the subpanel is powered.
- Once you have positioned and stripped the wires, attach them to the correct buses.
- The wires must be installed, or the feeder breaker must be able to handle the wires.
- Determine the right wire size for the subpanel and the right breaker.
- Make sure you are familiar with the wiring laws in your area.


