
The presence of water in a dryer vent can come as a surprise to many people. The last thing anyone expects is for an appliance that dries to end up leaking water. You might not think so, but it’s actually quite common.
The only way a clothes dryer can effectively dry your clothes is to have good ventilation outside your home, which allows the damp, hot air from the machine to escape.
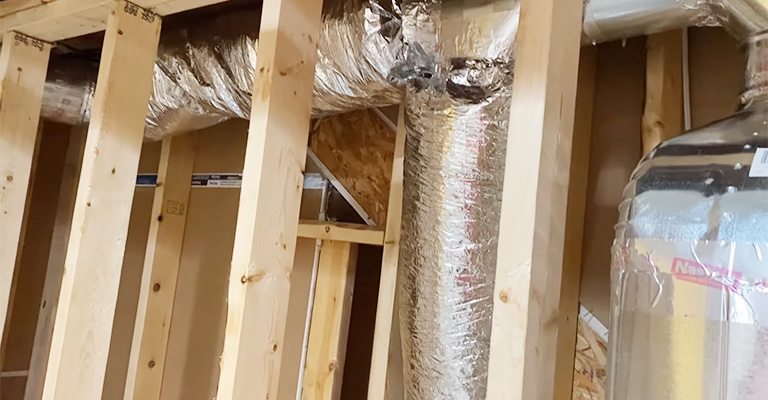
There can be many problems associated with an irregular vent duct, including condensation that leads to dripping or pooling of water.
Water coming into the dryer vent can be caused by a few different reasons—and you may be able to resolve the problem yourself. We’ll get started right away.
Why Is My Dryer Vent Filling With Water?
There can be unexpected problems with water in dryer vents. No one expects a dryer to develop a wet problem.
1. Vent Blockage
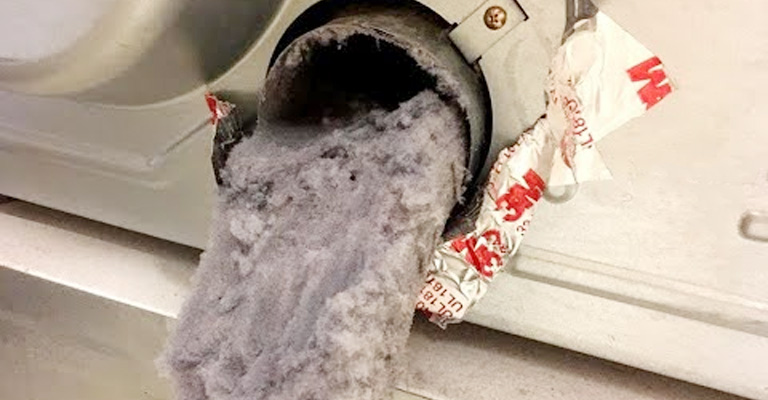
Heat and humidity are expelled outside through the exhaust vent hose from the dryer. Besides being hot and humid, this air is also laden with microscopic particles like lint and dust.
It is possible for this debris to accumulate inside the exhaust vent over time, eventually preventing hot air from escaping. The dryer vent is prone to becoming clogged with lint and excess fabric.
In the absence of a clear path for air and moisture to flow, moisture can condense and result in a leak.
By using a long-handled brush, you can remove any buildup within the vent of your dryer as part of routine maintenance.
Ensure that the vent duct is clear and able to pass air freely from the dryer to the outside by inspecting and clearing it out.
2. Vent Cover Damaged

It is possible for cold air to enter the exhaust vent if the vent cover is damaged, as described above. As a result, the dryer vent is filled with moisture as the dryer’s hot air quickly cools.
However, if your exterior vent cover is damaged, you may also be able to let rain, snow, and other precipitation into your home. This implies that the leak is more than just condensation in this case.
It is important to make sure that the vent flaps move freely in one direction to let hot air escape, but keep them closed so that water cannot enter. It is fairly easy to replace vent covers if necessary.
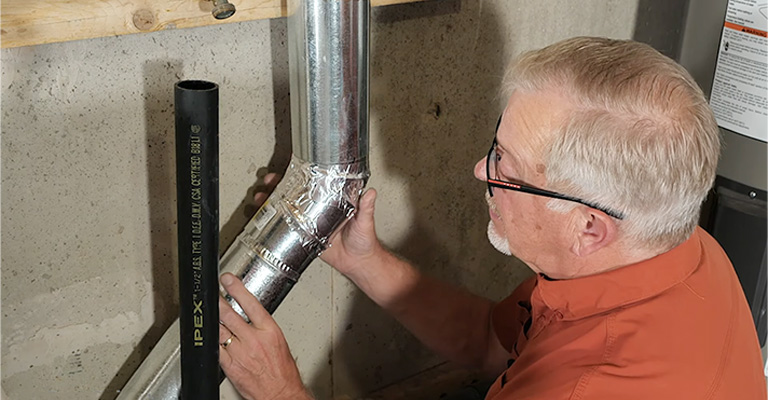
3. Crushed Dryer Vent Hose

To save space, most homeowners align their dryers next to one another or under a counter top as close to the wall as possible.
Although this is aesthetically pleasing, it can result in crushing the vent hose at the back of the dryer. The hose will collect water or lint if this happens, leading to restricted airflow from the dryer.
My first recommendation is to investigate this area. The vent duct should be free and able to circulate air, so pull the dryer away from the wall a little.
Try that and see if it helps. Replace the vent hose if it has been permanently dented, crushed, or damaged. This will restore adequate air flow and eliminate water pooling.
4. Cold Weather

An ice-cold soda can on a hot day is a great example of how hot, humid air deposits its moisture when it comes in contact with cold surfaces.
It may be the coldest days of the year that make your dryer vent “leak” more noticeable if you live in a cool climate.
There is either inadequate insulation in the pipe or cold air entering the pipe from outside, which is why the vent tubing is cold.
It is essential to insulate the exhaust vent along its entire length and to ensure the exterior vent cover is functioning correctly (allowing hot air to escape, but preventing cool air from entering).
5. Rainwater Entering The External Vent Of A Dryer
There is a small chance that this is the cause of the water in your dryer vent, but it can still happen. It is possible for rainwater to enter your home’s vents if the vent cover is damaged or missing.
Water can flow back toward your dryer if your dryer vent hose runs vertically from the outside opening.
You should inspect the outside vent cover during your annual dryer maintenance check to ensure it is securely attached and free of cracks or damage. Don’t ignore this quick task, because it can save you from major headaches in the future.
6. Condensation Is Caused By Uninsulated Duct Hoses
Attic or crawlspace dryer vents sometimes pass through the attic or crawlspace where hot air from the dryer meets cool ambient temperatures.
As hot air cools, condensation occurs, in much the same way as your car’s window mists when you blow on it.
Small pools of water form as a result of this condensation, resulting in moisture buildup, drips, and eventually, small pools of water.
You can prevent this by either replacing your existing dryer hose with an insulated duct or by wrapping your existing dryer hose in fiberglass insulation or lagging.
7. The Use Of Flex Vents Within Wall Cavities
Flexible dryer hoses are sometimes installed inside the cavities of walls and ceilings, which is generally not a good idea.
An airflow restriction can be caused by flexible hoses’ ridges that trap lint. As a result, cleaning, repairing and replacing the dryer vent is very difficult if it is located inside the wall or ceiling.
8. Duct Hose Dips Collect Water
Airflow is restricted by twists and bends, and condensate builds in areas where there is a dip in the flexible vent hose.
Any condensation that forms within your dryer vent hose will run straight into the low spots if it has significant dips in it. As a result of the pools of water, the vent’s interior diameter will narrow and the airflow will be restricted.
Use rigid tubing and straps to keep the hose from sagging to prevent water from entering your dryer vent. You should pay extra attention to straightening sagging areas of the vent the longer it is.
9. Is The Ductwork Too Long, Twisting Or Bending?
It is ideal for your dryer’s vent hose to be between 5 and 10 feet long and straight. Whenever there is a low point in your ductwork due to the length or twists and bends, it is likely that water will collect.
The longer the dryer vent, the longer it takes the hot air to cool inside, resulting in condensation. It is also possible for condensation to form inside a vent if the vent hose has bends or curves.
You may want to consider moving your outdoor dryer vent closer to the machine to create a short and direct vent system that won’t restrict air flow.
How Do I Get Water Out Of My Dryer Vent?
If the duct does not run behind a well or through an attic, removing water from an existing vent duct is very simple:
Unplug the Dryer:
Make sure that the dryer is unplugged before starting the process for safety’s sake.
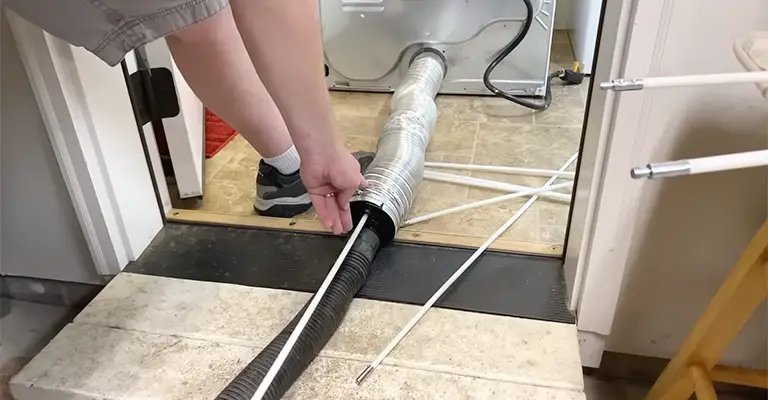
Detach the Dryer Vent:
The vent may need to be disconnected with a screwdriver, hex key, or another tool, depending on your dryer. Vents are usually attached to dryers at one end and to walls at the other.
Inspect the Vent:
Make sure there is no visible water or blockages within the duct. Water can be drained into a bucket if you tilt the vent and allow it to flow out.
Vacuum the Vent:
If you have a blockage in your dryer vent, vacuum it out with a shop vacuum or a special dryer vent cleaning kit like this one.
Air Dry:
Let the vent air dry completely before reconnecting it to the dryer. Before reconnecting the vent, you’ll need to ensure it is completely dry by blowing warm air through the duct with a hairdryer.
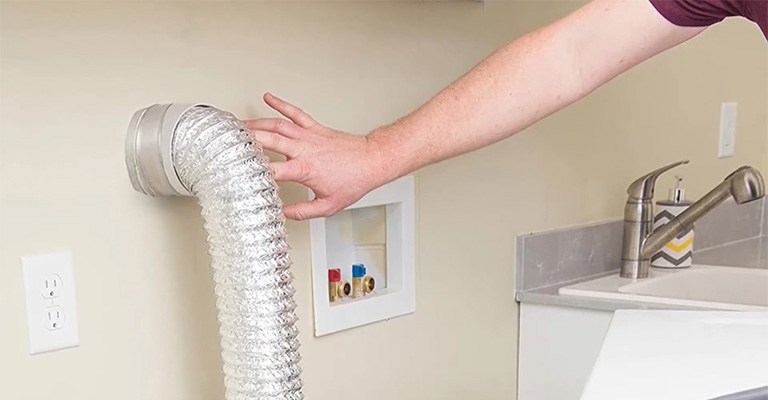
Reconnect the Vent:
As soon as the vent is dry, reconnect it to the dryer and the wall outlet, ensuring it is firmly connected at both ends to prevent sagging or blockages.
Address Recurring Issues:
Condensation may be prevented by insulate your vents, rerouting them, or making other changes if this is a recurring problem.
Signs of Condensation In Dryer Vent
Several types of condensation can cause problems with your dryer’s performance and operation due to condensation in your dryer vents. You may have a moisture problem if you notice any of these symptoms.
Water Or Dampness Around The Vent:
A water or damp spot around the exterior grill or near the indoor vent of your dryer vent is one of the most obvious signs of condensation.
Moisture Inside the Dryer:
Condensation within the dryer vent is most likely to cause your clothes to remain damp after a full cycle or to feel wet in the drum after the cycle has been completed.
Smells Of Mold Or Mildew:
It is possible that moisture accumulating in the dryer vent is encouraging mold and mildew growth if you smell mold or musty around the dryer.
Increased Drying Times:
As a result of condensation, the dryer will take longer to dry, which will lead to higher energy costs.
Visible Condensation:
Walls, windows, and other surfaces can often show signs of condensation dripping or fogging.
Lint Accumulation:
The humidity in the vent can lead to lint clumping together, building up, and blocking the vent.
Dryer vent condensation isn’t just a bother, it’s a serious risk and could potentially lead to mold growth or fire hazards due to lint buildup, so addressing it as soon as possible is imperative.
That being said, poor ventilation is most likely to cause water to accumulate in your dryer vent hose.
When your dryer cools, moist air cannot easily pass from the machine to the outside, resulting in condensation inside the vent.
Final Words
A poor ventilation system is the reason why your dryer vent leaks water. An overly long or curvy vent hose, lint build-up, crushed tubing, or extreme temperature fluctuations can all result in poor dryer ventilation.
Keeping your dryer’s hose short, straight, and clean regularly will prevent water from entering your dryer vent.
The sooner you fix the problem, the better your laundry routine will be. No matter why your dryer vent has water in it, you’ll want to get it fixed as soon as possible.
The best thing you can do if you didn’t succeed in fixing the problem yourself is to book an appointment with your local experts, who will take care of everything for you. There is also a good chance it will only take one visit.


