
In various aspects of life, the need for creating straight lines over long distances arises more often than we might think.
Whether you’re working on construction projects, landscaping, or even a DIY home improvement task, the ability to achieve precision and accuracy over extended distances is essential.
In this blog post, we will explore some valuable tips and techniques to help you get a straight line over a long distance with ease.
Method 1: The “3-4-5” Technique
Materials needed:
- String or cord (length equal to the desired distance)
- Stakes or pegs (at least two)
- A measuring tape or ruler
- A level (optional)
Here are the steps to create a straight line without equipment:
1. Choose Your Points
Determine the two points between which you need a straight line. These could be the starting and ending points of a project, like planting a row of trees or defining the edge of a garden bed.
2. Mark the Starting Point
At your starting point, securely drive a stake or peg into the ground. This will serve as your anchor point.
3. Measure and Cut the String
Measure the string to match the desired distance between your two points. Ensure it’s taut but not stretched, then cut it to the appropriate length.
4. Create a Taut Line
Tie one end of the string securely to the stake at the starting point.
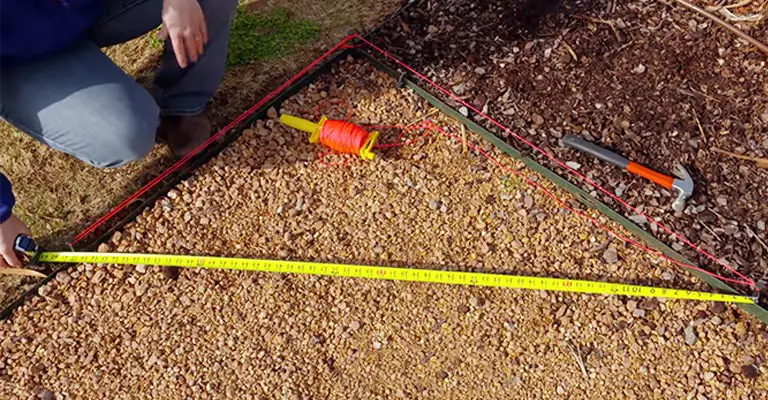
5. Use the “3-4-5” Method
Employ this method to establish a right angle and ensure a straight line:
- From the starting point, measure along the string 3 units (e.g., 3 feet).
- Create a small loop or knot at that point.
- Holding the loop or knot, walk the string toward the end point.
- At the 4-unit mark (e.g., 4 feet), create another loop or knot in the string.
- Measure the diagonal distance from the 3-unit knot to the 4-unit knot. It should be 5 units (e.g., 5 feet) if you’ve created a right angle.
6. Adjust as Needed
If the diagonal distance isn’t precisely 5 units, adjust the string’s position until you achieve the correct measurement.
7. Secure the String
Once the string is correctly positioned, tie the free end to another stake or peg at your end point.
8. Check for Level (Optional)
For added precision, use a level to ensure the string is perfectly horizontal or vertical, depending on your project requirements.
9. Mark Your Path
Use paint, chalk, or a suitable marking tool to trace the path of the string onto the ground. This will provide you with a visual guide for your project.
10. Proceed with Your Project
Now that you have a reliable straight line as a reference, continue with your project, such as digging a trench, planting, or installing fence posts, while using the marked line as a guide.
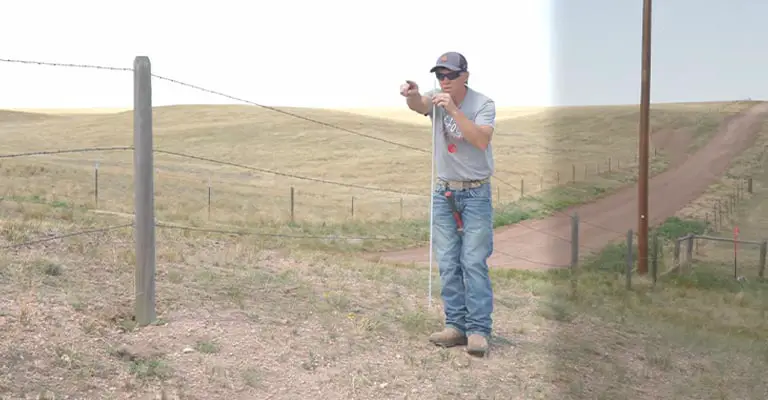
Method 2: Visual Alignment
Materials Needed:
- A clear line of sight
- A second person (optional)
Here are the steps to create a straight line without equipment using visual alignment:
1. Choose Your Points
Identify the two points between which you need a straight line.
2. Find a Clear Line of Sight
Position yourself at the starting point and look directly at the ending point. Ensure there are no obstructions in your line of sight.
3. Align Yourself
Stand directly behind the starting point, ensuring that your eyes are level with the ground.
4. Establish the Line
Visually align the starting and ending points along the same horizontal plane. If possible, have a second person at the end point to assist with alignment.
5. Mark the Path
Once the points are visually aligned, mark the path between them using paint, chalk, or another suitable marker.
6. Proceed with Your Project
With the marked line as your guide, carry on with your project while maintaining alignment with the visual path.
Final Words
Creating a straight line over a long distance without any equipment may require some ingenuity and basic tools, but it’s entirely achievable.
Whether you choose the “3-4-5” method for added precision or rely on visual alignment for simpler tasks, these techniques can help you achieve the straight lines you need for various projects.
With a little practice and attention to detail, you’ll be able to tackle tasks with accuracy and confidence, even when you don’t have specialized tools at hand.


