
Installing a chimney cap is important in protecting your chimney and home from potential damage caused by the elements and animals.
A chimney cap can also help prevent downdrafts, improve airflow, and increase the overall efficiency of your chimney. However, what happens when you have a chimney without a flue? Can you still install a chimney cap?
The short answer is yes, but the process can be a bit more complicated than installing a cap on a flue.
In this article, we will explore the steps you need to take to install a chimney cap without a flue, including the materials you will need and the different types of caps available.
What Are Chimney Caps?
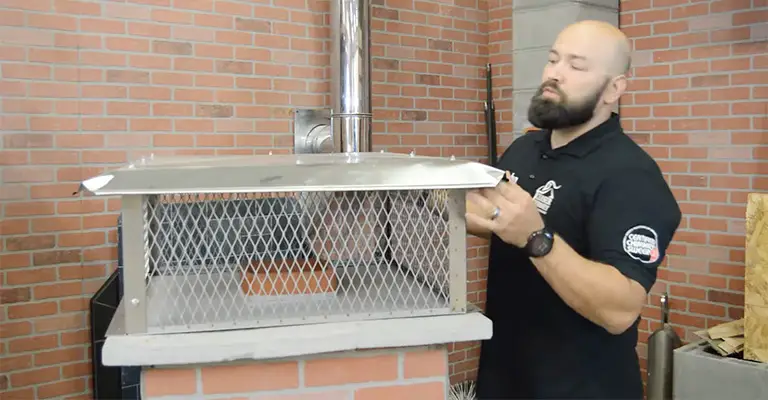
Fireplace chimney caps protect the fireplace from water and wildlife. Chimney caps are installed on top of your chimney, unlike fireplace dampers, which keep cold air from going down your chimney.
This cap prevents water from reaching the fireplace’s flue (a clay or metal tube that vents smoke and combustion byproducts to the outdoors).
This type of weathering can damage fireplaces and roofing materials near them. Furthermore, nests of birds and rodents inside or around the flue might pose a serious fire hazard.
A Guide To Installing A Chimney Cap Without A Flue
Depending on the shape of the chimney, there may be one flue (single flue chimneys) or two flue (double flue chimneys). You can either have a protrusion or a flush to the crown (the concrete shell surrounding the flue).
The flue of a chimney can also be shaped as square, round, or oval. The type of chimney cap you install will depend on all these factors.
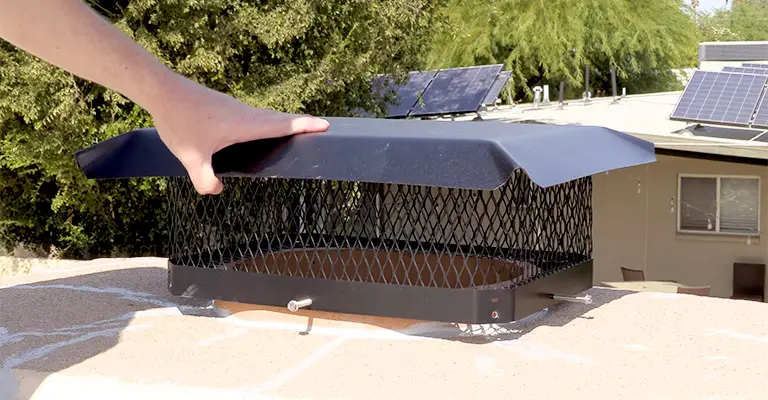
Caps for single-flue fireplaces that protrude from the crown are typically screwed on or clamped onto the flu. The chimney cap cannot be attached to single-flue chimneys flush to the crown due to no opening on the flue.
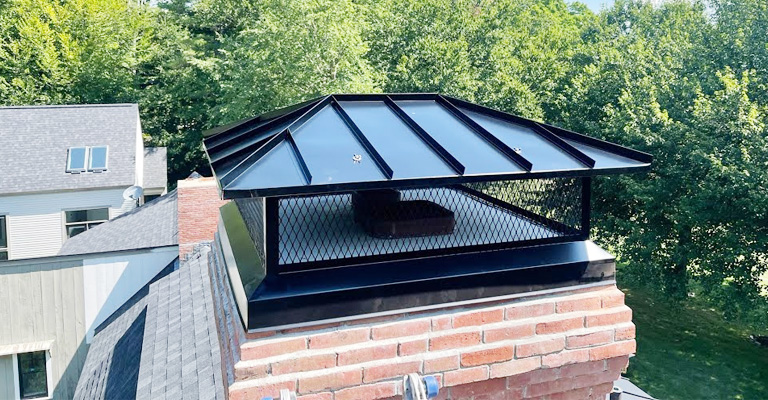
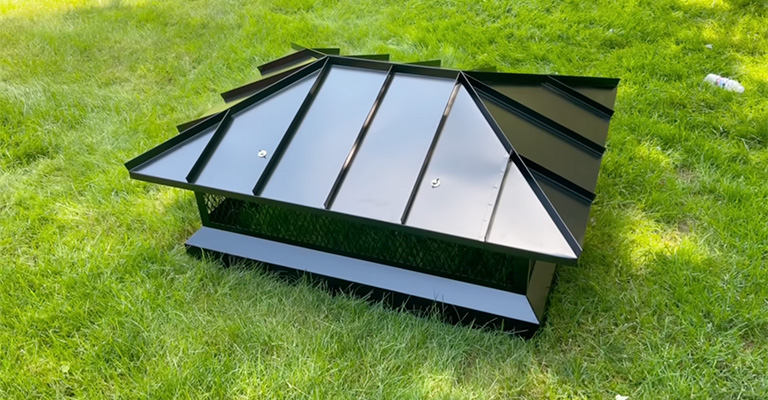
Using a top-mount chimney cap, which covers the entire crown, and can be anchored to the crown masonry screws, construction adhesive, or both, removes the need to expose the flue.
An additional top-mount chimney cap is required for double-flue chimneys. Generally, installing the chimney cap directly to the crown is possible without a flue. As per your crown setting, attach the cap using either self-tapping screws or masonry screws.
By covering the crown’s intake 2 inches from the crown’s edges, you’ll ensure your cap is secure. Nevertheless, installing your chimney cap without a flue liner will increase the risk of a chimney fire.
This sounds like it should be easy! In this post, we will provide more information on how to install a chimney cap. Our discussion will also focus on why chimney flues are important. Now that we have that out of the way let’s get started!
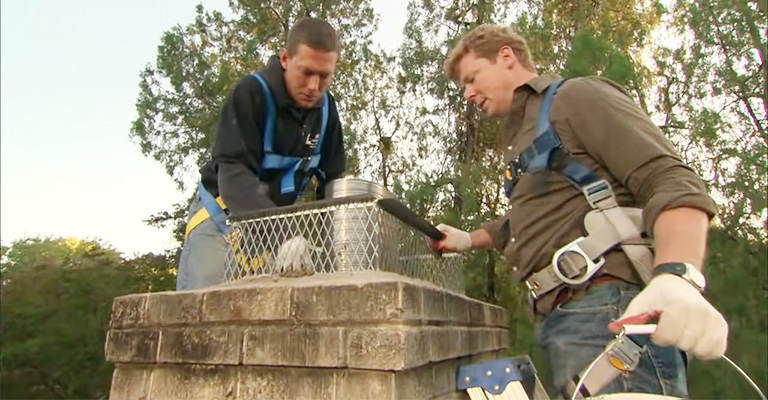
You may encounter safety risks when installing a chimney cap on your roof. If you are performing roof-related work, you should follow the following safety precautions:
- Do not use a ladder that has an A-frame.
- Utilize safety belts or harnesses to prevent injury.
- Extend your extension ladder’s top rungs 3 feet over the gutters.
- If you have a partner to assist you with this installation, it will go more smoothly.
Prepare these essential items before you begin installing your chimney cap.
- Steel tape
- Pen or pencil
- Scratch paper
- Power drill
- Hammer drill
- Impact driver
- Caulking gun
- Ladder stabilizer (optional)
Once you’ve gathered these things, you can start:
- You must carefully position your ladder and climb up your roof.
- To determine the flue’s length, width, and diameter, measure it with steel tape.
- Take notes on your scratch paper regarding the flue measurements.
- If you are measuring your flues, you should buy a 1/2 – 1 inch cap size.
- After you’ve put your cap on, you’ll need to slide and press it down into the flue.
- Attach your cap to the metal flue with the help of your power drill and a self-tapping screw.
- If you have a clay flue, use masonry screws and attach a bit to your hammer drill.
- Drill holes in your cap throughout the flue and drive the screws using your impact driver.
- You will need a caulking gun to seal the cap base with fire-resistant sealant.
Warning
You might want to consult a professional for guidance on installation, as clay flues are brittle and can be damaged if drilled or screwed into. There are some times when they will recommend using high-temperature sealant instead of screws.
Installing a Chimney Cap on a Double-Flue or Flush Single-Flue Chimney
1. Measure the Flues and Cap
In the case of double-flue chimneys, measure the combined length, width, and height of the tallest flue. When measuring a flush single-flue chimney, check the width and length from the outside.
Be sure to measure the crown’s overall length and width in both cases. As soon as you have recorded your measurements, climb off the roof.
2. Purchase A Chimney Cap
Make sure that your top-mount cap is large enough to cover the flue(s) but small enough not to overhang the crown corners.
You should check the manufacturer’s instructions to determine whether the cap should be mounted using masonry screws or adhesive. It is a good idea to buy the supplies they recommend.
3. Prepare The Crown
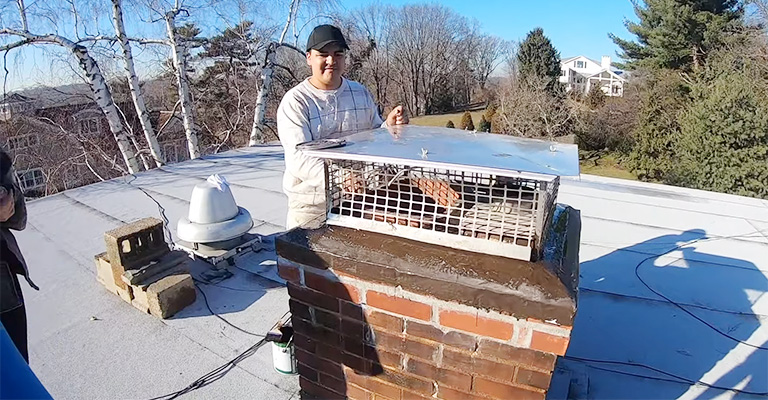
Place the cap on the crown so that it is centered. The screw-hole locations should be marked out on the crown if the cap is secured with masonry screws.
An attached masonry bit or hammer drill should be used to drill pilot holes into the marks. Identify the perimeter of the cap that contacts the crown if it adheres with adhesive. Wipe away any dust, dirt, or debris from the crown area where the cap sits.
Tip
You can verify that your pilot holes are deep enough with a piece of tape. You can mark the screw head’s location on the drill bit by holding the screw bottom tip against the bit’s tip. You need to drill your pilot holes until they reach the tape.
4. Secure The Cap
Apply construction adhesive along the entire perimeter of the cap if the adhesive is being used. If you get glue into any pilot holes, you won’t be able to remove the screws later. The pilot holes should be driven with an impact driver.
Safety Considerations
Chimney caps should be installed on your roof, which is a potentially dangerous undertaking. You should take the following safety measures when working on your roof:
- To do this, you will need an extension ladder with a ladder stabilizer (laptop jack), and a ladder extension ladder with the top rungs extended three feet above the gutters. It’s recommended not to use an A-frame ladder since they’re not as stable as extension ladders.
- You will have a much easier time in case of an accident if you have a partner who can hold your ladder, give you tools, and call for help.
- To protect yourself against falling, wear a safety harness.
Consider hiring a professional to install your chimney cap in the following cases:
- Taking a walk on your roof would be impossible due to its steepness.
- In addition, there isn’t enough space for maneuvering around the chimney.
- You don’t have the proper safety equipment.
- You’re uncomfortable working on the roof.
A chimney cap, installed by a professional roofer or sweeper, can ensure the chimney is safe, secure, and ready for use.
Tips for Maintaining Your Chimney Cap
No maintenance is required on chimney caps, especially if they are made of stainless steel or copper. You should only need to maintain them in spring or summer when you check on your fireplace. Check these things when maintaining your chimney cap:
- It’s mesh for holes that can let critters in.
- For debris that could cause obstruction.
- For creosote buildup.
You should consider hiring a local chimney sweeper to handle annual chimney maintenance.
How Much Does It Cost To Install A Chimney Cap?
In most cases, installing a chimney cap costs about $300, including labor. According to the type of chimney cap needed, chimney cap replacement can be as expensive as $125 to $1,000.
The cost of the chimney cap and similar supplies will be about $30, so you can save more money by installing the cap yourself.
DIY vs. Hiring a Pro
DIY chimney caps can be installed by homeowners who are comfortable working on top of their roofs. Materials cost between $100 and $200 for a chimney cap that you can install yourself.
Nonetheless, if you’re uncomfortable working at heights or completing this task yourself, we recommend calling a professional.
Hiring a licensed and insured local chimney cap installer can save money from a proper chimney cap installation. Additionally, they have the skills and experience necessary to handle the job properly and quickly.
Final Words
You can protect the inside of your chimney and your home from weather damage and outdoor pests by installing a chimney cap.
Most people prefer to hire a professional when capping your chimney, but technically you can do it by yourself. Select the right type of cap before going forward, as the steps differ based on the type of chimney you have.


