
If you’re having trouble keeping your floats filled up, you might have a torn pool liner. It’s still possible to patch a pool liner and fix minor rips and tears temporarily.
The water in a pool evaporates about 1/2 inch a day. You might have a rip or tear if the water looks much lower than when you swam yesterday.
Here’s how to fix a vinyl pool liner until you can get a pro to look at it.
How To Patch A Pool Without A Patch Kit?
You can patch a tear in a pool liner with waterproof tape or even duct tape if you don’t have a patch kit.
Even though these solutions are helpful, they’re only temporary fixes until you can buy a patch kit or hire someone. For smaller holes or tears, waterproof or duct tape works best.
If you’re using waterproof tape, make sure it’s at least 2 inches over the tear. Apply the tape over the tear right after you cut it.
If you want better coverage, layer a few pieces of waterproof tape. Over time, waterproof tape starts peeling at the corners but it’s better than duct tape at absorbing UV rays.
1. Duct Tape

You can temporarily patch small holes with duct tape. You just have to clean the area around the hole, cut a piece of duct tape that’s a little bigger than the hole, and tape it over it. Don’t forget to replace the patch when it needs it.
2. Peel-and-Stick
Pre-cut peel-and-stick patches come in different sizes, so choose the one that fits your pool best.
Remove the paper backing from a patch big enough to cover the tear, then stick it directly over the tear. Choose round peel-and-stick patches over rectangular ones to avoid the edges curling up.
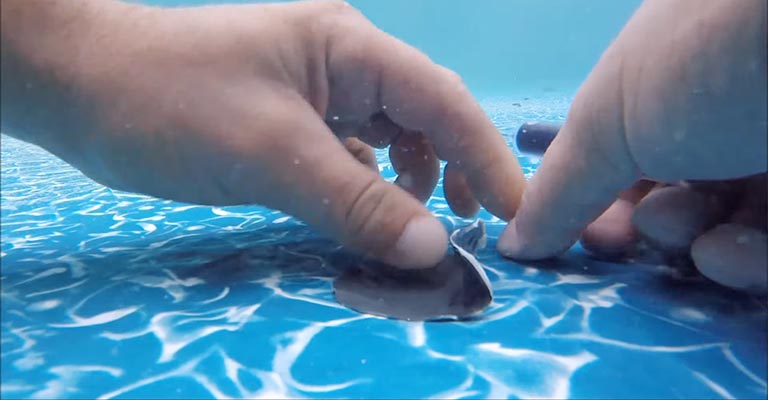
3. Vinyl Patch Kit
Again, make sure the material covers the edges of the tear by at least 2 inches. Stick the patch on the back with adhesive. Let’s move fast now.
The patch should be applied quickly, and any air pockets should be smoothed out with your hands.
Keep the patch in place for a few minutes so the adhesive can cure. To get the best results, put a heavy item on top of the patch for about 24 hours, like a brick or cinder block.
You can use clamps to attach a weighted item over a patch on the wall of the pool if the tears are at the bottom.
4. Shoe Adhesive

Using shoe adhesive to patch holes in your inflatable pool is surprising effective. It works great on other inflatables, like pool floats and toys. It’s best to stay away from this option if you have a vinyl, gunite, or fiberglass pool.
It’s waterproof and strong enough to hold shoes together, so it’s perfect for inflatables.
It’s hard to apply shoe adhesive to an inflatable pool while it’s wet, so it’s not a great option for repairs. You can use it like this:
Step 1: Make Sure The Puncture Is Dry
Make sure the repair area is completely dry by using a clean cloth. You’ll need to drain the water to below the leak so it can dry out if the leak is on the inside.
Step 2: Put The Adhesive In The Hole
You just need to squeeze some shoe glue on the hole. Keep it thick enough to make it durable, but smooth it out.
Step 3: Cover The Adhesive With A Waterproof Fabric Or Tape
Put a piece of tarp or an old inflatable float over the glue before it dries to strengthen the patch.
You can also use duct tape, which isn’t as strong as a tarp, but it’s durable enough for small holes.
5. Vinyl Cement

Vinyl liners can be repaired with PVC vinyl cement. You can use it above or below water without draining it.
This cement needs a vinyl patch to work. An old inflatable, a leftover pool liner, or even a piece of tarp would work.
Step 1: Cut Out The Vinyl Patch
Start by cutting a piece that’s the right size for the pool hole. Try to cut the vinyl so it covers the hole an extra 2 inches on each side.
Step 2: Apply the Vinyl Cement
You’ll need to apply vinyl cement to one half of the patch if this is an underwater repair. You can fold the other side of the patch over the adhesive to protect it underwater after it rests for a minute.
It can be unfolded underwater. The vinyl cement needs to be applied across the surface of the patch if it’s above water.
Step 3: Patch It Up
Put the patch on the damaged part of the liner. Form a watertight seal by smoothing out any air bubbles.
Step 4: Put A Second Layer On
Once the first layer has dried, you can add another layer in the same manner to provide extra protection. You’ll want to cut the vinyl larger for the second layer so there’s an overlap.
6. Underwater Epoxy (Pool Putty)
In concrete, fiberglass and vinyl pools, underwater epoxy can be used to patch leaks without draining the water.
You mix two parts of epoxy together and apply it to the damaged area. The epoxy hardens in 24 hours.
These are some general steps, but make sure you follow the epoxy manufacturer’s instructions:
Step 1: Make A Ball Out Of The Patching Bond
Remove small chunks of both epoxy parts. Make a ball by rolling and kneading them.
Step 2: Put Epoxy Bond on the Pool
Apply the epoxy to the damaged section of the pool once it’s ready. To cover the hole completely, flatten it across the surface with your fingers.
Step 3: Let It Cure
Make sure not to disturb the putty while it hardens. It usually takes 24 hours for epoxy to cure.
Prep Work For Patching A Pool Liner
First thing’s first, find where the leak is-if there is one at all-before you buy a pool liner patching kit.
It’s natural for pools to lose water through evaporation, so check for leaks and patch where needed.
Make Sure There’s A Leak
Using the bucket test method, you can tell if your pool has a leak or if it’s just evaporating.
Make sure the outside of the bucket is partially submerged in the pool water, and fill a 5-gallon bucket with water.
Mark the bucket’s water level with tape or a marker. Check the pool water level against the bucket after turning off the pool pump for 24 hours.
A leak happens when the level of the pool drops below the line from the previous day and below the bucket’s water level.
The water loss is just evaporation if the pool water level and the bucket water level are the same after a day.
Find the Leak
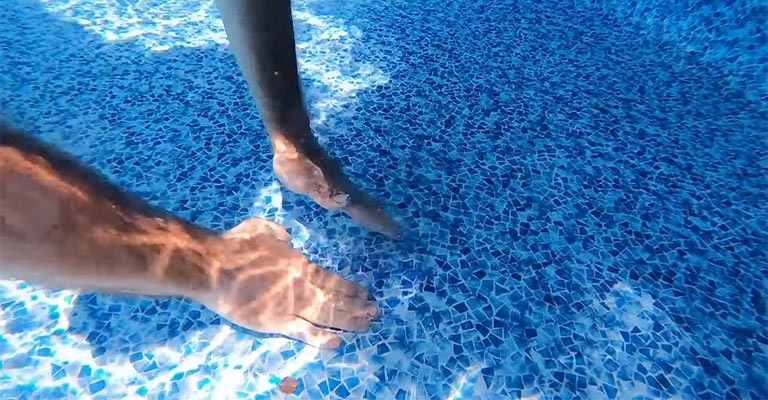
Ink tests can help you find a leak in a pool liner, since leaks are hard to see. Look and feel for bubbles in the liner as you walk around the pool in your swimsuit.
Watch where the colored water goes when you squeeze some food coloring near these bubbles. Tears will let food coloring flow through and toward them.
You’ll need to clean the leak area so the patch and adhesive stick. Wipe down the area with a cleaning cloth. You don’t want to scrub harshly, or the tear might get worse.
Here’s Why It’s Worth Knowing How To Patch Your Pool Liner

Whenever you notice a tear in your pool liner, patch it up right away. Waiting too long will cost you money because water, chemicals, and heat will leak.
Although you’ll eventually have to replace the pool liner after it tears, patching is a temporary fix that’ll save you money and prevent water damage until you can replace it completely.
Above Ground Pool Liner Repair
There’s nothing worse for your yard or neighbor’s property than a tear near the middle or bottom of your above-ground pool liner.
Your above ground pool can collapse if the liner isn’t repaired, spilling hundreds or thousands of gallons of water into your yard and your neighbors’ yards.
Repairing Inground Pools
Inground pools can get extensive and expensive damage from torn liners. Eventually, you could have to replace your entire pool if your steel pool frame rusts or your concrete pool erodes.
The cost of installing an inground pool is about $55,000. There’s also a risk of soil erosion from torn inground pool liners, which can cause water to leak into the soil and accumulate around nearby decks.
Tips for Repairing a Vinyl Pool Liner
There are a few tips to keep in mind when fixing small tears in a vinyl pool liner.
It’s best to work quickly and gather your supplies ahead of time so you don’t have to hop back in and out of the pool multiple times.
Don’t Drain The Water
You should always keep your pool filled even if it seems easier to patch a pool liner without water.
You can tear the pool liner more if you drain the water because the UV rays and harsh temperatures are more exposed.
The frame can also collapse if water is drained from above ground pools.
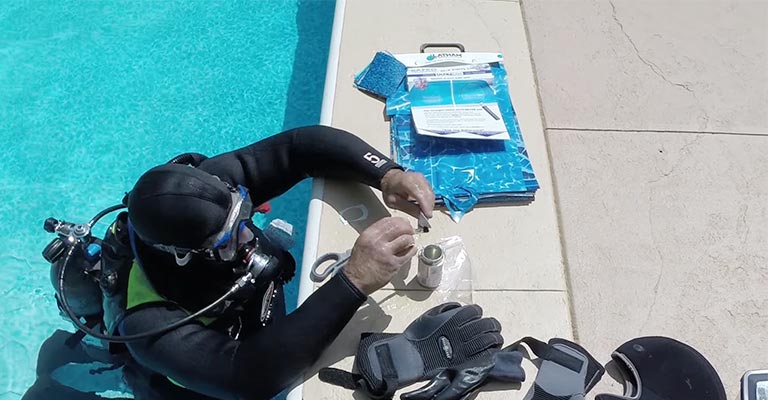
Make Sure You Have Tools And Materials Nearby
When you patch a pool liner, you need to work fast, so keep your tools and materials handy, including goggles.
Patching the pool liner should be easy since you can reach up and grab whatever you need.
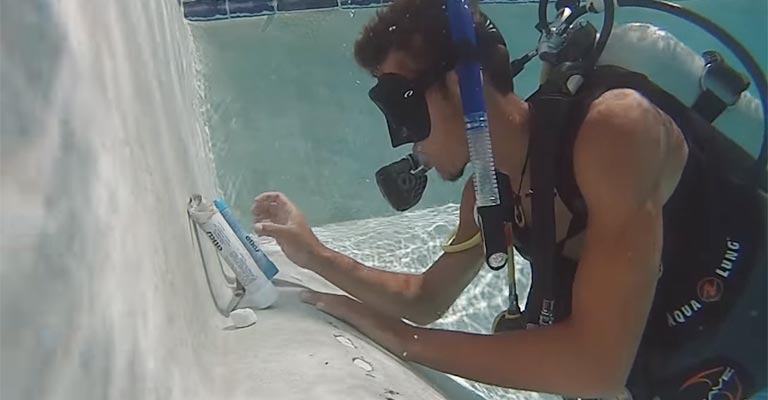
Get It Done Quick
Put on your goggles and get ready to patch the tear now that your tools and materials are in place. Make sure you move fast so the patch sticks firmly.
To ensure that the patch or tape sticks well to the liner, it’s important to minimize the time the adhesive side is exposed to air, sun, or water.
Is It Okay To Patch An Inflatable Pool With Duct Tape?
Good question! Duct tape works great to temporarily patch an inflatable pool, with the keyword being temporary.
There’s no way the duct tape will last very long, so a more permanent patch needs to be applied soon.
You shouldn’t patch a kiddie pool with duct tape, but if that’s all you have, it’ll work in a pinch.
Final Words
For pool liners, you’ve got lots of patch options: vinyl patch kits, waterproof tape, peel-and-stick patches.
You can use waterproof tape for the least expensive patch, but the edges might peel up and the patch won’t last as long as patch kits.
When it’s time to apply the adhesive patch, you don’t have to drain the pool. You can even damage the liner more by draining the pool. Grab your goggles and go find the leak.


