
Working with concrete can be rewarding, allowing you to create durable and functional structures for various purposes.
Whether you’re pouring a concrete floor, sidewalk, countertop, or any other concrete surface, achieving a smooth finish is essential for both aesthetics and functionality.
Once the concrete has dried, the process of smoothing it requires careful attention and the proper techniques to ensure a flawless result.
When performing this process, you must do it at the right time, or you can damage the floor structure. Performing the procedure too early can weaken the concrete surface, resulting in cracks in the future.
It may seem easy to do, but there are some details to consider since it is not just about dumping the materials.
There are two methods of smoothing concrete mix: manually and mechanically. Here is how you should follow the correct process.
In this guide, you will find as much information as possible and as few steps as possible. As well as being able to color and texture concrete, this process also opens doors to creativity.
How To Smooth Concrete After It Dries?

Even though, at first, the task might seem easy, it may not produce the results as expected. There may be moisture problems, difficulties levelling the space, extreme loads, or excessive abrasion as well.
This is why it’s essential to be careful during this process. Using the correct method is what we are trying to teach you.
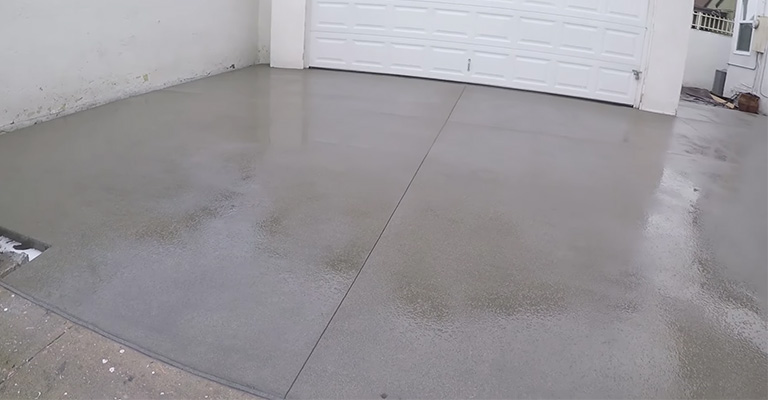
Since polished concrete floors reflect the natural light very well, one of the advantages is their brightness and luminosity.
It is, therefore, essential that you understand how to conduct this process correctly. Smoothing concrete after it has dried requires 4 steps:
1. Remove All Imperfections on the Surface
In the first step, it is necessary to remove all surface imperfections. Removing and scraping all loose material from the floor with a spatula is required.
This is very important since the original concrete must be attached well, firm, and free of deteriorated parts. This step must be completed correctly. Therefore, this process is significant for the finish.
The surface defects must be repaired and removed. By making the surface smooth, uniform, and more adherent after cleaning the concrete, the sealer will be better able to adhere.
2. Vacuum up All Debris and Apply the Adherent
Ensure that all dust and concrete debris left behind by scraping the surface has been cleaned up. Vacuuming everything well is essential before applying the adhesive to prevent residues from forming.
Make sure to sweep all large particles from the entire surface, then follow up with a deep cleaning. To ensure even cleaning, make sure you cover the entire surface.
For cleaning concrete, we recommend using muriatic acid. A chemical such as this will remove dirt, oil, and stains from surfaces.
Using this acid helps you soften the top layer of concrete and prepare it for pouring. To create muriatic acid, you must mix seven parts of water with one part of muriatic acid in a plastic container.
3. Apply a New Layer of Concrete
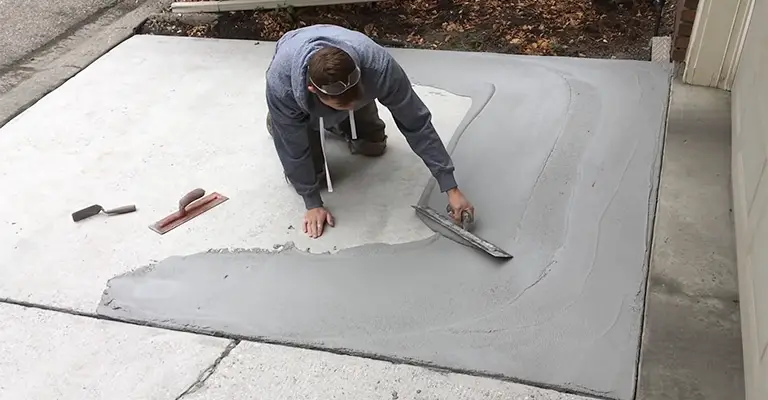
Now, you must spread the mixture on the floor. The easiest way is to throw it in stripes and spread it evenly with the trowel. You must beware of the unevenness since it will be necessary to match them.
Once the first layer is applied, let it rest for a few hours and check if you need a second coat to remove the irregular parts.
At first, the task may seem easy, but the results may not be as expected. Humidity problems or difficulties in levelling the space could also arise.
After brushing the compound mix over the old concrete, you should apply the new one you mixed. Pour everything in and spread it out with a manual spatula.
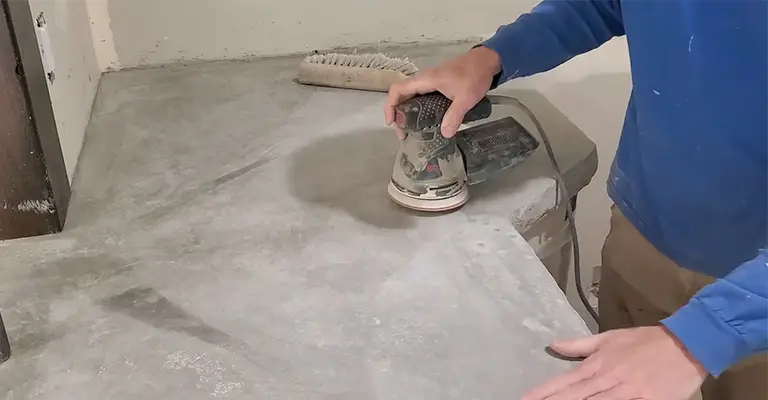
4. Sand the Surface and Wash the Concrete
We recommend using an orbital sander for this finishing process since the idea is not to lower too much. Start with medium sandpaper to remove the most noticeable irregularities.
Finish by fine-tuning with light sandpaper until the surface is perfectly smooth. We recommend using a hand planer to smooth and compact the surface.
If the concrete dries a lot, we recommend adding water to the surface; this will help you give it a good finish.
You must be careful, if you use a lot of water, you may damage the concrete. The way to do it is simple, but there are details to consider since it is not only about sanding the concrete.
How Long Do You Wait to Smooth Concrete?
Even though concrete can be smoothed when fully dry, it is best to do so while it is still set. You must choose a suitable timing because if you smooth it too early, you risk ruining the integrity of the concrete by creating crevices and air pockets.
Waiting too long might make it difficult to smooth it properly and look clean and attractive. Smoothing concrete takes time depending on humidity, temperature, wind, concrete thickness, brand, and type, and more.
The bleeding and setting of the paint can take as little as 20 minutes or as much as four hours. Using your senses is the best way to determine if you can begin finishing and smoothing the concrete.
As a first step, check to see if any traces of water remain and that the concrete is just beginning to change color.
Make sure you wear gloves and place your thumb on one of the edges of the surface. If the concrete is ready for smoothing and finishing, it should leave about a ¼ inch mark if you press hard.
Tip: Apply a Layer of Vitrifier to Protect the Concrete
After curing the concrete, you should use a concrete sealer to make it even more resistant. Be sure to clean the concrete thoroughly before applying the sealer.
We recommend applying thin coats to avoid puddles. You should wait a couple of hours before applying for a second coat. Once the dust has been sucked up and removed, apply the vitrifier.
The first layer is a seal, so it must be diluted with 50% synthetic diluent; apply it to the entire surface with a brush. You must let the sealer dry before you start walking on the concrete.
How To Make Concrete Surfaces Smooth Using A Concrete Grinder?
Smoothing your existing concrete is achieved by grinding it smoothly by removing imperfections, levelling high spots, and smoothing out rough edges.
Typically, concrete is ground with two types of machines: a large walk-behind grinder and a hand-held grinder. The following are the instructions on how to use both tools to achieve a smooth concrete surface.
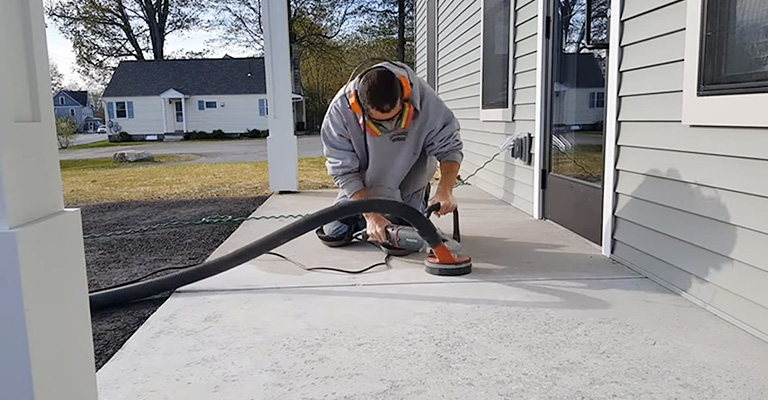
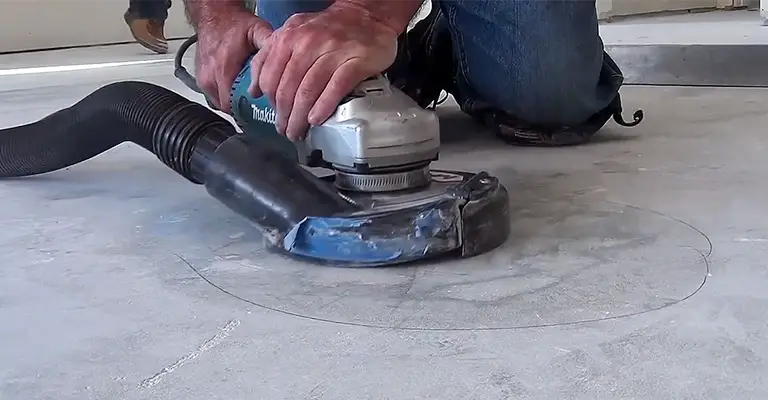
Hand-Held Concrete Grinders:
Compact, portable grinders are perfect for grinding concrete slabs, sidewalks, and patios, making repairs and patches, and working in tight areas with a more giant machine.
Hand-held grinders also use diamond attachments with the same grit range. Consider the condition of the concrete as well as your desired outcome when choosing an attachment.
In this step, ensure the hand-held grinder is unplugged and turned off before attaching the diamond segment. You can now plug in the grinder and start using it once the attachment has been inserted.
During the grinding process, apply even pressure as you guide it over the dry concrete surface, moving circularly.
To achieve a uniform finish, work in small sections and overlap each pass slightly. Switch to finer grit diamond attachments to achieve the desired smoothness, similar to the walk-behind grinder.
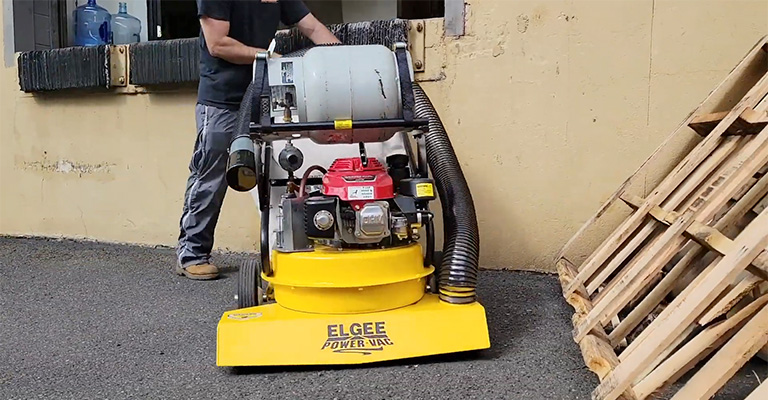
Large Walk-Behind Grinding Machines:
These machines are typically used for smoothing large surfaces, such as floors in a basement or garage.
If you plan to use a walk-behind grinder, you’ll need to select the proper diamond attachment based on the concrete’s hardness and level of smoothness.
Generally, coarse diamond attachments (around 30-40 grit) are used for smoothing rough concrete, while finer diamond attachments (80-150 grit) are used for smooth concrete.
Ensure the machine is turned off and the plug is unplugged before attaching the diamond segment to the grinder. Connect the machine to the electrical outlet and begin using it once the attachment is in place.
You should guide the grinder across all surfaces slowly and steadily, overlapping passes slightly. Keep the grinder moving if you don’t want to create divots or uneven spots.
Increasing the diamond attachment’s fineness until the desired smoothness is achieved.
If you plan to use a walk-behind grinder, you’ll need to select the proper diamond attachment based on the concrete’s hardness and level of smoothness.
Concrete can be smoothed with coarse diamond attachments (around 30-40 grit), while finer diamonds can achieve smoother finishes (80-150 grit).
Ensure the machine is unplugged and turned off while attaching the diamond segment to the grinder. You can now plug in the machine and turn it on once the attachment is secure.
You should guide the grinder across all surfaces slowly and steadily, overlapping passes slightly. The grinder should be kept moving so that there are no divots or uneven spots.
Continue to use finer diamond attachments until the smoothness is desired.
Pro Tip
Using a HEPA vacuum to attach to grinders prevents dust from being generated for both dry grinding methods. A dust shroud can be installed on both grinders so that most vacuum cleaners can connect to them.
Protect yourself against dust and debris generated during grinding by wearing gloves, safety glasses, and a dust mask.
When to Use a Concrete Grinder?
Using a concrete grinder is not always necessary, but it can sometimes be the only option for drying concrete.
Using a concrete grinder may be required if the concrete is very rough or has larger imperfections that cannot be smoothed out by sandpaper.
In addition, you can use a grinder if you do not have the vertical space needed for another layer of concrete.
This way, you can grind the floor smoothly without adding thickness. Also, a concrete grinder can polish the floor to make it smooth and shiny.
A grinder can be used for significant irregularities, larger dips or flakes, or errors in the evenness of rough concrete. Sandpaper usually works well for undamaged, uneven concrete.
However, a grinder can be used for significant irregularities. The aggregate can also be exposed for a different look, or the surface can be resurfaced.
How Much Does a Concrete Grinder Remove?
On average, the motion of a concrete grinder is 1/16 of an inch per pass. The process should not be used for minor imperfections, and perhaps multiple times may be necessary to even out thick irregularities or layers in concrete.
With two passes, you can take off about ⅛ millimeters, and with four passes, you can take off about 1/4 millimeters. Be sure to calculate accordingly to take off only the amount you need to advance your project.
How To Smooth A Concrete Floor With A Concrete Overlay?
It is an effective solution for smoothing rough concrete surfaces like floors, patios, sidewalks, and driveways with a thin overlay or micro-topping.
The products are designed to hide imperfections in existing concrete and create a smooth, even appearance by coating it with a thin, durable, and stylish layer.
In most cases, micro-toppings are made from polymer-modified cement, fine sand, and other additives that hold firmly to the concrete and provide flexibility, strength, and adhesion.
The surface must be thoroughly cleaned before applying a thin overlay or micro-topping to ensure that loose material, debris, dirt, and any existing coatings or sealers have been removed.
In addition to patching any cracks, holes, or surface damage, it is essential to repair any significant damage.
It is crucial to ensure proper surface preparation to ensure strong adhesion between the micro-topping and the underlying concrete. To further improve adhesion, it may be necessary to use a primer or bonding agent.
Ensure the micro-topping is smooth and lump-free, and follow the manufacturer’s instructions carefully. Mixture evenly across the surface with a trowel, squeegee, or roller, maintaining an approximate thickness of 1/16 to 1/4 inch (1.5 to 6 mm).
The application method may vary according to the concrete’s overlay product and smoothness desired.
When concrete is in bad condition, you may be able to smooth it out by applying multiple thin layers of micro-toppings. Follow the manufacturer’s recommendations and let each layer dry before applying the next.
To enhance the appearance of micro-topping after it has fully cured, a high-quality concrete sealer can be applied to protect it.
It can provide additional protection against staining, water penetration, and wear, and it can also impart a polished or glossy finish.
How to Smooth Rough Concrete Edges?
In concrete, the edges often remain rough after finishing due to the focus on the upper surface. However, their edges may be rough if they were blocked with a frame or for other reasons.
Sanding them smooth enough can be accomplished with an orbital sander, but the grit you use will help. Concrete grinders may be required if the edges are uneven.
When smoothing mildly rough concrete with few visible imperfections, 40 to 60 grits may be sufficient.
When sanding more substantial irregularities, 80 to 120-grit sandpaper may be necessary, and when sanding very smooth edges, 200-grit sandpaper and up may be used. In some cases, you may have to use a diamond disc.
Final Words
Many techniques can be used to obtain the desired results, including grinding, sanding, applying self-leveling compounds, overlaying concrete, patching and repairing concrete, and polishing concrete.
You should choose a method depending on the specific requirements of your project, the condition of the existing surface, and the smoothness and finish you would like.
Using the appropriate tools and materials and following the proper preparation and application procedures, it is possible to convert a rough and uneven concrete surface into a smooth, even one.


