
Discovering that the electrical outlets in a single room of your home are not functioning can be both puzzling and inconvenient. The first instinct is often to check the circuit breaker, assuming it might have tripped.
However, if you find that the breaker is not the culprit and remains untripped, a different issue could be at play.
A situation where outlets are not working in one room while the breaker is not tripped requires a more targeted approach to diagnosis and resolution.
It is common to run into electrical problems like these, but they can be difficult to pinpoint if you don’t know where to look.
Since it makes no sense to poke around electrical circuits looking for the issue, I wrote this helpful guide to help you.
The following video will show you how to troubleshoot when an outlet stops working but no circuit breaker trips and how to fix the problem.
Why Is Power Out in One Room but Breaker Isn’t Tripped?
Your GFCI outlet has likely tripped if the power in one of the rooms has gone out without the breaker tripping. In addition to faulty wiring, worn-out outlets could cause this problem.
Why Your Outlet May Have Stopped Working
There are a few possible reasons why an outlet may have stopped working, whether it is your living room light or the outlet next to your bed where you charge your phone. Here are some ideas:
Worn Out Outlets
In the same way that every electrical component has a limited lifespan, outlets also have one. Outlets wear out faster than others in your house if they are used too often.
The outlets in older houses are likely not to have been replaced since the house was built so long ago. To visually examine the outlet for cracks, warping, discoloration (but not black), etc.
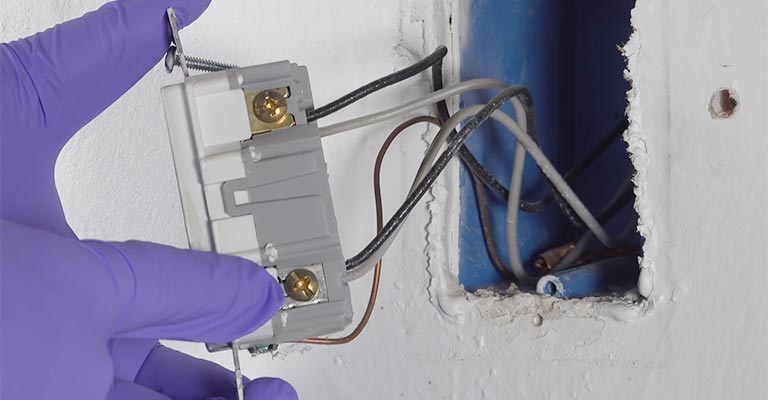
Loose Connections
Sometimes, wires become loose. It is essential to remove the outlet and check for any loose connections. Generally, loose connections occur in three types:
Terminal screws: Gently bend their terminal screws to check to see if any wires are loose.
Stab-in: Make sure the stab-in connections are tight by gently tugging them.
Wire connector: Check whether any wire in the connector is loose by gently tugging it.
Damaged Wires
When I cannot spot a problem with my electrical outlets, I check for damage to the wires.
The reason? Damaged or worn-out wiring may be unable to transmit electricity, resulting in a dead outlet.
In reality, damaged wires aren’t very hard to spot. The issue can often be diagnosed without disassembling the outlet.
When you turn on the outlet, listen for “crinkling” sounds or burn marks around the outlet.
Burnt Outlets
One possible cause of a non-working outlet is that the outlet and wires inside have burnt out. It will look like there are black spots or streaks all over the outlet.
If you want to be sure that the outlet is burnt, turn off the circuit to which the outlet is connected and open the outlet.
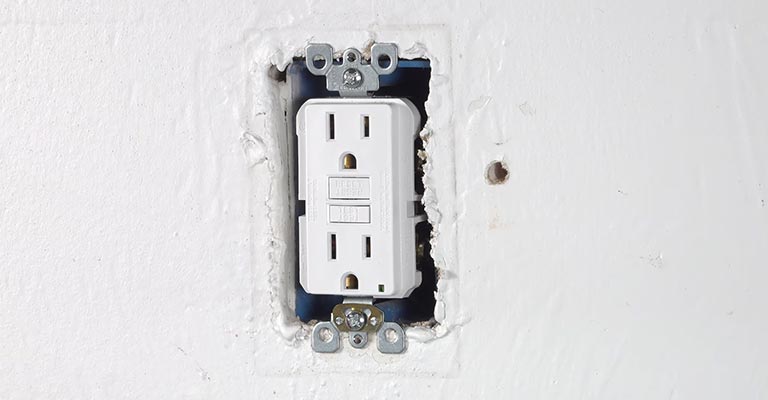
Tripped GFCI

GFIs (ground-fault circuit interrupters) are circuit breakers that interrupt power to a circuit if a ground fault occurs.
Are you curious how it looks? As an outlet, GFCIs have two buttons — reset and test — that can be pushed to reset the device.
When electrical flow fluctuates, the GFCI prevents the outlet from flowing current.
Its purpose is to prevent fires caused by electrical currents. Your appliances will also be protected from severe damage or electric shock if you use them correctly.
Power will be cut off until a GFCI has been reset in the circuit where your non-functional outlet is located.
My first recommendation would be to test the GFCI, as I’ve found that tripped GFCI may be the source of many non-working outlets.
Damaged Appliance
The wall outlet might not be working because it is in the On position, but check it by checking the appliance, tool, gadget, or device that is plugged into the wall outlet.
There may be a problem with the plug, power cord, or internal fuse (if present) on the appliance, or it might have died simply.
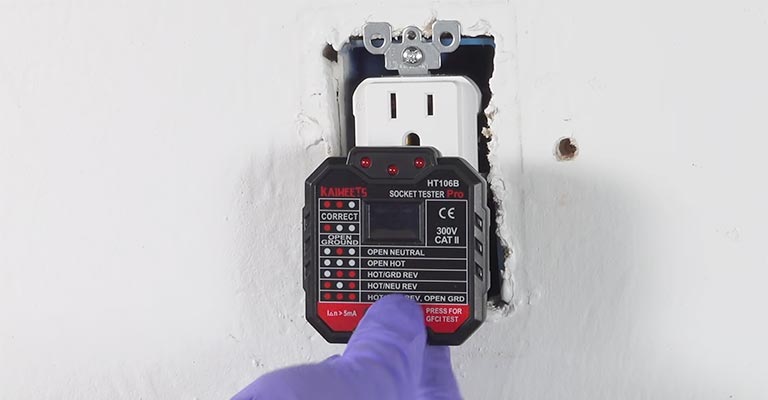
Use a line tester (voltage tester) or another instrument to verify if there is power in the wall outlet or test another device that works appropriately using another wall outlet.
Check the device after verifying that the wall outlet and power are functioning correctly.
Make sure your warranty is valid if the device is under warranty. After the warranty period is up, either repair it (certified shops and dealerships are highly recommended, although they’re not always the cheapest) or recycle it and get a new one.
In addition to these causes, there are many reasons why a wall outlet can appear dead without tripping an electric breaker or blowing a fuse.
How to Fix an Outlet That Stopped Working
This is just the beginning of troubleshooting, so I am happy to have you with me. In the following sections, I will describe how to resolve each of the issues I mentioned above. You can use this trick if you have an outlet in your house.
Tighten Loose Wiring
A loose connection (terminal screw) can cause your outlet to stop working, so you can simply tighten them up.
According to the instructions above, follow steps 1 through 7. When the wires reach your desired length, reattach them to the same receptacle, secure them properly, and then screw it back into the wall.
Try connecting the power again after reattaching the wall plate. Troubleshooting your non-functional outlet? Try removing the loose stab-in connections and switching (pun intended) them to screw terminals.
Replace Damaged Wires or Outlets
A faulty electrical component must be replaced if the wires inside the outlet have been damaged or if the outlet is worn out or burned.
Here are some steps you should follow if your building codes allow DIY repairs or if you’re comfortable handling electrical issues:
- Unplug the main circuit breaker. Whenever you’re uncertain which breaker to use, switch each one off, then test it with a voltage tester. You can continue as long as there is no current registration on the tester.
- Remove the wall plate by unplugging it and unscrewing it
- Free the wall plate by wriggling it without touching the terminals or wires
- If necessary, take pictures of the wiring so you can rewire it correctly
- Test the current once again by placing the voltage tester on the top and bottom terminal screws. Alternatively, try a yellow, green, or black wire or a brass screw if you don’t see any terminal screws
- Remove the receptacle and the attached wires carefully from its place
- Cut off damaged sections of wire and strip new ones
- Replace the original receptacle with the new one (refer to the previously taken photo for help!)
- Wrap the wall receptacle with electrical tape and screw it into place
- Reinstall the wall plate, restore power, and test it
It would be best to contact a qualified electrician (recommended! ) who can do this job correctly.
Reset the GFCI
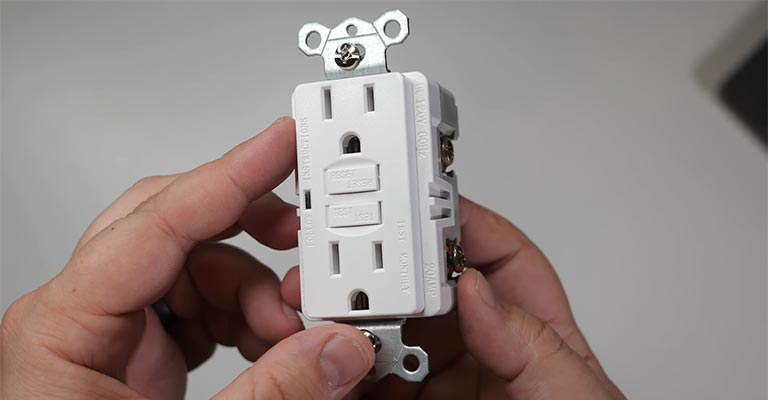
You should always shut off and unplug all appliances connected to that circuit before taking action. It’s now time to test the GFCI.
Most GFCI models produced after 2015 have a self-test feature, including LEDs. Outlets can have between one and three lights, depending on the brand, make, and model.
A green outlet indicates that it is working properly, while a yellow outlet indicates that it has tripped. Professional assistance is needed if the red light starts blinking or turns on.
This is how you should test and rest an outlet if your GFCI tripped or you see a yellow light:
- Turn off all electric appliances
- Select the “test” option
- Put any one appliance into the jack to see if it works (it shouldn’t)
- Disconnect the appliance from the power and press “reset.”
The GFCI is more likely to malfunction if it doesn’t reset after you press the reset button. This can be due to a compromised outlet or damaged wiring.
You should shut off the circuit breaker and contact a professional in this emergency.
What to Do When Multiple Outlets Aren’t Working but the Breaker Hasn’t Tripped
What is more frustrating if one of your crucial outlets at home stops working? As you may have guessed.
Multiple outlets stop working even though the breakers aren’t tripped, and this has happened to many people (including me).
This is usually due to multiple outlets experiencing outages due to a tripped GFCI.
It is typical for different circuits in a house to be protected by one GFCI. The GFCI can be reset by following the instructions above.
Additionally, I assumed multiple outlets in my house didn’t work because I used the same testing appliance throughout. I found out that not all the outlets were dead; it was the appliance. This is embarrassing for me.
Why Is My Top Outlet Working but the Bottom One Isn’t?
Usually, if one half of an outlet works, but the other half doesn’t, the outlet is damaged inside.
Possible causes include incorrect wiring, worn-out outlets, and faulty wire nuts. A qualified electrician should be able to diagnose and fix the problem.
Is a Dead Outlet Dangerous?
In fact, yes. Once you identify and fix what’s wrong with them, dead outlets can become a fire hazard.
Wires can be shorted if the insulation around them melts, which causes the exposed wires to touch. It is a serious fire hazard that must be resolved as soon as possible.
Can A GFCI (Ground Fault Circuit Interrupter) Outlet Cause Other Outlets Not To Work?
It is true that a tripped GFCI outlet will cause other outlets connected to the same circuit to lose power as well.
It is highly recommended that GFCI outlets be installed even if you don’t live in an area with a lot of moisture and humidity.
GFCI outlets should only be replaced by a professional electrician when they need replacing.
Final Words
Now you know where to look for possible reasons why your outlet stopped working, although the breaker was not tripped. Furthermore, you have a good understanding of how to troubleshoot and resolve problems.
Make sure you are safe before putting my solutions to the test. Wear protective gear and turn off the main breaker before proceeding.
It’s always best to trust your gut when dealing with wiring or testing the GFCI rather than trying it yourself.


