
If you’re a DIY enthusiast or have a project that requires attaching a 4×4 post to concrete, you may be wondering about the best way to do it.
Anchoring a post to concrete can seem daunting, but with the right tools and some basic knowledge, it can be done quickly and securely.
This article will provide a step-by-step guide on anchoring a 4×4 post to concrete so you can confidently tackle your project and achieve a professional-looking result.
Before that, here are some safety tips to keep in mind when anchoring a 4×4 post to concrete:
- Always wear protective gear, including safety glasses and gloves, to protect yourself from debris and sharp objects.
- Use a hammer drill with a masonry bit to drill into the concrete, as regular drills are not designed for this type of material and can break or become damaged.
- Ensure the post is level and aligned correctly before securing it to the anchors.
- Use a level to check the post periodically as you are working to ensure it stays straight.
- If you use a power drill to screw the post to the anchors, ensure it is properly tightened and secure.
- Use a torque wrench to ensure the screws are tightened to the correct torque specifications.
- Follow the manufacturer’s instructions carefully, and do not exceed the maximum weight or load capacity of the anchors or screws.
Following these safety tips can help ensure a safe and successful installation of your 4×4 post to concrete.
A Short Guide On Securing 4×4 Post To Concrete
To anchor a 4×4 post to concrete, you will need to use concrete screws or concrete anchors. Here is a step-by-step guide on how to do this:
- First, use a hammer and cold chisel to mark the location on the concrete where you want to install the post.
- Next, drill a hole into the concrete using a hammer drill and a masonry bit the same size as the concrete screws or anchors you will be using.
- Tap the concrete anchor into the hole using a hammer, ensuring it is flush with the surface of the concrete.
- Place the 4×4 post over the anchor, ensuring it is level and aligned the way you want it.
- Use a wrench or drill to screw the post to the anchor, using the holes in the post as a guide.
- Repeat this process for each anchor you are using to secure the post.
It’s essential to ensure the post is level and aligned properly before securing it to the anchors, as it will be difficult to make adjustments once it is in place.
You may also want to use a level to check the post periodically as you are working to ensure it stays straight.
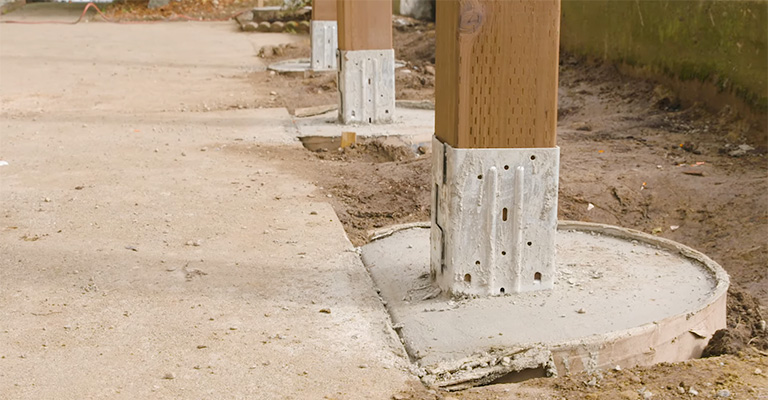
How To Anchor Post To Concrete [Detailed Guide]
Anchoring posts to concrete is essential when building a deck, railing, or fence. Following this DIY step-by-step project will help you to do that.
Attaching wooden posts to concrete is straightforward, so anyone can do it very quickly. It is necessary to first buy the post to know its dimensions when purchasing hardware post anchors.
Post anchors are available in many shapes and sizes, from standoff post bases to uplift post bases. Besides regular post anchors, there are heavy-duty post anchors as well, which are ideal for home improvement projects.
For unequal concrete surfaces, you also need to know that adjustable anchors can be used to attach posts. Despite their higher price, at least you can adjust the height of the posts to align perfectly.
The following materials and tools are required to anchor posts to concrete:
- Plastic Dowels
- 4×4 Lumber
- Post-Anchor
- Wood Primer
- 2-3″ Lag Screws
Step 1:
To begin with, you need to check whether the concrete surface is level. Adjustable post anchors are necessary when there is an uneven concrete floor.
These anchors are more expensive than regular post anchors, but they allow you to adjust them to fit other posts.
Step 2:
Our next step will be to build the wooden post that will be anchored to the concrete platform. So, the choice is to buy 4×4 pressure-treated Lumber or purchase fancier decorative posts.
Regardless of your choice, you must adjust them to the desired length (generally around 3’/1m).
Tip: Make cut lines on posts using an L-shaped square and a carpentry pencil. You must work carefully and with good judgment to achieve a professional outcome.
Step 3:
Depending on the wooden posts’ size, we will have to use a circular saw or a wooden chainsaw to cut them. The circular saw is a better choice for an inexperienced DIYer, as it will give you more control. Our time pressure forced us to use the chainsaw.
Tip: If you are cutting wooden posts, ensure they are locked into place firmly, or you will risk damaging the posts.
Step 4:
Afterward, you must install the post anchors on the concrete after adjusting the post to the correct dimensions.
Due to this, several plastic dowels and lag screws are usually used to fasten the metal anchors to the concrete. Ensure that the anchors are aligned with one another before making marks.
Tip: Mark the spots where you will drill several holes with a carpentry pencil before driving in the screws. Check that they are visible and that the platform and post are aligned correctly.
Step 5:
We used masonry drill bits and good drill machinery to drill holes in concrete. To avoid damaging the drilling machinery, you should ensure the drill bits are in good condition. As an alternative to sleeve bolts, you can also use jack bolts.
Tip: Drill machinery must have hammering capabilities if you want to drill into concrete and anchor posts.
Hold the drilling machinery like a gun by using one hand to hold the holder and the other to provide good control.
Step 6:
The plastic anchors were installed with a rubber mallet after the holes had been drilled in the concrete. You won’t be able to mount the post anchor properly unless the dowel heads are aligned with the concrete surface.
Tip: Be sure that the size of the plastic dowel matches that of the screws; otherwise, they will break.
Further, you might consider using expansion shields instead of plastic dowels since they provide more support.
Step 7:
Then, after inserting the plastic dowels into the holes, we need to drive in the screws to fasten the post anchors. Our metal hardware was locked into position using a wrench key and 3″ lag screws.
Tip: When driving screws into concrete, use washers to enhance strength.
Using self-tapping screws for concrete will save you the trouble of drilling holes and inserting plastic dowels.
If you are buying screws from your local DIY store, make sure you ask a professional.
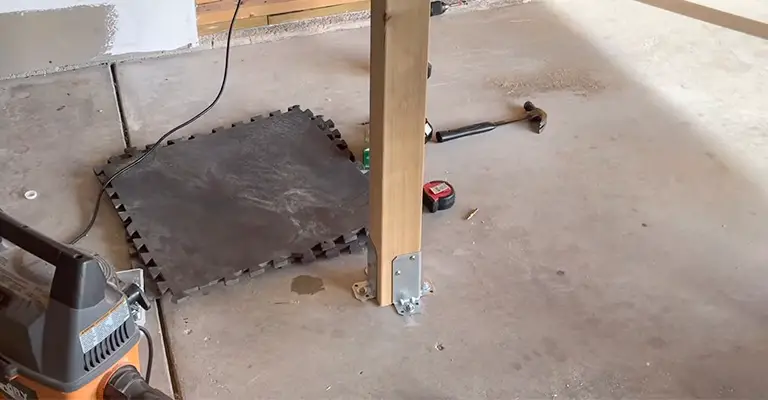
Step 8:
It would be appropriate to install the wooden posts once you have secured the anchors into place.
For concrete anchoring, your post’s bottom section should be painted with wood primer to resist moisture. If it doesn’t fit into the anchors, sand the bottom section with a band sander.
You can tap the post into the anchor using a rubber mallet until it sits properly, but you don’t need to drive in the lag screws yet.
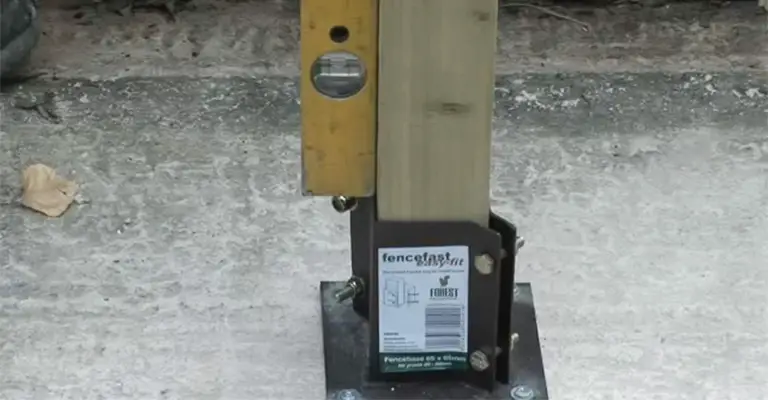
Tip: Check the uprightness of the wooden post with a level.
If the post does not appear plumb, you must bring it into the right position and secure it with a clamp and two braces.
To ensure the post is perfectly upright, you will need to use your hand level again.
Step 9:
For securing the post into place, use lag screws 1 1/2 inches long. Thus, drilling pilot holes through the anchor holes in the post are the last step to securing a post to concrete.
It is important to use a thin drill bit for lag screws. Otherwise, the post won’t be adequately secured.
Tip: Drive the lag screw into the pilot holes using a wrench key. Be sure not to apply too much force to the post.
Otherwise, you may damage it (the wood may split). Ensure that the second screw is inserted on the opposite side of the anchor.
Final Step:
With the help of lag screws, we have anchored a post to concrete. Using a spirit level, we ensured that the wooden post was upright and secure with four lag screws.
Use the anchors that suit your needs and match the rest of your backyard, as you can use many types of anchors.
Final Words
Use a post level to ensure the post is plumb. This tool reads both directions simultaneously. Thus, you could save time and efficiently accomplish the job. Hopefully, now you know how to anchor a 4×4 post to concrete.


