
Building a shed can be a great way to create extra space for storage, work, or leisure activities. One crucial aspect of shed construction is attaching the shed roof to an existing roof, such as that of a house or garage.
Attaching the shed roof properly ensures that it is stable, secure, and able to withstand the elements. However, this process can be challenging, especially for those who are new to construction.
In this guide, we will explore the steps involved in attaching a shed roof to an existing roof, including the materials needed and important safety considerations.
Whether you are a DIY enthusiast or a professional contractor, this guide will provide you with the information you need to successfully complete this project.
Joining A Lean-To Roof To An Existing Roof
As its name implies, a lean-to roof slopes in a single direction with rafters that cross against other structures at their high ends and overhang support posts or exterior walls at their low ends.
It is not necessary to have a shed roof on a shed. There are different types of shed roofs, which are all single slopes from one end of the building to another. Most shed roofs are low slope, usually rising just 4 inches per foot or less.
Since they have a low slope angle and do not have a directional orientation, they are ideal for attachment to another roof.
Dormers with a shed shape are often attached to a gable roof, placed over a porch or patio, or placed over small additions.
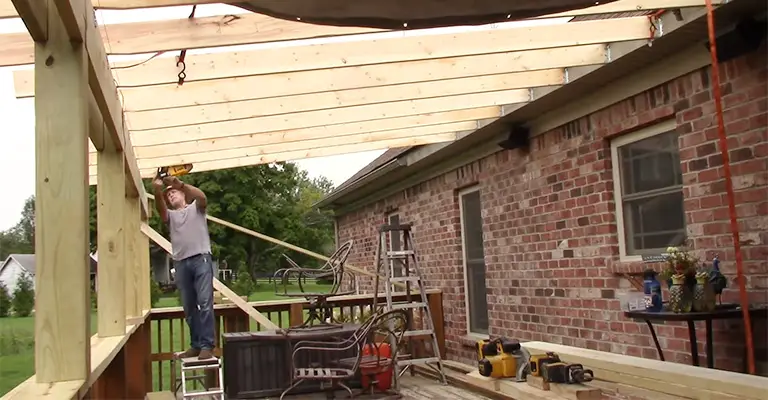
Typically, shed roofs be built to tie into existing roofs. The new roofs could be covered lean-tos over decks and porches, or they could be the shed roof of an addition.
Anyhow, the shed roof is resting on an existing roof, typically a gable roof with a ridge and a steeper slope than the shed roof.
Things You Should Know

It is essential to plan the scope and design of your project in advance. Establish a budget and decide what type of foundation and materials you will use.
Start by hanging the end posts, then set up your nailer and purlins. Make sure the top nailer is in contact with the rafters.
You can then finish by adding trim around the edges of your roofing material.
Make sure your lean-to is complete by adding doors, partitions, floors, and exterior walls.
Things You’ll Need
- Roofing paper
- Rafter hangers
- Shingles
- Tape measure
- Roof decking
- Rafters
- 2-by-6-inch ledger board
- Chalk line
- Lag bolts
Step 1
Decide the pitch or slope of the existing roof, which will influence where the connection will be placed.
An addition with a framed exterior will have a fixed height outside the wall; a patio or carport can have end posts.
The ground should be filled with concrete. If there are no posts or end supports, install 4-by-4-inch wood or metal posts. If necessary, adjust these heights to make a good connection with the old roof.
Step 2
Assume that the shed roof is at the height of the outside and begin from there. In general, shed roofs should slope at least one inch per foot. In some cases, slopes of two or three inches may be better.
A shed roof addition will need to be attached at least 9 feet 3 inches above the porch or other roofed area or 10 feet 6 inches for a 2-pitch shed roof.
Step 3
On the existing roof, measure the height and draw a chalk line across the width of the new shed roof. It is recommended that all shingles and roofing paper be removed from that area.
It is still advisable to leave the wood roof decking in place but mark the rafters or joists to which it is fastened. To cut a 2-by-6-inch ledger board, measure its width with a tape measure and cut it with a circular saw.
Using lag bolts–long, strong bolts that screw through the ledger into the joists–fasten it to the existing roof rafters or joists.
Step 4
Metal rafter hangers are attached to the ledger board with screws or nails to hang shed rafters from the outside wall. The rafter board should be fit into the U-shaped hangers and nailed in place.
Ensure that the shed roof is securely attached to the existing roof by adding decking to the top and nailing metal flashing to the joints.
Put roofing paper on the new shed roof and shingle it starting at the bottom and working upwards. You can reinstall the removed shingles or use new ones to cover exposed portions of the old roof.
Using Collar Ties
It is possible to tie the shed rafters to the gable rafters on the far side of the gable roof using horizontal collar ties if the ridge is not structural or is otherwise incapable of carrying the weight of the shed roof.
This collar tie prevents the front wall of the addition from bowing outward under the weight of the roof. As well as acting as ceiling joists in the addition’s interior, they also support the gable roof.
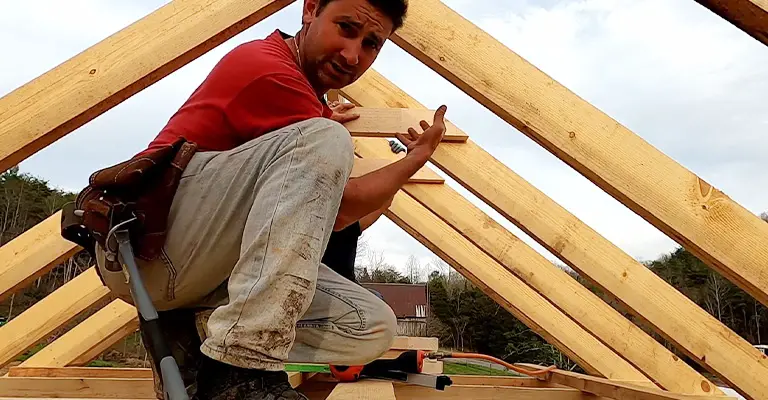
Attaching At The Ridge
Shed rafters may be inserted along the ridge of a gable roof to tie a shed roof over a full-height addition together.
Depending on how structurally sound the ridge is, it may also support the weight of the shed roof, preventing the roof from exerting too much outward pressure on the addition’s front wall.
This wall supports the lower ends of the shed rafters, which in turn are supported by the joists below the roof.
Attaching Below The Ridge
As with any lean-to roof over an addition, the existing rafters will need to be cut away to accommodate the addition, and the shed roof will require support along its framing.
Below the ridge, shed roof rafters join a gable roof with a header running horizontally between the gable roof’s rafters.
Short cripple rafters run between the header and the ridge above the shed roof; the shed rafters attach to the header opposite the cripple rafters. The gable rafters on either side of the roof are doubled.
The shed roof should be appropriately flashed at all intersections where vertical walls intersect the existing roof.
Attaching Near The Eaves
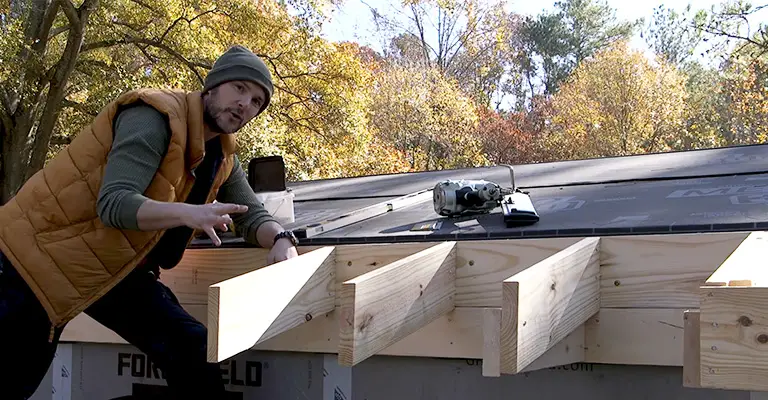
The rafters of an old roof can typically support the upslope end of a simple shed roof that sits near the eaves.
To construct the shed roof, you’ll need to remove the existing shingles and trim the existing eaves. Then you’ll need to nail a two-by-six ledger board on the existing roof; the ends of the shed rafters will rest on this board.
Another horizontal beam supported by posts will rest on the other end of the shed rafters.
As soon as the shed roof framing is finished, finish the lean-to and any part of the existing roof from which you have removed shingles with new shingles to blend the two.
Final Words
There are many forces working on any roof structure. It is essential to consult a structural engineering professional before making any changes to your roof plan to make sure any changes won’t compromise the roof’s stability and that all new framing members are the correct size and layout.
When adding a shed roof, it’s important to ensure that the existing structure is capable of sustaining the new roof’s additional weight.


