
Nails sticking out of wood can be a common issue in woodworking and construction projects. These protruding nails not only pose a safety hazard but can also be unsightly and cause damage to surrounding materials.
Nails can ruin the perfect look of whatever project you’re working on, be it fixing up your home or creating your own furniture. The contractor may have left exposed nails that you need to cover.
We’re here to address some of your most frequently asked questions about how to solve this issue, and don’t worry—there are several ways to go about it.
Quick Fixes for Protruding Nails: How to Cover Them in Wood
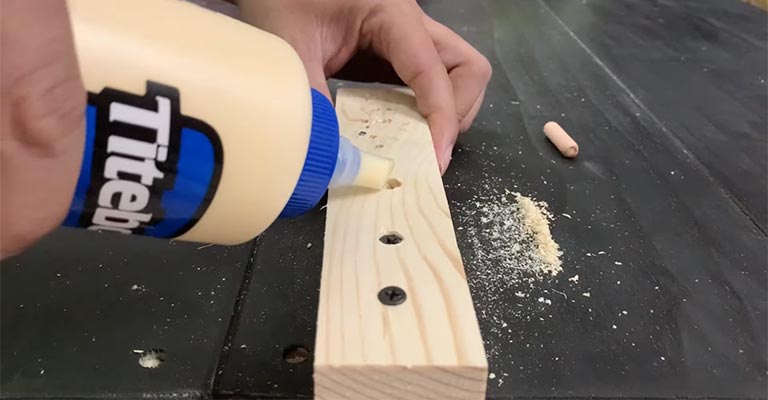
Cover the nails with wood filler after countersinking them. Tapping the nail set gently until it sinks approximately 1/8 in (0.32 cm) below the surface of the wood is the best way to sink it.
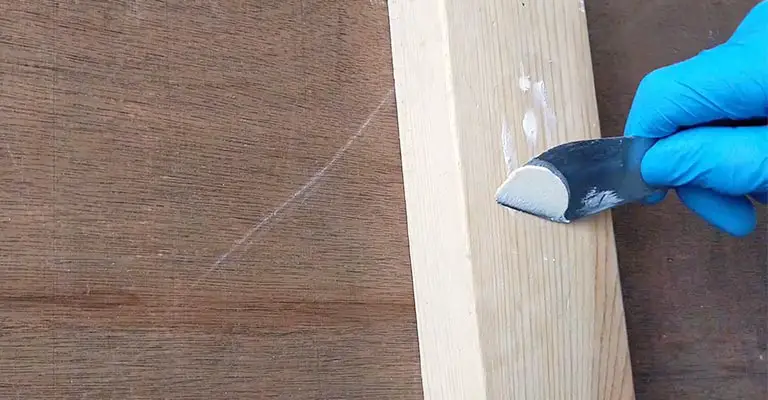
Make sure any sawdust is removed from the hole, then use a putty knife to insert the putty or filler. Make a smooth surface by scraping off the excess with your putty knife. Make sure the filler has hardened completely before using.
To smooth out the surface, use 180-200 grit sandpaper. The best filler or putty to choose is one that matches the wood.
It is also possible to use a plain filler, then stain it after drying. All kinds of projects can be completed with this versatile option, including flooring, stairs, furniture, and baseboards.
Door Repair 101: Tackling Sharp Nail Ends Sticking Out
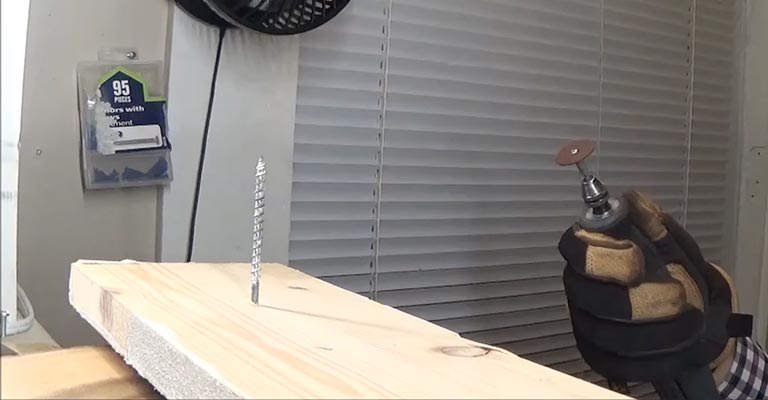
If you have a nail set, bend over the tip without pushing the nail back out the other side. Or grind the nails off with a grinder.
My suggestion is to use a grinder.
If you file them down, it will take you 30 minutes (or more) to restore the file marks to the door and who knows how long it will take to repair the damage.
You could also spend 10 minutes removing them and replacing them with the appropriate screws.
Use a pry bar or the claws of a hammer to gently pry out the nail’s head after it’s tapped out far enough.
You can protect the door with a scrap of wood if you want to use a hammer or bar. A longer and larger screw will be more effective than a shorter nail.
Hollow doors may require an anchor for the screw, and hollow doors may not be appropriate for nails.
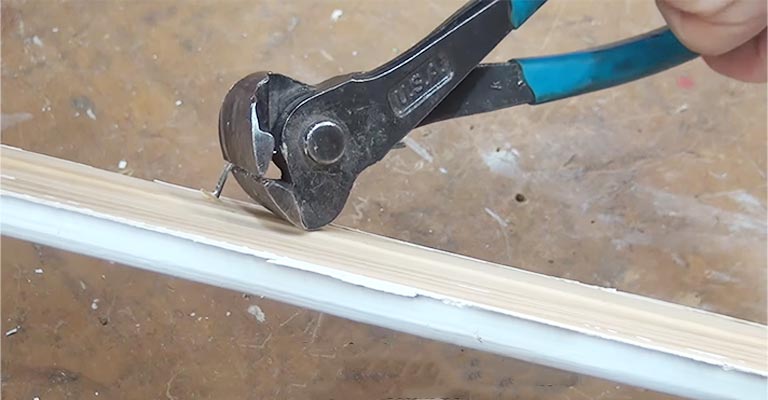
1. Using Wire Cutters
Cutting away the top of the screw or nail with wire cutters is one of the simplest and quickest methods.
With wire cutters, you can cut through metal and other materials with relative ease. It’s not just any wire cutter that will do.
If you want to make a precise cut, you will want a pair of beveled blades that contact each other after cutting. For cutting the heads off screws and nails, this type of cutter is called an anvil cutter.
If you have long handles on your anvil cutters, you’ll get better leverage. It means cutting through screws or nail heads with less force.
Bonus tip: To make nails less visible, cover up nails sticking out of wood if you find it difficult to fix them.
For hiding those ugly marks, you can apply caulking, paint, putty, etc. over them or cover them with wooden parts.
2. Using A Reciprocating Saw
Sawzall and reciprocating saws can be used to cut through screw or nail heads. There are many types of saws available, but reciprocating saws are one of the most versatile.
With its small size, it can work in tight spaces where a jigsaw or handsaw won’t. As an added bonus, it works faster than wire cutters, even if it takes up more space.
3. With A Jigsaw
Invest in a jigsaw blade that cuts metal so you can remove screws coming out of wood.
When it comes to removing screws and nails, a circular saw is more convenient than a jigsaw.
Nevertheless, if all you have is a jigsaw, simply place the blade flat against the surface and cut into the screw or nail head.
Because there is not much room for the jigsaw, it is probably best not to use one at all since there is not much space.
4. Hand Saw
Most people are familiar with this method of removing screws and nail heads. A hacksaw with metal-cutting teeth is required.
Because the hacksaw is designed to cut metal, most jobs of this nature should be completed quickly.
What if you don’t have a hacksaw? A woodworking handsaw can also be used in this situation.
You should avoid using the teeth of the woodworking saw since they will be ruined by trying to cut into the metal. Rather than cutting straight across, create dings and divots on the backside.
You can then cut through the nail or screw using that backside. Though it is not as smooth as a hacksaw, it still works.
How Do You Hide Nails On A Deck?
Make your decking look nail-free by using hidden fasteners.
Galvanized nails and screws are traditionally used to build decks. The boards can be held together with specialized fasteners if you prefer an elegant, nail-free look.
Undermounts and edge-mounts are the two types of no-show fasteners. In edge-mount fasteners, a screw anchors them to the side of the board in a slot on the end.
If you look straight down, you might be able to see them between the boards. A steel strip is mounted on top of the deck joists for undermounting. In most cases, they cannot be seen at all.
How Can I Fix My Nail Pops?
To fix nail pops, follow these steps:
Step 1:
Make sure the loose nail is hammered in and then add more screws. Nails can work their way loose over time because of the natural expansion and contraction of your home.
The nail should be hammered back into the stud, and then the drywall panel should be secured with two drywall screws about 1 inch (2 cm) above and below the nail.
Nails will eventually work themselves loose if you just hammer them back in place.
Make sure the screws penetrate the stud at least three quarters of an inch (1.9 cm). For example, screws should be at least 1 1/8 in (2.9 cm) long if you have 0.95 cm drywall.
If you notice any indents left by nails and screws, you can smooth them out with drywall joint compound.
Step 2:
Nail pops in the ceiling should be repaired by a contractor. You may have drywall panels that were attached directly to your ceiling trusses rather than clips or blocks if the nails start popping out.
The drywall panels will need to be replaced by a contractor if that’s the case. Some people even have foundation problems when they experience these symptoms, especially if they have other problems like:
- A door that sticks or won’t close
- Window, door, or ceiling cracks
- Foundation cracks
How Do You Hide Finish Nails In Trim?
After you have gouged out the wood, glue it back over the nail. You can conceal the finishing nails by scooping out a small chip of wood just above the nail with a wood gouge.
You can drive the nail into the divot created when you removed the chip if the chip is attached to the wood on one side.
Place the wood chip back over the nail, then glue it in place. If you want a smooth finish, lightly sand the area once the glue has dried.
It’s best to practice on scrap wood first since this can be tricky. Knots in the wood can also be used to hide nail holes.
How Can I Cover My Nails In The Attic?
For a quick fix, place corks over the nails. Corks make a great solution if you just want to put a box in your attic without bumping your head on a sharp roofing nail.
A hobby store will sell you a bag of standard corks that you can push firmly onto the nail. It’s that simple! Additionally, cork repels termites naturally.
You can create a longer-term solution by using paneling. Alternatively, you could attach wallboard or paneling to your attic rafters for an aesthetic solution.
Nail the paneling in place with finishing nails after cutting it to the width of your rafters. In this way, the nails will be hidden and the ceiling will be lightweight.
The boards should not be nailed or screwed to the underside of your roof. Creating holes in your ridge vents will allow moisture and air in.
Can I Paint Over Nails?

The best way to cover nails you don’t want to remove is with a thick roller. Before you begin painting, don’t worry about pulling out the nails that hold your pictures and art in place.
The better option would be to use a roller with a thick nap-anywhere from 3 1/4″ to 1 1/4″ (1.9″ to 3.2″).
There will be no gaps left in the paint after the roller glides smoothly over the nail. In this way, you won’t have to spend time finding nail holes again after they’ve been covered up.
Siding nails should be primed and painted. The nails you used to attach to your siding will likely rust over time, so you’ll have to paint right over them to prevent the rust from showing through.
A layer of metal primer will prevent rust by sealing out moisture and sealing out moisture from nail heads. You can paint the siding once the primer is dry.
How Do I Cover My Nails Before Painting?
Spackle the nail head with a little spackle. If you’re going to paint something, countersink your nails with a nail set and hammer just a little below the surface.
To hide the nail head, spread spackles over it. Smooth out the surface of the spackle with a putty knife if you like. You should sand the spackle with 180-grit sandpaper once it has dried, and then paint it.
Final Thoughts
It is not only dangerous to have screws protruding from wood surfaces, but rusted and old screws can also be hard to remove.
It is a good idea to keep a pair of cutters on hand while doing DIY projects or home renovations because you never know when an emergency will arise.
A reciprocating saw and wire cutters are handy for shortening or grinding nails and screws you put into materials regularly.


