

A crack in your fiberglass tub can be a frustrating and unsightly problem. Whether it’s a small hairline crack or a more significant fissure, addressing the issue promptly is crucial to prevent further damage and maintain the structural integrity of your tub.
Fortunately, repairing a crack in a fiberglass tub is a task that can be accomplished with a few simple tools and materials, even if you have limited DIY experience.
In this guide, we will walk you through the steps required to fix a crack in a fiberglass tub, helping you restore its functionality and aesthetics.
Can A Crack In A Fiberglass Tub Be Repaired?
A simple kit can be used to repair cracks, chips, and holes in porcelain, ceramic, fiberglass, and acrylic bathtubs and showers, thereby saving hundreds or even thousands of dollars in remodeling costs.
That’s great news anyway, since replacing a bathtub or shower is rarely just a case of replacing a fixture in a bathroom.
What Is The Best Way To Fix A Crack In A Fiberglass Tub?
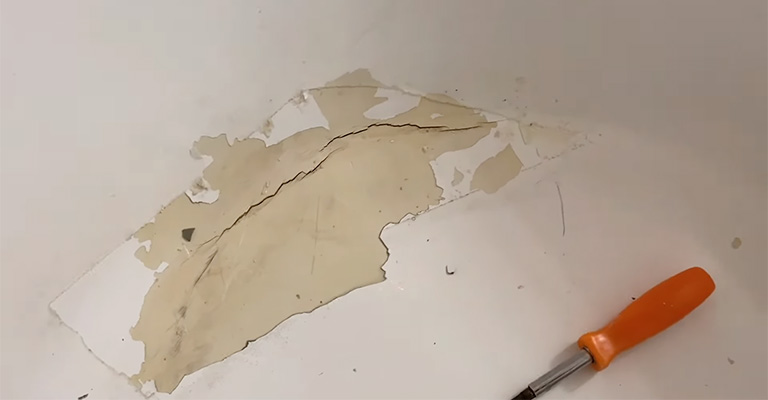
It is usual for a fiberglass tub to develop small cracks. It is, however, important to fix any small breaks you notice early so they do not expand and cause leaks. Eventually, you may break your bathtub if you do not act promptly.
You can repair your cracked fiberglass tub yourself if you follow these instructions. Using fiberglass tub repair kits, you can fix cracks in your tub:
1. Clean The Surface And Dry It
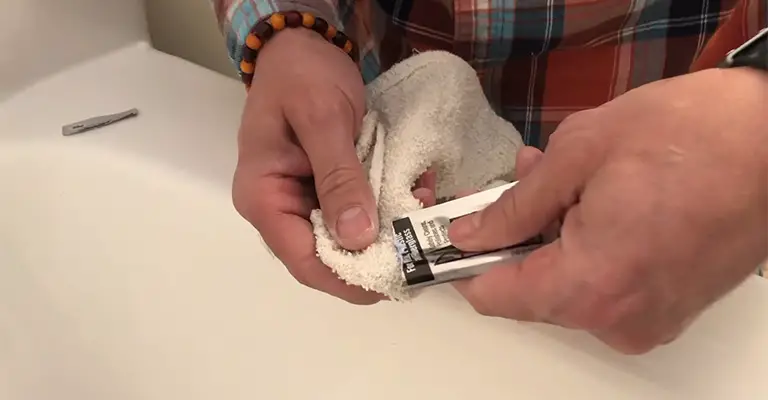
Make sure you have these materials ready to repair the crack:
- Paintbrush
- A fiberglass bathtub repair kit
- A piece of lint-free cloth
- A cleaning rag or sponge
- Emery cloth or fine(150grit) sandpaper
- Household cleaner
- Rubber gloves
- A pair of scissors.
- Medium (80grit) sandpaper
Afterwards, clean the area around the crack. Using rubbing alcohol and a sponge, wash the surfaces with a home-based cleaner.
Take steps to remove debris, dirt, or mold from the dent and surrounding area. Following that, you should dry the area with a paper towel.
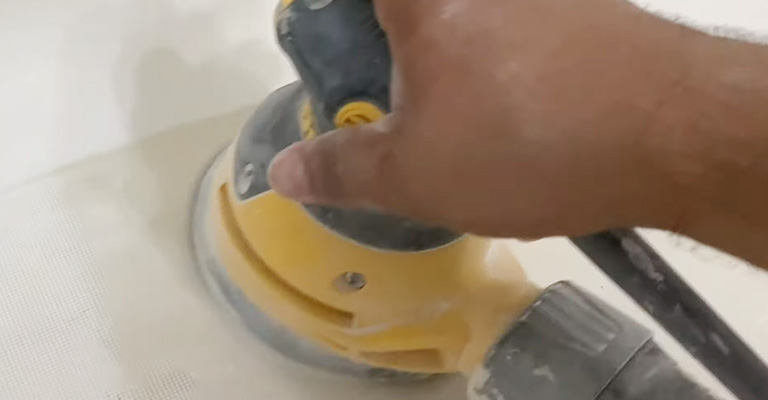
2. Sand The Surface Surrounding The Crack
After cleaning, use the emery cloth or sandpaper with a medium (80 grit) grit and gently roughen up the surface.
If the surface of the adhesive is rough, the adhesive will bond quickly with the chemicals. A few inches away from the crack, sand. Clean the surface after sanding with a brush or cloth.
3. Mix And Apply Fiberglass Resin Adhesive
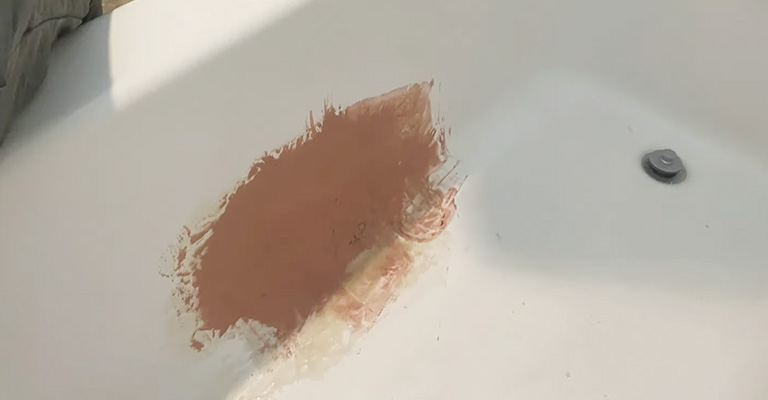
In the repair kit, instructions provide the right proportion for mixing the adhesive components (resin and hardener).
You should mix more than needed to thoroughly mix the contents. Letting the adhesive settle for three to five minutes after mixing is recommended.
Then, apply an evenly spread mixture layer to the dent and surrounding area. It is essential that you extend the coverage beyond the crack by at least one inch.
Also, make sure to get the adhesive as deep into the hole as possible. If you notice any drips, wipe them away and let the mixture dry for up to two hours.
4. Sand The Adhesive
Using medium grit sandpaper (grit 80) and the adhesive after it has dried for two hours. Once that is complete, lightly sand it again with smooth sandpaper (grit 150).
It will be helpful if you sand off the excess adhesive. Taking out excess adhesive will make the fiberglass filler easier to bond.
5. Apply Putty (Fiberglass Filler) To Fill The Crack
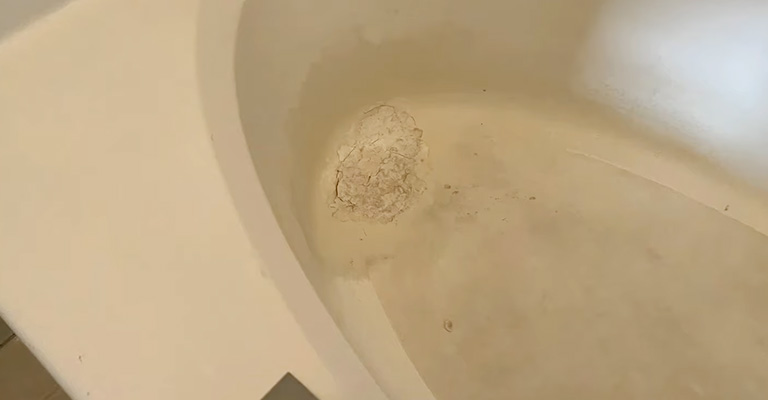
You should now mix the filler you have in your repair kit. Make sure you follow the mixing instructions that come with the kit.
Once the fiberglass filler is applied, spread it evenly with the putty knife. A thickening agent like cream hardener can also be mixed with all-purpose putty.
Don’t forget to fill the crack with the chemical. In the next step, remove all surplus filler and allow it to dry for a few minutes.
6. Sand The Surface Again
When the filler is dry, sand it with an emery cloth or smooth (150 grit) sandpaper. The whole surface should be smooth, including the edges.
You should ensure the repaired area is level with the rest of the surface. It is important not to overdo the sanding and ruin the work.
Wipe smoothly with a paper towel and then wipe with a tack cloth to ensure the surface is smooth.
7. Apply Epoxy Coating
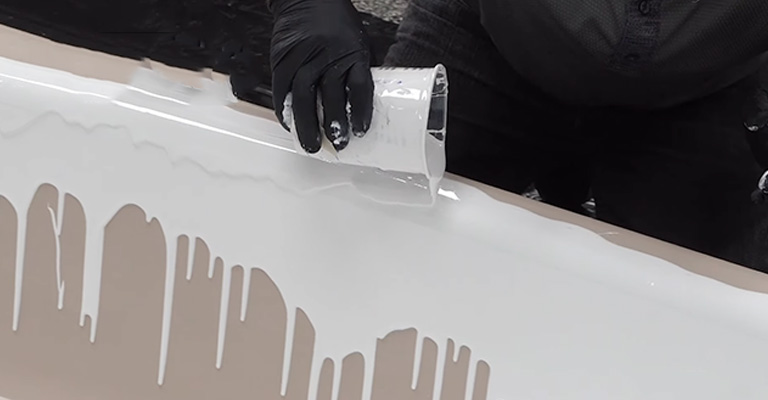
Once the epoxy mixture is ready, follow the instructions on the kit. Fill the crack with the mixture and coat it w. Use a brush to spread the epoxy blend and ensure it covers up to two inches beyond the dent for better results.
Also, ensure that the coating is even across the surface. Otherwise, you’ll end up with an uneven coating.
8. Put Fiberglass Clothing Over The Crack
Find fiberglass clothing from your kit. Measure the size of the crack, then cut a portion of the fiberglass cloth that can fit the area. Make sure that it overlaps the edges of the dent by one inch.
Place the patch on top of the material while the epoxy is still damp and press firmly against it. Using the putty knife, remove any trapped air bubbles beneath the cloth.
9. Add More Epoxy Coating
Cover the crack with fiberglass cloth, then apply more epoxy coating with a paintbrush. The coat needs to be applied evenly to cover the dent and the edges.
Rather than a small quantity of epoxy last time, this time, use a larger quantity that is reasonable in amount. After it has dried, you can move on to the next step.
10. Apply A Finishing Coat Or Sealer
In the final step, the sealer is applied to the patch. You will also find a sealer in your repair kit to protect the repaired area from harmful substances. Once the sealer has dried, buff the bathtub to restore its glossy finish.
Using this method, you can even fix fiberglass tub and shower pan cracks. Choosing the right fiberglass repair kit is crucial for the best results.
You will need the repair kit to fix damaged or cracked fiberglass surfaces. It contains chemicals and tools you will need to accomplish this task.
This kit contains the following items:
- Brush
- Fiberglass cloth
- Hardener
- Mixing stick
- Resin
- Mixing tray
- Spreader
There are two types of repair kits available:
- A surface repair fixes cracks on the external surface of a product. Polymer paint or tape is included in this kit.
- A repair for deeper cracks that is carried out internally. These cracks are sealed using glue or pastes.
You’ll need to pick the correct repair kit based on the depth of the crack.
Common Causes of a Cracked Fiberglass Tub
A fiberglass tub is inexpensive and easy to maintain, so it is a popular choice for many homeowners. Their beauty and ease of installation make them an excellent choice.
The problem is that they can also be damaged if you are not careful. It is more likely that they can be cracked or chipped, causing them to look less appealing and can compromise their structural stability.
Lack of Support
During installation, your fiberglass tub must be appropriately supported. It is possible to cause cracks in the shell due to the pressure of water and your body pressing against the weaker parts of the shell.
You shouldn’t ignore cracks in your fiberglass tub simply because they are aesthetic. It is crucial to have the cracks fixed immediately because they can spread across the bathtub, allowing water to seep through and damage the underlying materials, including your house’s structure.
It’s essential that you get bathtub crack repair and bathtub chip repair done as soon as possible once you notice the damage. Besides having a beautiful, restored tub, you won’t have to worry about it deteriorating in the future.
Accidental Dropping
Among the lightest bathtubs are fiberglass ones. Anywhere you want, you can take it. This increases the likelihood of it being dropped.
You can fix a crack yourself, depending on how deep it is. In most cases, you can fix the dent by yourself if it is not too deep.
It may require the assistance of a professional if it intrudes through the tub’s thickness. Keeping your bathtub in its original location will avoid damage once it has been installed.
Heavy Objects
An attractive statuette, a candle that smells nice, or a vase filled with flowers might look beautiful around your tub. If you have a metal shower caddy or other accessory, that would be great.
When knocked down, these can crash into your fiberglass tub, creating a crack or chip. It is typically straightforward to repair these stress cracks since only the surface of the finish is affected.
However, avoiding these types of cracks entirely is as easy as keeping those heavy objects out of your tub.
You should keep the decorative objects in the bathroom on a shelf rather than in a window or on a ledge by the tub and use plastic or lighter-weight shower accessories instead of heavy ones.
Abrasive Cleaners
A bathtub can get really dirty after a while. It’s common for soap scum, dirt, hair, and bacteria to accumulate in tubs, causing stubborn stains and collections that aren’t always removed with a quick cleaning.
In those circumstances, you may bring out the big guns, like bleach, ammonia, and heavy-duty commercial cleaners. However, these products can damage your tub’s finish and weaken it while removing nasty stains.
Abrasive cleaners should be avoided when cleaning your fiberglass tub. Using a soft-bristled brush and mild cleanser is all you need. You may need to contact a professional cleaner if you need more than that.
Anything containing acid, including citrus cleaning products, should be avoided, including bleach, ammonia, and ammonia. As a result, cracks and chips can occasionally develop on the surface.
Normal Aging
The normal usage of bathtubs weakens the bathtub over time. Continuous and slow wear occurs on the surface. When a tub becomes thin, cracks can begin to appear.
Older tubs are more likely to get cracked due to wear and tear, so I recommend replacing them instead of repairing them.
Final Words
In many homes, fiberglass tubs are favored since they are less expensive to buy and maintain. As well as being attractive, they are easy to repair and install. They can, however, easily be damaged if not handled carefully.
Therefore, it’s important to learn how cracks are generally caused so that you can prevent them. Repairing your bathtub instead of replacing it can help you save thousands of dollars.


