
A garage door is both a functional and aesthetic component of your home, providing security, convenience, and curb appeal. However, over time, you may encounter issues that can compromise its performance and appearance.
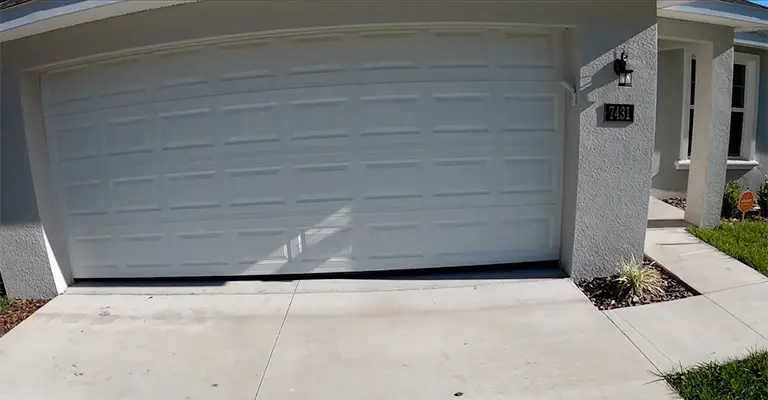
One common problem homeowners face is a noticeable gap on one side of their garage door. This gap affects the door’s functionality and exposes your garage to the elements and potential security risks.
In this guide, we will explore the reasons behind a gap on one side of your garage door and provide you with practical steps to fix this issue, ensuring your garage door operates smoothly and maintains its integrity.
The presence of a gap in your garage door is unsightly at best. Especially if you are on the market to sell your home, it will decrease your home’s curb appeal. You’ll also want to fix it quickly for various other reasons.
You’ll first need to seal the gaps in your house because they pose a severe security threat. It is easy for burglars to break in when there are gaps between the door and its frame.
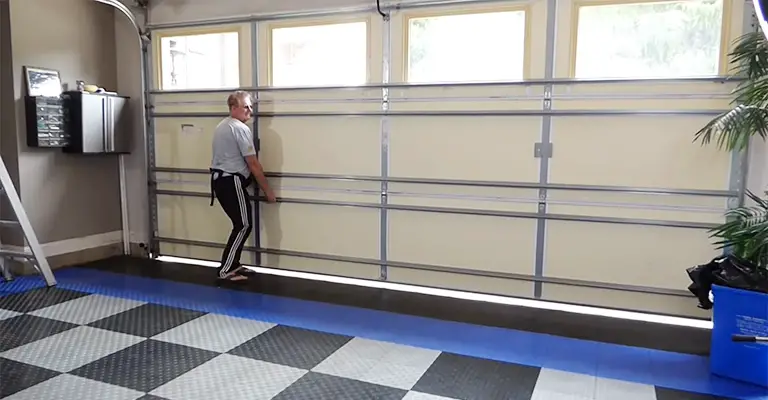
Fixing the Garage Door to Avoid Scraping Against the Frame
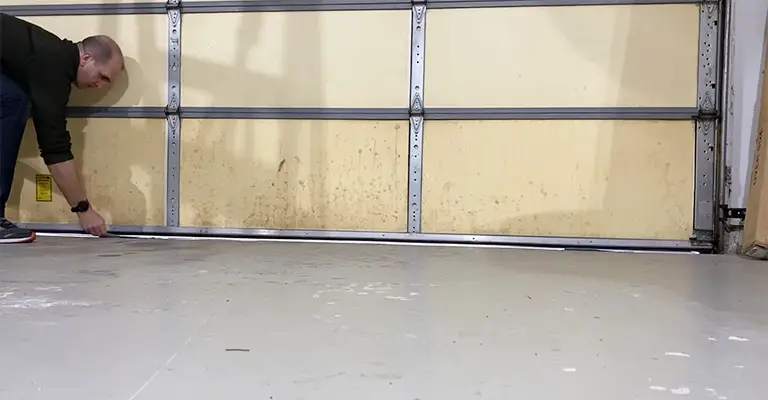
If your garage door isn’t fitting right or it’s rubbing against one side, you can sort it out by adjusting the track parts.
Step 1: Loosen the Bolts on the Tracks
Start by using a wrench to loosen the bolts holding both tracks in place. Make sure both tracks are loose before moving to the next step.
Step 2: Get the Door Gap Right
Move one track to the left or right until there’s a gap of about ¼ inch between the stop molding and the side of your doorway. Make sure the gap is the same on both sides. Adjust the other track the same way.
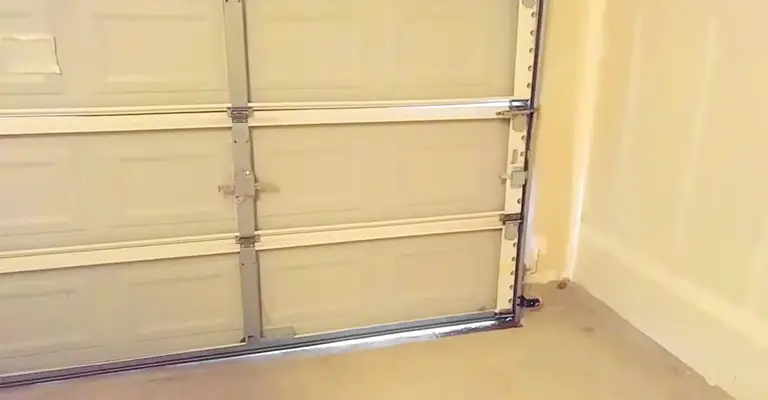
Step 3: Tighten the Track Bolts
Once you’ve got the gap in your garage door sorted, use the wrench to tighten the track bolts. Make sure they’re tight but don’t overdo it.
Other Way Of Fixing Garage Door Gaps On Sides
Garage door gaps on the sides can be fixed with weatherstripping seals. As this seal adheres to the door jamb, it seals off any gaps or cracks in the door frame.
Keeping your garage door tightly closed prevents air, light, and unwanted pests from entering.
The following post will walk you through how to fix the gaps on the sides of garage doors. This article explains a cost-effective DIY fix for garage door gaps on the sides.
1. Check the Garage Door for Gaps on the Sides
Generally, you can tell if your garage door has air gaps by looking at the gaps. A small gap can also be detected in other ways if you’re unsure:
Make sure the lights are off in your garage during the day. As you look for light-letting spaces, you will notice them. Light can be seen at the bottom and top of the door by placing your hand against it.
There’s likely to be a crack on the outside if there’s a draft, especially if it’s cold outside.
Increased exterior noise is also a warning sign that there are some gaps. If more noise comes in, there may be a warpage of the door.
If you have a gap on the side of your door, I recommend performing the pencil test to determine if there is something to worry about.
An attempt at fitting a pencil into the gap in a garage door is required. There is a reason to be concerned if the pencil fits into the gap. There can be a lot of dust, cold air, insects, and noise when the gap is large enough to fit a pencil.
2. Identify the Problem
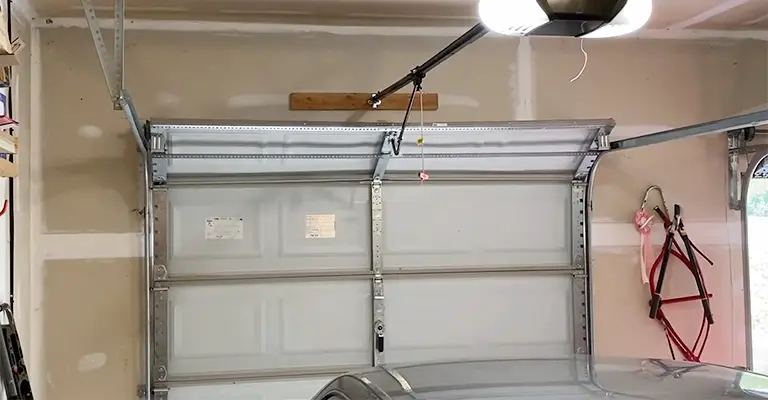
After determining whether the gap is large enough to warrant attention, the next step is determining why the gap exists. The main culprits when it comes to garage door space are stops and tracks.
The rubber lining of the door ensures it closes correctly and makes up the stops. Your door has them running along the top, bottom, and sides.
You might need to adjust their position as they have warped over time. Any loose gaps in the door can be sealed with caulk, which works well. A warped tree might have to be replaced entirely if it is completely warped.
Assuming you have a sliding door, check your door tracks to see if they function correctly. If your door tracks are misaligned or bent, they will sag, leaving gaps along the edges.
In this case, you may have to replace the tracks. If you installed a weatherstripping seal, ensure it is functioning correctly.
3. Get the Right Tools
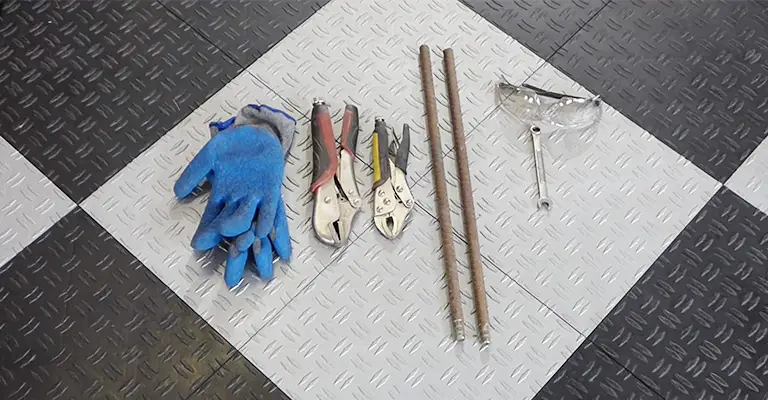
In the right hands, you can easily fortify your garage door. Here are the supplies you will need to fix your garage door gaps:
A seal for weatherstripping. Door seals are made of adhesive rolls that can be used to effectively seal off the door. Depending on the size of the gap you want to fix, you will need a specific seal size.
- A pneumatic stapler, a driller, or a hammer.
- Usually nails or screws. These will usually be included in a weatherstripping seal kit.
- The caulking. Using nails or a sealant, caulk will provide a great result.
- An electric knife or saw.
Measure the length of one door and multiply it by two if you are adding a weatherstripping seal to both sides. Using this total, you will purchase seals of this length.
In this case, you would multiply the width of the door (multiplier by 2) by the length of the door to find the seal’s length. As a result, you will know how long the entire perimeter of your door is.
4. Prepare the Door for Fixing
It’s time to complete the work now that you have all the needed tools.
It is easy to seal garage door spaces by using weather stripping. If you need to close smaller spaces, you might consider using a door gasket.
Replacement is the best solution if your weatherstripping seal is worn out or damaged. Vinyl weatherstripping seals deteriorate over time, so they are generally made of rubber.
- Tear it off the door as a first step. You can complete this task with a sturdy kitchen knife. Using a knife, cut the old caulk and lift the seal all around the door.
- Take a look at your jamb because there might be some damage there. The seal might be damaged if it was fixed with adhesive solid glue. With a bit of elbow grease and sandpaper, however, this fix is easy.
- Make sure the edges are perfectly smooth. You might want to consider wood putty if you have any prominent marks like scuffs or nail holes. A smooth surface will ensure that the seal adheres properly.
5. Place the Seal
It’s time to seal your door after it’s been prepared.
- Begin by measuring the length of the door or the side where a new seal is needed. You should double-check anything you are unsure of. When working on your own, you may want to use a retractable measuring tape.
- You will need to trim the seal to the correct dimensions. It is common for seals to come in lengths of 7 feet (2.13 meters).
Because you are only fixing the sides, you simply place the seals along the jambs of the side doors.
The top of a door is recommended for repair if you work on an entire door. If you start from the top, the side seals will fit perfectly on the top seal because you can adjust them as you go down.
6. Attach the Seal
To fix the seal properly, you must use nails through the adhesive seal. You should plan on spacing the nails 16 inches (0.41 meters).
- First, mark where you intend to insert the nails to ensure they are correctly aligned. Ensure that the seal between the door jamb and the door is tight.
- Insert the nails partway into the seal once you are sure everything is in alignment.
- Once again, check the position of the seal before you drive the nails all the way in.
7. Caulk the Gaps

You may notice small gaps after drilling in the nails, but you can fix this with a caulking gun. For caulking the gaps, follow the steps below:
Start by rubbing the gun between the seal and jamb along the door edge.
Keeping a finger along the sealant bead will smooth it out after application.
The caulk is also pushed into any cracks the gun might have left.
8. Adhesive Instead of Nails and Screws
It might be better to use adhesive instead of screws and nails to create a smoother finish. As a result, this method is not recommended since removing the sealant when needed is more difficult.
Choosing this method is as easy as following these steps:
- Adhere a narrow, uniform layer of adhesive to the door jamb using a sealant gun.
- Position the seal carefully and apply pressure until it dries completely.
- Using alcohol, scrub any excess glue off the jamb edges.
- Allow the alcohol to absorb completely into the seal, then wipe it off with a cloth. Keep in mind that the seal and jamb should remain intact.
Other Ways To Adjust A Garage Door Gap
Garage doors represent one of the main entrances to your home, so you want them to be as secure as possible. You won’t have to worry about people trying to break in by repairing the gap as soon as possible.
Besides people, you’ve got to worry about other things as well. Gaps are tempting for pests, too. Your garage is the perfect place for them to set up a home, and that gap gives them the ideal entrance.
Once they’re in your home, they’re challenging to get out. You want to stop them before they get the chance to try and get in.
Install a Garage Door Threshold
The garage door threshold works well if there’s a small gap at the bottom of your garage door. They’re easily installed and can be purchased at any DIY store.
The kits usually come with a rubber threshold and glue; sometimes, they come with a caulking gun.
A permanent barrier for the bottom of the garage door can be created by gluing a threshold to the garage floor. It is great to have them, but don’t forget that they can make a slight barrier when sweeping or hosing down your garage.
Add More Concrete to the Floor
There is a possibility that the concrete floor of your garage has settled over time, leaving a space between it and the bottom of the door.
Adding more concrete to the floor can restore the floor to its original level if this has happened to you. By doing this, you can create a flat and level surface, thus closing the gap.
Trim the Door to Fit
A garage door’s settling can alter its position within the frame, making it impossible to open or close. If you trim down a wooden garage door, the door can be fitted properly.
It sits properly by sanding off the bottom and replacing it in the frame. You can use a jigsaw or circular saw to do this. A garage door replacement may be the best option if you don’t have a wooden garage door.
Adjust Your Limit Switches
The limit switch that controls your garage door determines when the garage will close. There may be a gap if it’s not quite right. In addition, animals can chew away at the seal at the bottom, which is their prime target.
It is essential to adjust the limit switch so the seal is compressed to the floor, making it harder to access and seal the gaps.
It is usually included with the opener that you will find the limit switch. For each door opener, check the instructions, as various models have different settings.
Look at the Tracks
If the door is closed perfectly vertically, how does it look? In the absence of this, you will be creating gaps around your door.
It’s an easy fix you may be able to do yourself. It might be a good idea to take a look at the vertical tracks that your garage door travels on.
Do they hold the door consistently at a distance from the stops? In this case, moving the mounting bolts slightly so the door sits closer to the stops and loosen the mounting bolts is possible.
For those of you who are not confident about doing this, a garage door repair service can do it for you.
Check the Stops
The rubber seals along the edges of your garage door are garage door stops. When your garage door is closed, they seal it off, keeping the weather out and preventing the door from remaining open.
If the door has gaps, it could be due to stops that aren’t aligned properly. They will either need to be moved or replaced to be positioned closer to the gaps.
Frequently Asked Questions About Garage Door Gaps
There are many questions and concerns we hear from homeowners in need of assistance. Concerning garage door gaps and adjustments, we thought it might be helpful to share a few of the most common questions we get.
1. Why is there a gap on one side of my garage door?
In most cases, a gap on one side of your garage door occurs due to misaligned tracks, worn-out rollers, or uneven installation.
2. Why is there a gap at the top of my garage door?
Garage door gaps can be caused by misaligned tracks, incorrectly sized doors, or damaged weatherstripping, resulting in poor seal and alignment.
3. Why is there a gap at the bottom of my garage door?
Uneven flooring, worn-out seals, or improper installation can cause gaps at the bottom of your garage door.
Final Thoughts
Using a weatherstripping seal on the side of your garage door can save you money.
Seals like these can be easily replaced. A new seal set along the sides of your door takes less than an hour to install with the right tools and a new seal.
In the case that you are not confident enough to follow our steps above, you may wish to contact a technician for assistance.


