
Are you frustrated with stepping into your shower only to find that there’s no cold water? Dealing with a lack of cold water in your shower can be both inconvenient and uncomfortable, especially during the hot summer months.
If you’re facing the issue of no cold water in your shower, the most likely culprit is a faulty or malfunctioning shower valve.
The shower valve controls the flow and temperature of the water, and when it’s not functioning correctly, it can result in a lack of cold water.
To fix this problem, you will need to replace the shower valve. However, before doing so, it’s essential to ensure that the cold water supply to your shower is not blocked or turned off.
If the cold water supply is okay, replacing the shower valve should resolve the issue and restore the cold water flow in your shower.
Check the Other Faucets in The House
To get started, let’s run through a few troubleshooting steps. If the issue only occurs in one shower or whether it affects the entire house, determine what caused it.
Try some of the other faucets to see if they supply cold water. A shutoff valve in the main water supply line most likely blocks other faucets with no cold water.
Using your shower again is easy when the valve is turned back on. The water pressure balancing valve is likely defective if all other faucets in the housework are normal.
The pressure and ratio of cold and hot water flowing from the shower head are controlled by this valve, commonly located in the shower’s faucet.
Replacing the defective pressure balancing valve should not take long, and you’ll be up and running like normal.
Reasons Cold Water Isn’t Coming Out of Your Shower
Your worst nightmare may be waking up with no hot water for your morning shower. Nevertheless, losing cold water in your home can be just as detrimental.
However, when you schedule plumbing repair right away, the problem is relatively easy to resolve.
Your Shower Has Mineral Buildup or Corrosion
Regularly used showers accumulate mineral deposits more efficiently. There is corrosion within the cartridge holding the pressure-balancing valve in place.
The pressure-balancing valve may malfunction when hard water builds up in the water pipes. As the accumulation grows, it may prevent cold water from reaching the showerhead. As a result, you will need to replace the cartridge.
You can quickly and economically repair your plumbing by replacing the pressure-balancing valve or cartridge. By doing so, you will be able to restore the balance between hot and cold water in your shower.
Your Pressure-Balancing Valve Needs Replacement
Most likely, you’ve got a bad pressure-balancing valve if all your other showers and faucets are giving you cold water. An internal shower valve is usually found in the faucet of a shower.
During the showerhead’s flow, this valve regulates water pressure and adjusts the flow of cold and hot water. A defective valve can be easily replaced if the problem persists.
What Causes Malfunctions In the Pressure-Balancing Valve?
A pressure-balancing valve on the shower faucet regulates water pressure and the amount of hot and cold water flowing through the faucet.
The effectiveness of a cartridge can be affected by mineral buildup and corrosion over time. Rarely used shower systems experience this problem very often.
Though replacing a faucet valve is not difficult, it requires disassembling the faucet. For most people, removing the old cartridge is the most challenging part. Professionals can assist you if you’re having trouble with this process.
Your Main Water Valve Is Turned Off
You should check how widespread this issue is by checking your other showers and faucets. The main water shutoff valve is probably turned off if there is no cold water from your taps. Putting it back on is all you need to do.
The Solution Is to Replace the Cartridge
There is a likely defect in the pressure balancing spool inside your shower faucet, which is part of the cartridge. Replacement of the cartridge will solve the problem.
Replacing the Cartridge is Harder than It Sounds
It is possible that over the years, corrosion may have caused the cartridge to become lodged inside the faucet. Replace a shower cartridge is usually the most difficult part, as getting the old cartridge out can be a real challenge.
You’ll Need a Special Tool
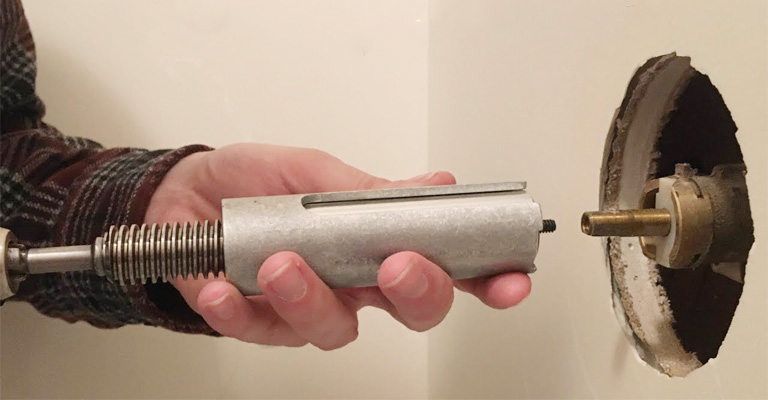
To remove your old stuck cartridge, you’ll need a unique tool called a “cartridge puller.” The cartridge puller threads into the old cartridge, making it straightforward to remove it.
As well as the cartridge puller, you will need a Phillips screwdriver, needle nose pliers, and silicone grease. Choosing the right materials is relatively straightforward once you have them. The following are the details:
- Ensure the shower faucet’s water supply is turned off.
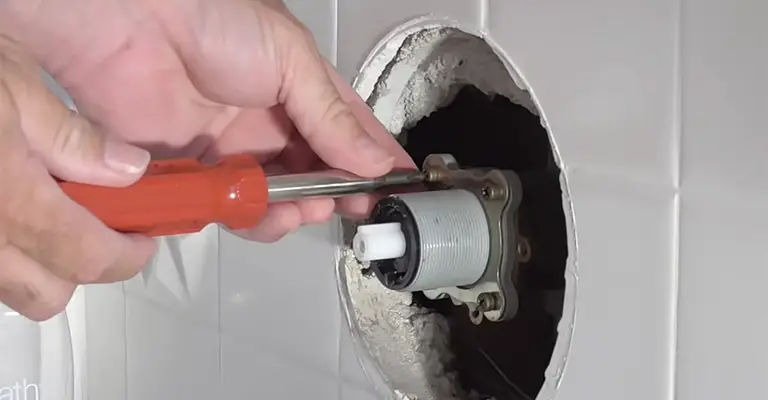
- Removing the faucet handle is easy with a screwdriver.
- By removing the metal cover from under the faucet handle, you can see the valve stem protruding from the wall.
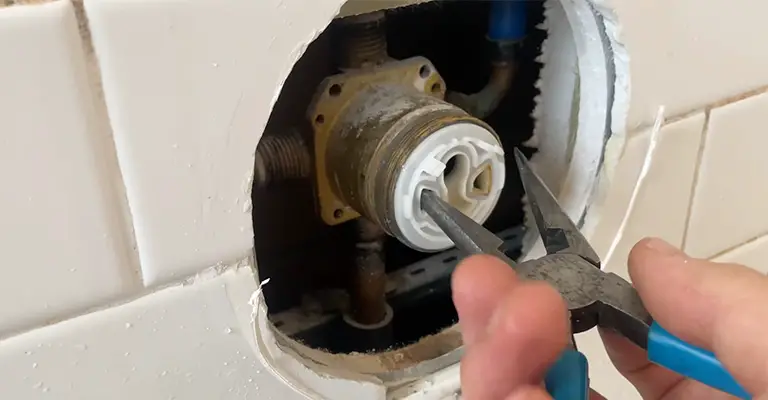
- remove the retainer clip from the valve body with needle nose pliers.
- Take hold of the valve’s stem and pull it out. When you remove the stem of the valve, you will find that there is a space inside the valve body. As the cartridge lines the wall of the space, it forms a barrier.
- Removing the cartridge from the faucet can be done using a cartridge puller. It’s important to follow the instructions that come with your model of cartridge puller, as they function differently.
- A new cartridge can be purchased at a home improvement center or hardware store by comparing the old and new cartridges.
- Ensure that the new cartridge slides into the valve body easily by applying silicone grease to the inside of the valve body and the new cartridge.
- Reassemble the faucet by placing the new cartridge into the valve body and replacing the outer parts removed in steps 1 and 2. The retainer clip should be placed back on the valve stem.
- Ensure the shower is running by turning back on the water supply.
It’s that simple! Test the cold water now to ensure that it is working correctly. Frequently, reinstalling the faucet will reverse the hot and cold water.
This indicates the cartridge was installed backwards. Put the cartridge back in the valve body after pulling the cartridge out, turning it upside down, and reattaching it.
Final Words
It may not be one of the most common plumbing emergencies, but it does occur more regularly than you think. It may not be a difficult project for you to replace your shower valve if you are handy around the house.
For the task to be completed, you will need a faucet handle puller, a pipe wrench, and plumber’s grease. It also requires muscular strength to remove, clean, and replace the parts.
If you don’t have the time, energy, or motivation to replace the valve, hire a plumbing professional as soon as possible.


