
Fluorescent light covers are an essential part of any well-lit space, providing diffused lighting and protecting the delicate fluorescent tubes.
However, there comes a time when you need to replace the tubes or clean the cover, and that’s when knowing how to remove the fluorescent light cover with clips becomes invaluable.
In this step-by-step guide, we’ll walk you through the process, ensuring you can perform maintenance tasks safely and efficiently.
Understanding Fluorescent Light Covers with Clips
Fluorescent light covers are usually secured to the fixture by small clips. These clips play a vital role in keeping the cover in place while allowing easy access to the tubes when needed.
The type of clips may vary depending on the model and brand of your fixture. It’s essential to familiarize yourself with the different clip types to ensure a smooth removal process.
Safety Precautions
Before attempting to remove the fluorescent light cover, safety should be your top priority. Here are some essential precautions to follow:
- Turn Off the Power: Ensure the power to the fluorescent light fixture is completely turned off before starting the removal process. This will eliminate the risk of electrical shocks while handling the cover.
- Wear Protective Gear: Put on a pair of protective gloves to safeguard your hands from any sharp edges or potential debris. Safety goggles will protect your eyes in case of accidental breakage.
- Use a Sturdy Ladder or Step Stool: If the fixture is mounted on the ceiling, use a sturdy ladder or step stool to access it safely. Make sure the ladder is placed on a flat surface and someone else is aware of your activity for added precaution.
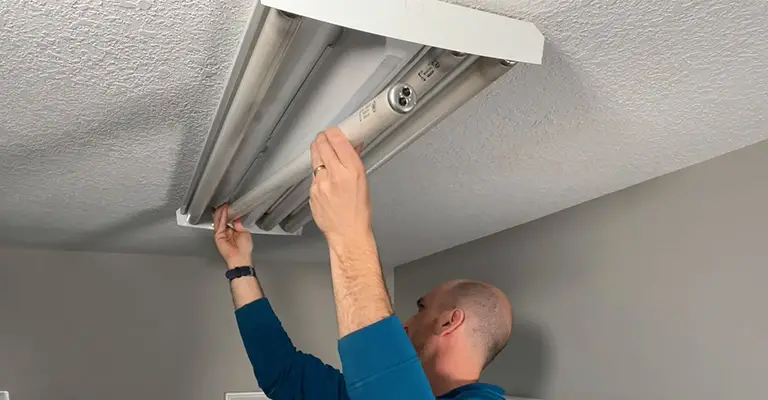
Step-by-Step Guide: Removing Fluorescent Light Cover with Clips:
Step 1: Turn Off the Power
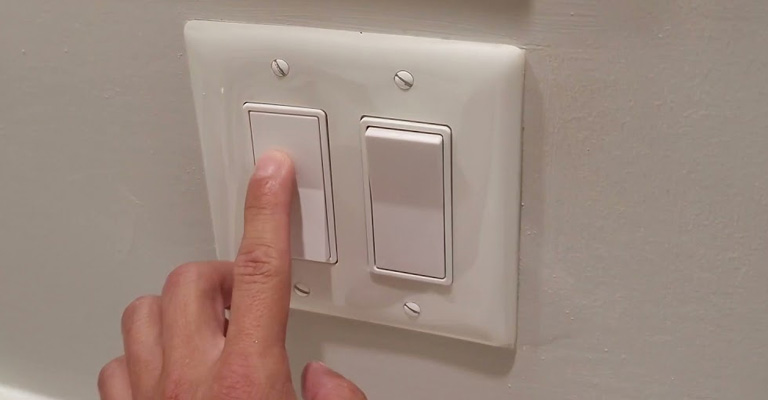
Locate the switch or circuit breaker that controls the fluorescent light fixture. Turn it off to ensure there’s no electricity flowing to the fixture.
Step 2: Identify the Clip Type
Examine the fluorescent light cover to identify the type of clips holding it in place. Common clip types include spring-loaded, sliding, or push-in clips.
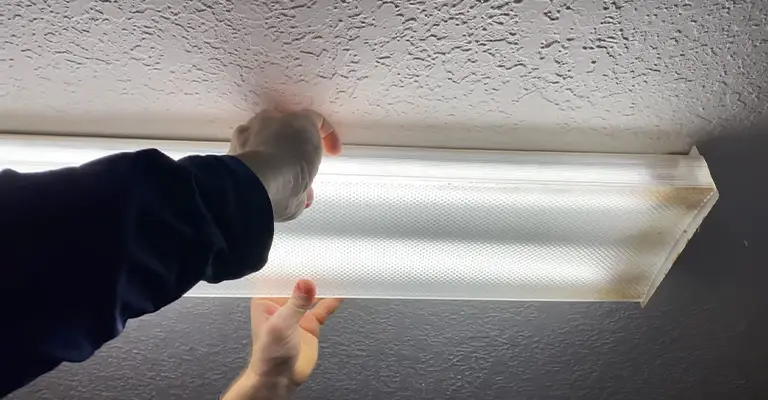
Step 3: Release the Clips

Depending on the type of clips, follow these methods:
Spring-loaded Clips: Gently squeeze the clips together and push them inwards, towards the center of the fixture. This will release the clips’ grip on the cover.
Sliding Clips: Slide the clips sideways to disengage them from the fixture’s edge. This action should free the cover.
Push-in Clips: Locate the small tabs on the sides of the clips and carefully press them inward. This will release the clips’ hold on the cover.
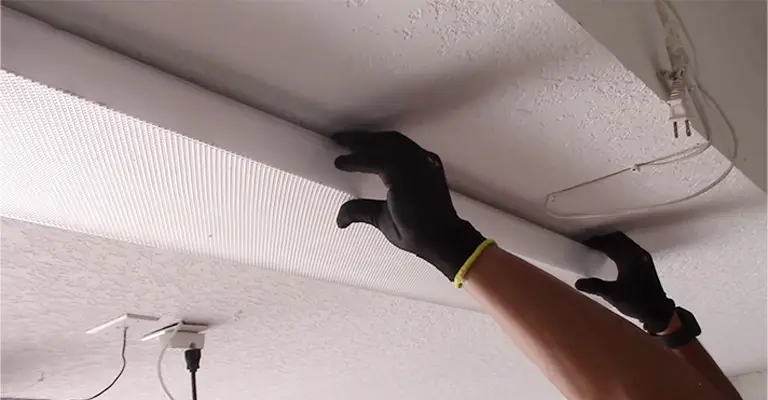
Step 4: Lower the Cover Safely
Once all clips are released, lower the fluorescent light cover gently. Handle it with care to avoid any accidental damage.
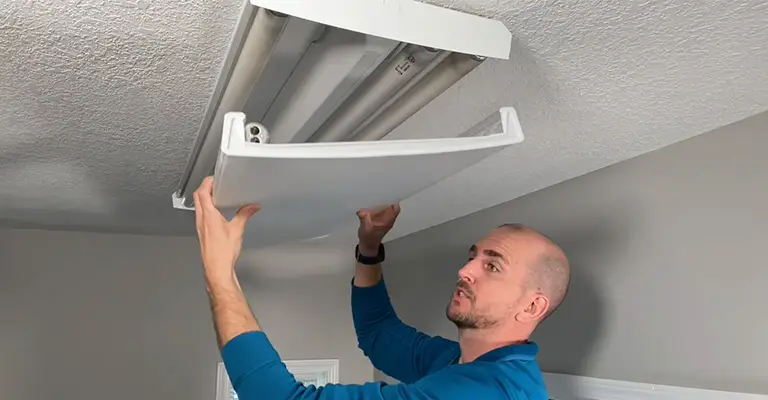
Step 5: Clean or Replace the Fluorescent Tube (Optional)
At this point, you can clean the cover or replace the fluorescent tubes as needed.
Troubleshooting Tips
- If you encounter stubborn clips, try using a flathead screwdriver to aid in the release.
- In case of damaged clips, consider replacing them before reinstalling the cover.
Step-by-Step Guide: Removing Fluorescent Light Cover Without Clips
While some fluorescent light covers are held in place with clips, others may use different mechanisms for attachment.
Let’s explore how to remove a fluorescent light cover without clips, providing you with the necessary steps to accomplish the task safely and efficiently.
Types of Fluorescent Light Covers Without Clips
Before proceeding, it’s essential to identify the type of attachment mechanism used for your specific fluorescent light cover.
Common types include magnetic covers, twist-on covers, and slide-in covers. Understanding the method of attachment will guide you in the removal process.
Safety Precautions
As with any electrical fixture maintenance, safety is paramount. Before attempting to remove the fluorescent light cover, make sure to follow these precautions:
Turn Off the Power: Ensure the power to the fluorescent light fixture is turned off to prevent the risk of electrical shock while handling the cover.
Use Protective Gear: Wear protective gloves and safety goggles to shield your hands and eyes from any sharp edges or potential debris during the removal process.
Step 1: Identify the Attachment Method
Carefully examine the fluorescent light cover to determine how it is attached to the fixture. The following are the most common attachment methods:
Magnetic Covers: These covers attach to the fixture through magnets on the frame. Gently pull the cover away from the fixture to release the magnetic hold.
Twist-On Covers: Twist-on covers are secured by rotating them onto the fixture. Grasp the cover firmly and turn it counterclockwise to release it.
Slide-In Covers: Some fluorescent light covers may slide into a groove or track on the fixture. Slide the cover sideways to disengage it from the fixture.
Step 2: Remove the Cover
Based on the attachment method you’ve identified, proceed with the corresponding steps:
Magnetic Covers: Simply pull the cover away from the fixture until it detaches completely.
Twist-On Covers: Firmly grip the cover and rotate it counterclockwise until it comes free from the fixture.
Slide-In Covers: Slide the cover sideways along the groove or track until it is no longer connected to the fixture.
Cleaning or Replacing the Fluorescent Tube (Optional)
With the fluorescent light cover removed, you may take the opportunity to clean the cover or replace the fluorescent tube as needed.
Final Words
By following the appropriate steps and taking necessary safety precautions, you can successfully remove the cover and perform maintenance tasks with confidence.
Remember to turn off the power and wear protective gear throughout the process to ensure your safety. Enjoy a well-lit and pleasant environment with your freshly maintained fluorescent lighting!


