
Are you tired of dealing with a faded and weathered cedar fence? Want to give it a fresh new look and extend its lifespan? Look no further, as we will show you how to seal your cedar fence properly in just a few easy steps.
From selecting the suitable sealant to properly preparing the surface, we’ve got you covered in this cedar fence treatment guide. Keep reading to learn the best ways to seal your cedar fence and protect it from the elements.
If you wish to extend the life of a fence that you already have or have just installed a new fence, you can do so with some supplies found at a hardware store and a few hours of effort.
Should You Seal A Cedar Fence?
Wood fences made of cedar feature a reddish coloring, a desired characteristic among most cedar fence buyers. In the long run, that red will become light gray if left untreated.
To prevent cedar from fading to gray, you must seal the fence with a stain containing a mildewcide that blocks ultraviolet light.
To let the natural wood color show through cedar fence stains, the stain should be transparent or semi-transparent – to let the natural wood coloring show – and oil-based to penetrate the wood.
Depending on the wood’s texture, sunlight exposure, and transparency, the stain must be reapplied frequently.
How To Seal A Cedar Fence?
Sealing the wood on your fence is an important step during installation. Keeping a wood fence sealed will prevent swells from occurring and the wood from turning gray.
A professional may install the sealer on your fence, but that is not necessary. The satisfaction of completing this beginner-friendly project on your own will save you some money and allow you to achieve your home improvement goals.
Is there a specific method for sealing a wooden fence? When sealing a wood fence for the first time, what considerations should a beginner remember? For more information, keep reading.
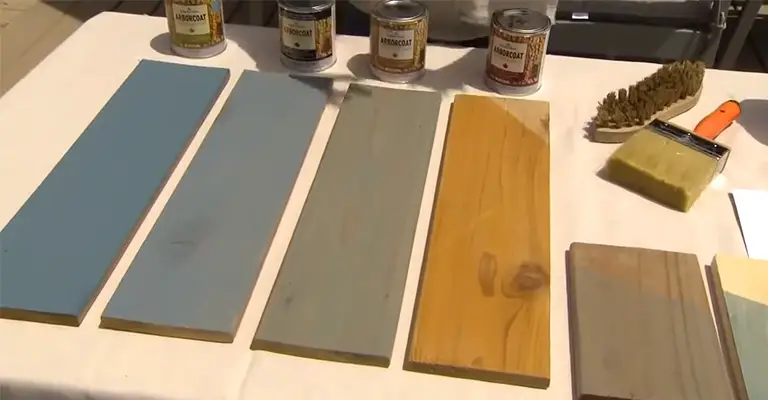
1. Choosing and Buying Your Stain
You can measure the surface area of your fence by taking a measurement. Measure the length and height of your fence with a tape measure, then multiply them together to find its surface. To find the surface area of your fence, measure the height and length.
If you want a primary treatment, you can use an oil-based semi-transparent wood stain. Wood stained with oil-based stains penetrates the cell walls better and is much more stable than acrylics with water-based stains.
Unlike a stain that conceals the natural beauty of wood, a semi-transparent stain protects it from UV rays without overpowering it.
You can choose a solid stain if you prefer a paint-like finish. Compared with the other two types of stains, solid stains hold up the longest. Additionally, they do the same thing as paint by hiding the wood grain.
Rather than using stain or paint, use a clear sealer to highlight the details in the wood grain. Clear sealant can be applied to your fence as another option. When using a clear sealer, it shows off all the natural wood grains.
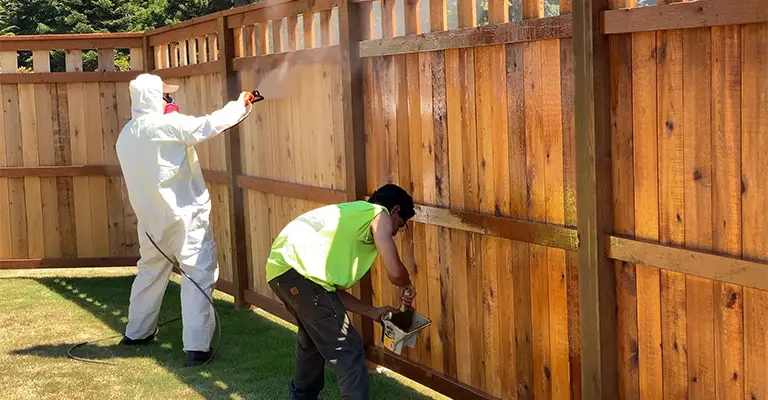
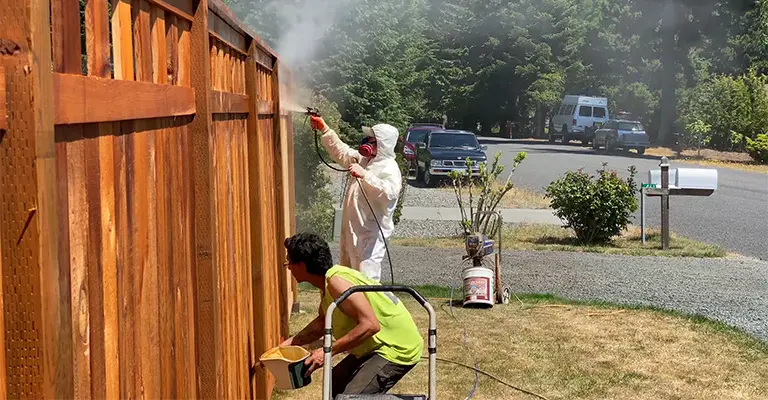
2. Applying Your Stain
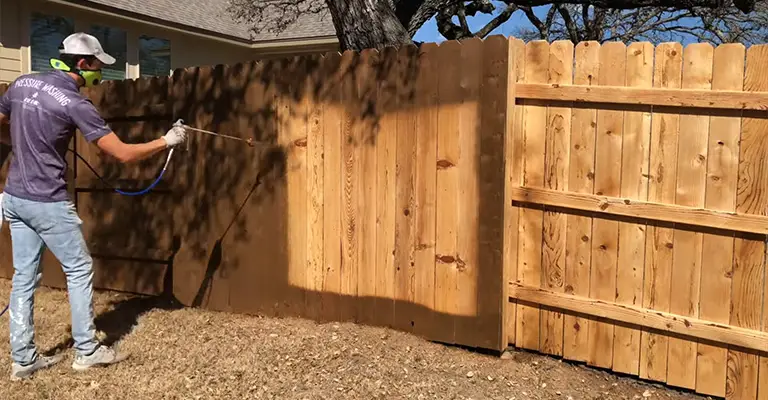
With a pump sprayer, if you have one, apply the stain to a small area of your fence. For your convenience, some wood stains come in pump sprayer containers for your decks and fences.
Aim to spray an even coat on about 2 square feet (0.19 m2) with the nozzle of the pump sprayer about 1 foot (0.30 m) from the fence surface. In the case of pump-sprayed surfaces, brush or roll them immediately after spraying.
The first thing to do is roll the brush with the grain. With your brush or roller, “buckbrush” to ensure that you get the stain into all corners, gaps, and crevices. Using a brush is the best way to apply stain if you don’t have a pump sprayer.
Unless your stain comes with a pump sprayer, or you don’t have one available, you can apply your stain with a brush or roller.
Apply stain using brush strokes with the grain before back brushing against the grain using the brush you dipped in the can. After shaking off any excess drips, apply your stain.
Keep staining your fence until the entire structure is covered. As you finish each section, continue to stain the fence in smaller sections of 2 square feet (0.19 m2).
Semi-Transparent oil stains last two to five years on average. After about three years, you should coat your fence again with stain.
Make sure your stain has dried for 24 hours. You should do your fence staining on a clear day when there is no forecast for rain. Wait at least 24 hours before touching any wet fence.
3. Sealing Your Posts
You should buy a sealer for the end grain of your posts. Water can soak up more readily in your fence posts’ ends than in their sides and cause them to rot.
Oil stains typically contain a protective sealant, but for your ends, it is necessary to add some additional protection against water.
Make sure the ends of your fence posts are sealed with the sealer by brushing them with a brush. The tops of your fence posts can be sealed with a light coat of sealer using a brush 2″ (5.1 cm) in diameter.
Wait 24 hours before applying your sealer. When applying sealer, it’s best to do so on a clear day with no chance of rain. If you want to ensure the posts are completely dry, do not touch them for at least 24 hours.
4. Cleaning and Repairing Old Fences
Identify whether your fence needs to have retreated. Stains applied in the past need to retreat every 3-5 years.
Test your fence for restraint readiness using the “sprinkle test.” Make a few drops of water run down the side of the fence, or soak in.
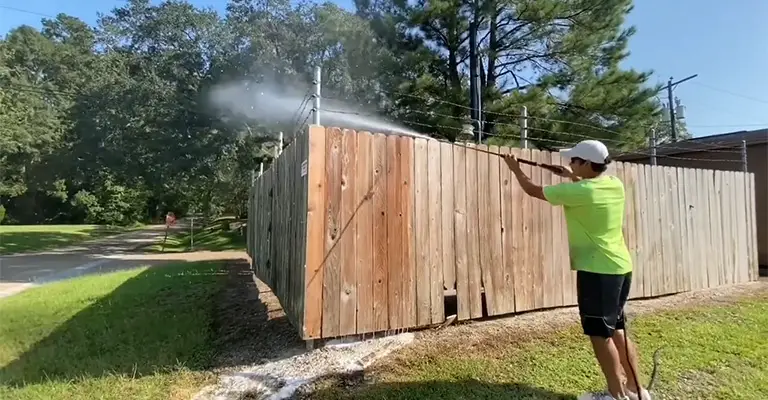
Watch for water beads that run down the fence’s sides. Give your fence a power wash. Plug your garden hose into your power washer and pull the trigger on the hose tip until you see water streaming out.
Once the engine is running, turn on the power washer and hold the wand’s tip about 18 inches (46 cm) away from the fence. Keep it moving along the length of the boards, so your fence wood is not gouged.
Your fence needs to be repaired and tightened if any sections are damaged. Replacing any broken fence pieces, using wood glue, and clamping or taping them until they are completely dry is an effective way to repair your fence.
Ensure that wood preservatives protect your base posts. Fence posts near where they enter the ground are always the first to rot.
To protect them, you can apply a wood preservative, such as Cuprinol, near where your base posts enter the ground.
Care And Maintenance Of Your Cedar Fence
Wood such as cedar is durable and resilient and can withstand just about any weather condition. In addition to providing beauty and privacy to any house’s exterior, cedar fences are highly durable.
Fences made of cedar require little maintenance, although special care must be taken to maintain their quality. To preserve cedar wood fences, cleaning and general maintenance are necessary.
A cedar fence remains attractive and structurally sound for many years if it is cared for correctly.
Cleaning
Make sure your cedar fence is cleaned at least once a year. Combine 3 qt. Warm water, 1 qt. Oxygen bleach and ¼ cup non-ammonia dish soap into a garden sprayer. Use the cleaning solution to saturate the fence.
You should allow it to sit on the fence for about 10 minutes. You can remove any tough stains from the fence with a scrub brush. You can clean your fence by rinsing it with plain water from your garden hose. Removing mold and mildew stains promptly is essential.
Without treatment, mold and mildew can eat away at the wood. Combine 4 oz of the solution with 4 oz of water. Into a bucket, add oxygen bleach and one gallon of hot water.
Make sure the fence is clean of mold and mildew by scrubbing it with the cleaning solution and a stiff scrub brush. With plain water, wash the fence.
Weeding
You should keep bushes and vines from growing up your fence. I don’t have any problem with landscaping around the fence perimeter. The fence surface may begin to grow weeds and vines. Trim them down.
Preventing Water Damage
Cedar fences must be treated with a waterproofing sealer to prevent splintering, cracking, and warping. Use a paintbrush to apply two thin layers of waterproofing sealer.
When applying the sealer, allowing each coat to dry before applying another. Cedar fences need to be sealed every three to five years. Keep the fence from being wet for an extended period of time.
Inconvenient, it’s impossible to prevent rainwater from getting on a fence. It is not advisable to place sprinklers where water streams hit the fence, even after the fence has been sealed.
Warning
Cedar fences should not be stained for at least two months following installation. Stains may differ in application instructions depending on the type and brand, so always follow the manufacturer’s instructions. Using a pressure washer that works no more than 1,500 PSI is recommended.
When to Seal the Fence?
You should first determine whether or not a wood fence needs to be sealed before you begin sealing it.
Seal your fence if it has no coating whatsoever. This is especially important for a new fence. The fence could be damaged if you weather it before sealing it, contrary to what some people believe.
The fence might get damaged by the sun or rain when left outside for too long without protection from the weather.
If you’re considering resealing or updating an existing fence’s seal, spray some water on it to see how the sealant looks. Water that soaks into the wood indicates that it needs to be sealed.
Final Words
If your wood fences need to be sealed and waterproofed, you should add it to your regular landscaping routine.
By doing this, you will ensure that your natural wood fences will last for many years to come. Keep your fence clean and sealed every couple of years by cleaning off dirt and debris.
There may be a need to reseal woods such as yew or white oak less frequently than other woods like firs and pines. It will, however, be necessary to re-treat them all in the future.


