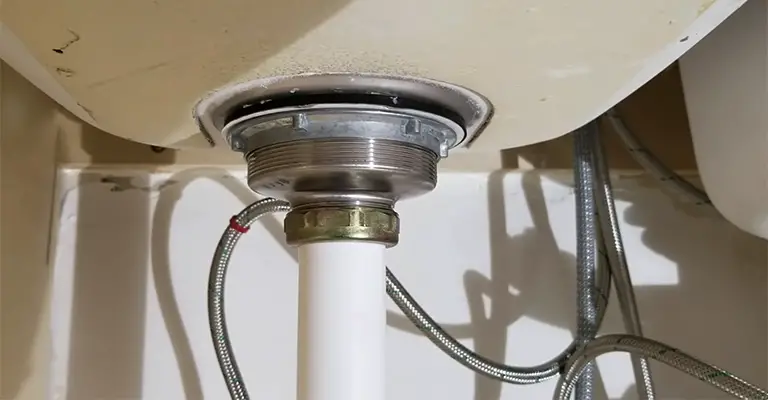
A leaking or improperly sealed sink drain pipe can lead to many problems, from water damage to unpleasant odors and even pest infestations.
Ensuring that your sink drain pipe is adequately sealed is essential to maintaining a functional and hygienic kitchen or bathroom.
To ensure a leak-free sink drain, loosen the nut and remove the old drain with an adjustable wrench.
Thoroughly clean the area around the hole, then choose your sealant – plumber’s putty for an immediate test or silicone caulk for long-lasting durability (with drying time).
Apply the sealant around the base of the drain, screw it back in place, and tighten the nut snugly with the wrench.
Finally, turn on the faucet and check for leaks, making adjustments or reapplying sealant as needed.
Remember, regular maintenance is crucial for a trouble-free sink, so keep an eye out for leaks.
Ways To Seal A Sink Drain Pipe
When everything is ready, repairing a leaky sink drain pipe is a relatively simple procedure, which can be accomplished in a few ways. A sink drain pipe can be sealed in a variety of ways.
1. Use Temporary Methods To Patch Them
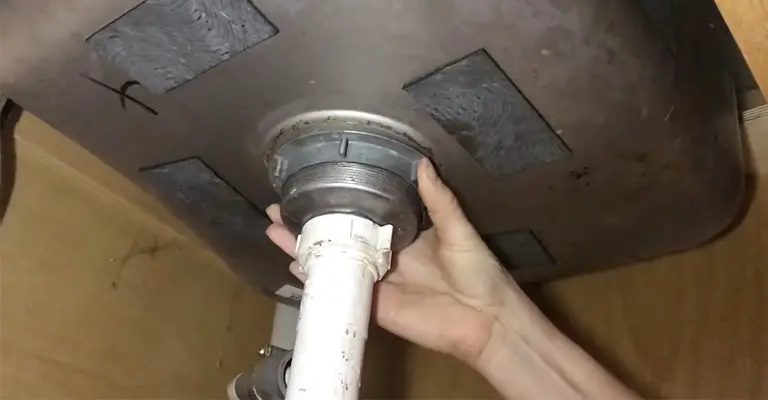
Disconnect the P-trap by unscrewing the connection to the sink with an Allen wrench screwdriver.
So, you can quickly locate the problem and figure out what you need to do about it. For example, epoxy putty and tape can temporarily fix a leaky pipe.
Tape
If you don’t have those tools on hand or have been damaged or lost, the plumber’s tape can be used instead.
A piece of plumber’s tape works just as well as a plumber’s putty but is much easier to use: just wrap a piece around each threaded connection between your pipes and P-trap.
Wrap self-securing silicone tape around the pipe if you notice a minor leak. Using this method, you will be able to stop water from leaking out of the tube without having to do any serious work on your part.
You just need to make sure that the tape has been applied correctly. In this way, you will prevent water from entering other areas of your home while you repair your plumbing.
Epoxy Putty
If you want a more durable temporary fix, use two-part epoxy putty. It hardens approximately 15 minutes after application, making it ideal for small tasks like patching up holes. However, you’ll have to reapply periodically to maintain eligibility.
2. Change Your Pipes
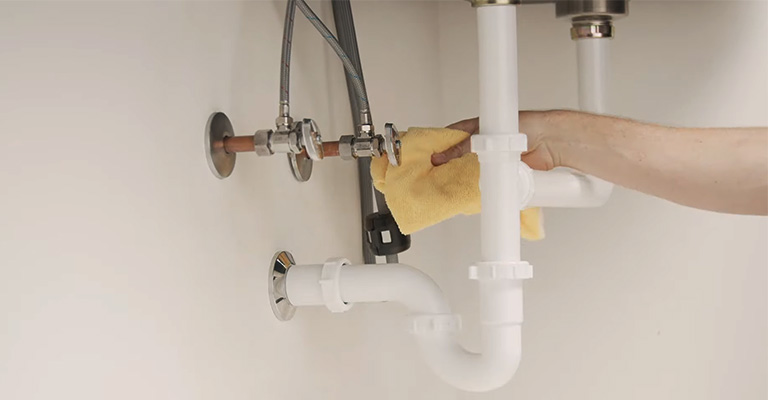
Replacing your sink’s P-trap if you find damage to the pipe is an easy, quick fix that can save you a lot of time and trouble later on.
Take Out The Old Trap
If you plan on replacing your P-trap, you must take a few steps before you begin. You should first place a bucket or pan underneath the pipes. It’s important not to splash water over your floor when removing the old trap.
To remove the pipe, you must unscrew the slip nuts starting at the drain. To get started, you’ll need a wrench and a screwdriver. If you have pliers that reach through the opening in the wall, you can use them.
Lastly, buy a P-trap of the same size as your old one. Whether your pipes are metal or plastic, you will also need a plumber’s tape and a screwdriver.
Install The New Pipe
- The first step is to install a new P-trap on the pipes. A new trap should have been included in the box you bought it. Before purchasing a trap or cutting into anything, you might want to draw out the design of the trap on your existing pipes.
- Attach the new P-trap to the pipes by threading it onto both ends. After each nut has been tightened on the pipe ends, use pliers to tighten them.
- After that, turn on the water supply valves on both sides of the house to check for leaks. When a leak appears under the sink or faucet spout, tighten nuts again until they no longer leak; then turn off valves and fill in any untapped threads with Teflon tape or plumber putty.
In the bathroom, turn on all faucets at once and look for water coming out anywhere except into the drain after you install your new P-trap following manufacturer instructions.
Before using plumbers’ putty or epoxy to repair leaks, turn off all faucets and ensure no pipes have been damaged.
3. Fix Your Leaky Pipe Sink Connections
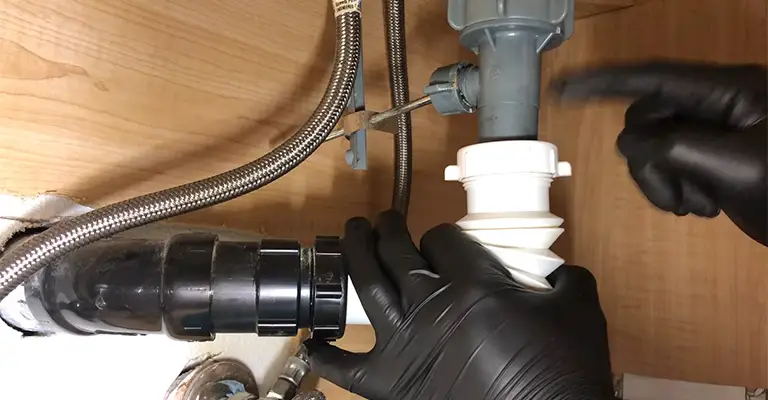
Tightening the slip nuts between pipes is necessary if they leak at the joints. The slip nuts on your home’s copper pipes may be loose and need to be tightened or wholly replaced.
You can install pliers to tighten them up and prevent leaks if this is the case. Whenever the rubber gaskets at pipe connections are old and cracked, they must be replaced. Between metal pipes, rubber gaskets prevent water from getting between them and causing leaky connections.
Gaskets that have become aged or damaged over time need to be replaced as soon as possible! Before tightening nut screws on metal pipes, wrap the plumber’s tape around the threading.
4. Apply Silicone Caulk On The Sink Drain Flange
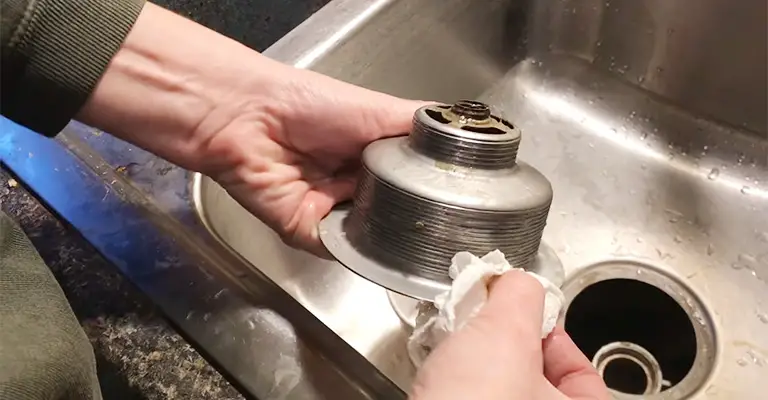
The best option for fixing leaks is silicone caulk because it is inexpensive, easy to use, and available in most hardware stores.
Aside from being flexible and waterproof, it will not crack with time and won’t cause mold growth in your walls like some other types of caulks do overtime when wet.
The first step is to turn off the water supply and remove any stoppers or plugs that are currently in place.
Make sure any excess grease and hair around your sink drain flange can be removed so that you can apply silicone caulk on the surface.
To finish off, apply a generous amount of silicone caulk to the sink drain flange circumference.
Make sure not to get caulk on your hands or on any surfaces you don’t want to be waterproof, which will prevent leaks later on.
Try To Find What Is Going On Under Your Sink
Your plumbing may have been problematic if you lived in an old house. Have you ever experienced it? If so, you know how frustrating it can be.
Water drips continuously while washing dishes or doing household chores around the sink, requiring constant focus.
It’s even worse because that wet spot on the countertop is where water has collected over time. As a result, you need to learn how to seal a sink drain pipe to keep your kitchen safe.
We recommend calling a plumber if your issue seems beyond DIY efforts, though we do recommend trying some simple solutions first.
You might think of calling a plumber if you discover a leaky sink drain pipe.
Even though hiring a professional is a good idea in some circumstances, there are times when you can solve the problem yourself, saving yourself some money and hassle.
You may be experiencing a slow drain in your kitchen sink for one of three reasons:
- Damage has occurred
- You have an unfastened P-trap
- Your pipes are either clogged or damaged
If your drain leaks, you should check to see if anything is inside.
For example, if tree roots grow into your downspouts and block them with debris, you’ll notice leaks where they’re growing through cracks or holes.
Check the pipes underneath the sink to determine what is causing the problem. Remove clogs caused by previous repairs with pliers if debris from previous repairs is clogging your pipes. Likewise, any old putty you’ve used in prior repairs must be removed.
After that, ensure you have a clear space under your kitchen sink so that you can work comfortably without bumping into anything else or accidentally knocking something over.
How Can You Keep This From Happening In The Future
It is usual for everyone to experience leaks in their sink drain pipes at some point. Over time, this happens from normal wear and tear, so you can’t do much about it.
Also, you can test your water to determine if it’s the product of other factors, such as excessive pressure or chemical additives like bleach or ammonia.
Conclusion
It is the last thing anyone wants to deal with a clogged drain. Most people avoid the hassle altogether by calling a plumber whenever something goes wrong.
Nevertheless, if you don’t want to pay for expensive repairs or rent out your home for days on end, you should learn how to fix things independently.
Sealing a sink drain pipe yourself will save you both time and money. This process is simple, and we guarantee that your sink will work like a new ones once you follow these steps.

