
Yard hydrants, also known as outdoor hydrants or frost-free hydrants, are a common fixture in many households and are often used to provide water to outdoor faucets, sprinkler systems, and other outdoor water features.
Picture this: you step outside to enjoy your beautiful backyard, only to find your yard hydrant leaking water underground. Not only is this frustrating, but it can also lead to significant water wastage and potentially costly repairs.
It’s essential to detect an underground leak in your yard hydrant as soon as possible to prevent further damage. But how can you tell if your yard hydrant is leaking underground?
Let’s explore some telltale signs that you can look out for and provide practical tips to help you identify the issue quickly.
Can A Yard Hydrant Leak Underground?
It has the advantage of draining itself when turned off, so the pipe won’t freeze in harsh weather conditions. It is crucial to install the hydrant correctly to ensure that it will last a long time without causing any issues.
Whether connected to a private well or a public water supply, yard hydrants use pressurized water.
It is essential to bury water lines deep enough to prevent freezing. The frost line ranges from 0 to 8 feet in different regions depending on the maximum frost depth.
It is not possible for a yard hydrant’s bottom valve assembly to withstand freezing temperatures. A frozen pipe may crack or burst, causing an underground water leak, which requires enormous effort to repair.
A water shut-off valve is located on this piece. When it is opened, the pressurized waterline will be ready to discharge water. Excess water is drained out above the valve piece when the hydrant is not in use through the drain hole.
Common Problems With Yard Hydrants
Frostproof hydrants have a drain port built into the bottom of the valve, which helps keep them dry during cold weather.
The standpipe drain port becomes blocked when the pump rod and plunger lift off the valve seat, resulting in water running up the standpipe.
Pumps and plungers are lowered to close against water inlets, which opens the drain port. Any water in the standpipe drains away into the ground-the surrounding gravel, usually facilitating drainage.
No water is left in the pipe, so there is no risk of the water freezing and bursting the pipe. If a leaky hydrant is not repaired, the standpipe can burst due to water remaining inside the system.
It is simple and quick to replace the plunger on your yard hydrant to ensure that it remains leak-free and that it does not burst.
Your hydrant model has specific replacement parts, so getting them is important. Many hydrant manufacturers offer repair kits for their products, and many of these kits are universal.
For parts, you can contact the manufacturer or find them online or at a local plumbing supply store.
Reasons For The Yard Hydrant Leaking
It is important to know the reasons behind the leaks in your yard hydrant. To resolve this issue, you must figure out what is causing it in the first place. If you have leaks, you may come across the following situations:
Problems With The Set Screw
What do you think of yard hydrants with a set screw? The leak occurs when this part is overlooked and somehow ends up being the cause. The yard hydrant can leak if the set screw is tightened or loosened too much.
It is typically these causes that lead to the yard hydrant leaking. I recommend going through yard hydrant troubleshooting to determine which applies to your situation. I’m about to discuss some solutions that you can try out as soon as you do that.
Damaged Drain Valve Or Pipe
It is also possible for this issue to be caused by the drain valve getting damaged. In addition to severe leaking problems underground, a damaged pipe can also cause severe flooding.
You can get this result if you are using low-quality pipes or pipes without corrosion resistance.
Rubber Stopper Is Going Bad
Your yard hydrant’s rubber stopper serves as a sealant and keeps the components in place. You will experience leaks from the hydrant when that wears out or goes bad.
A hydrant leak can usually be observed on the surface surrounding it. It is, therefore, crucial to notice wet areas around the hydrant if you suspect leaks.
Faulty Installation
A faulty installation can be one of the reasons why hydrants leak. If you make any sort of mistake while installing the hydrant, you will have issues with leaks. You should be aware of several things that may go wrong with the installation.
Damaged Plunger
Undoubtedly, a damaged plunger is one of the most common and concerning issues.
Your yard hydrant can leak continuously if your plunger has been damaged or worn out. In most cases, it doesn’t happen immediately after you install the system; it comes up over time.
How To Tell If A Yard Hydrant Is Leaking Underground?
It can be difficult to detect an underground leak in a yard hydrant, but identifying it early ensures the issue is addressed before further damage is done.
Listed below are a few signs that can help you determine if your yard hydrant is leaking underground:
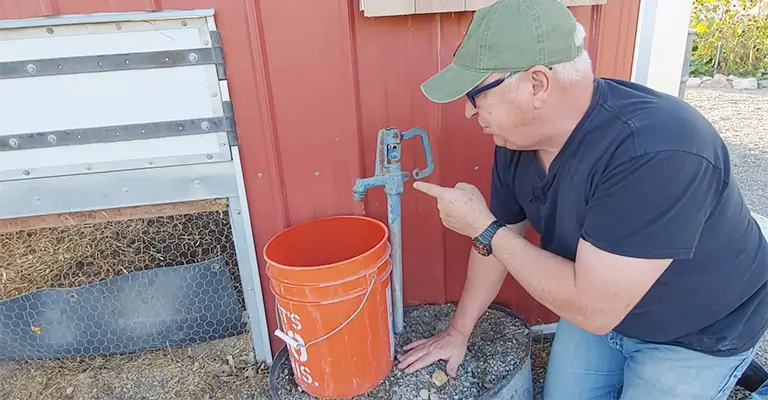
The wet or muddy area around the hydrant – An underground leak may occur if there is a constant wet or muddy area around the hydrant.
Reduced water pressure – An underground leak may be causing the water pressure from your yard hydrant to fall.
Strange noises – A leaking underground could be causing strange noises or hisses coming from your yard hydrant.
High water bills – An underground leak may be causing a significant increase in your water bills.
Difficulty in turning off the hydrant – It is likely that underground water will still flow even after you completely turn off the hydrant.
Water leaks from below ground level when the hydrant is on – There may be a leak at the drain hole that causes the small leak. Whenever you see a worn or old plunger, replace it.
The corrosion caused by electrolysis may cause a large leak in the pipe casing. Some soil conditions can cause the pipe’s casing near the valve body to fail prematurely. The best choice in these circumstances is a brass pipe.
It’s crucial to call a professional for a yard hydrant inspection when you notice any of these signs. Their goal is to locate the source of the leak and repair the problem to avoid further damage or water waste.
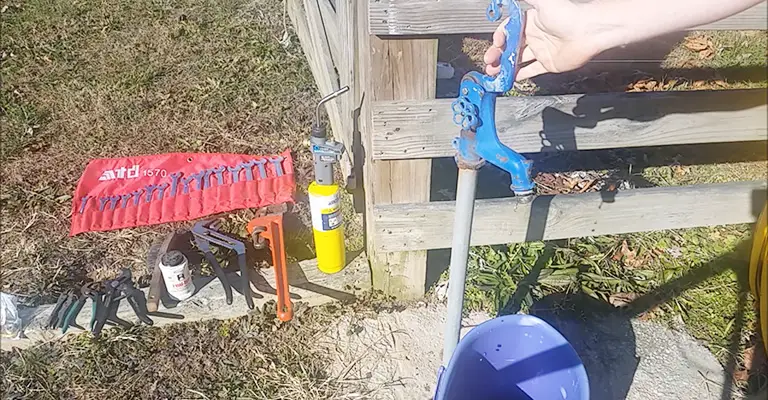
How To Repair A Frost-Free Yard Hydrant?
It is typically necessary to remove the pump rod and replace the plunger when troubleshooting a yard hydrant’s ability to seal off water flow if you notice that your hydrant leaks from the top, from the lock nuts that hold it in place, or even from underground, you can fix it with this standard repair.
Shut off the Water
Ensure that the water supply to the hydrant is turned off. Possibly on the water line, there is a shut-off valve.
If you find lines leading out of your basement or crawlspace, they should be buried below the frost line or the depth to which the ground freezes in winter.
It is possible to shut off the water at your home’s main shut-off valve if there is no shut-off valve on the individual water line.
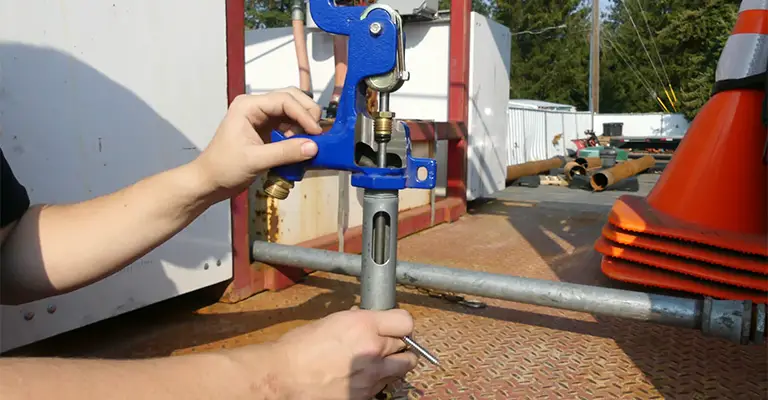
Remove The Hydrant Head
By using two pipe wrenches, remove the hydrant head from the standpipe. Using one wrench, hold the standpipe in place and prevent it from turning, and use the second wrench to unscrew the hydrant head.
The wrenches must face each other in the opposite direction. After trying again, apply some penetrating oil to the pipe threads underneath the head to see if it will budge.
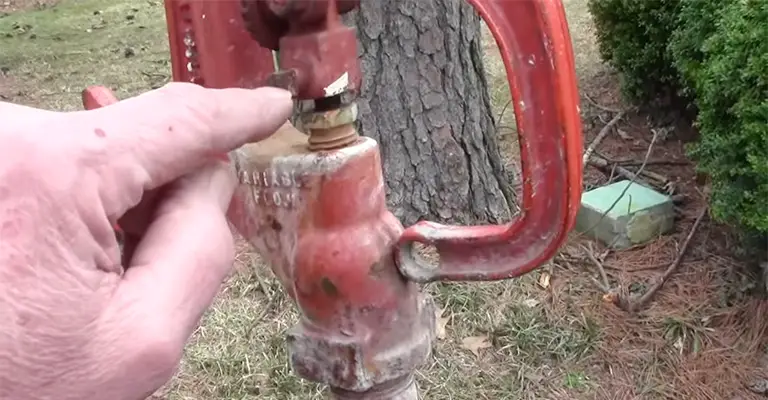
It may be necessary to loosen a linkage set screw and/or packing nut on the head of some hydrant models before turning the head. Set screws and packing nuts do not need to be removed; they will just need to be loosened.
Remove the Pump Rod
Using a long pump rod, carefully remove it by pulling it up. Remove the rod using pliers only on its outer portion; do not remove the brass spindle with pliers.
Using a screwdriver, unscrew the old plunger from the end of the rod in your yard hydrant and replace it. You will need to install a new plunger and secure it with a screw.
You may find some replacement plungers pre-lubricated, but if yours doesn’t, coat the assembly with silicone waterproof plumber’s grease to help it slide down.
It is recommended not to use petroleum-based lubricants because they can damage the seal. Model-specific instructions differ regarding how to replace the plunger, so pay attention to them.
Reassemble The Hydrant
Ensure the plunger is fully against the valve seat at the bottom of the standpipe as you reinstall the pump rod. The standpipe threads should be free of any old plumber’s tape or pipe-joint compound.
After screwing the hydrant head onto the standpipe, apply the new plumber’s tape to the threads.
A snug fit and facing the desired direction should be achieved by tightening the head. You may want to tighten the packing nut or set screw if applicable.
Check for leaks after you turn the water back on. Yard hydrants may need to be dug up and replaced if they are still leaking or if the rod is damaged.
Adjust the Shut-off (As Needed)
There may be a need to adjust the hydrant’s shut-off valve if the hydrant lever cannot be closed fully, or the faucet continues to drip even when it is closed.
A square head set screw, or a locking wheel can be loosened on hydrants to adjust the lever’s position. To stop the water flow, you may need to experiment with the adjustment until you find the right amount of downward pressure.
How Long Will My Yard Hydrant Last?
It is impossible to find a yard hydrant on the market that will last a lifetime. Hydroponics require digging up and replacing when they are no longer functional.
Luckily, a Hydrant Assist Kit makes repairing and replacing your hydrant simple. You can enhance the performance of your yard hydrant with a Hydrant Assist Kit, a simple yet effective system.
A couple of amazing things happen when it is used. As a result, the vertical pipe is not in contact with the soil, extending the life of your hydrant.
As a result, you can repair or replace the hydrant on the surface in seconds without digging. Using this simple kit, you can save hundreds, if not thousands, of dollars and numerous hours.
How Often Should A Yard Hydrant Be Flushed?
To maintain a high quality of water, yard hydrants typically need to be flushed annually. Flushing your hydrant more often (about twice a year) is a good idea if it is not used frequently.
How Much Does It Cost To Replace A Yard Hydrant?
Replacing a yard hydrant with a professional typically costs between $95 and $165. If you can do the work yourself, yard hydrant repair kits are much more economical.
Final Words
The problem of the underground hydrant leaking when the water is off can be annoying. The problem can’t be diagnosed if you can’t see the leaks happening in front of you.
After you’ve identified the problems and their causes, you can take appropriate action. Moreover, you know the solutions now. If you want to try them out or if you want to consult a professional, the choice is entirely yours.


