
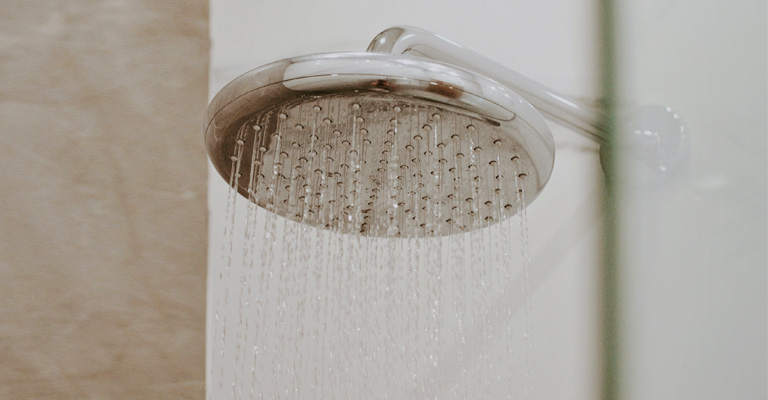
Imagine stepping out of a soothing rain shower, feeling refreshed and relaxed, only to be disturbed by the annoying sound of water droplets persistently dripping from the shower head. You might wonder why this happens and how it can be fixed.
Clogged rain shower heads are the most common cause of dripping rain shower heads. Minerals and bacteria, as well as limescale deposits, cause this issue.
Minerals and limescale, when gathered together, can block the small holes on the shower head, which results in inefficient water distribution. When the power supply is switched off, they can drip.
How To Stop A Rainfall Shower Head From Dripping?
It is possible that the air pressure and surface tension within the shower head’s can cause the rainfall shower to drip when it is not in use.
Shower heads with a rainfall pattern contain water in a flat surface with air pockets on top, which allows gravity to push water through them.
Water remains in the shower head when you turn off the valve, relieving pressure on the air pocket.
Water will then be held inside by the outside air pressure. Water will be released when the surface tension is released. The problem can be fixed using a few methods.
The first thing to do is to slightly tilt the shower head after use so the water can drain.
It is also possible to break the air tension by running your hand over the end of the nozzles.
By tilting the shower head, the surface tension of water will break and air can flow between the shower and the outside room.
There might be a problem with the shower valve cartridge or washer if it’s constantly dripping.
There is a possibility that a gooseneck might drip for a few minutes after the water is turned off, but if there is a new supply of water, it will cease to drip.
It is fairly easy for a DIYer to replace cartridges and bad washers. Installing a shower head shut off valve would also be a quick fix. The market offers few options.
Now, it will be better to try cleaning the shower head first. This will hopefully solve this problem.
How To Clean A Ceiling/ Wall Mounted Shower Head?
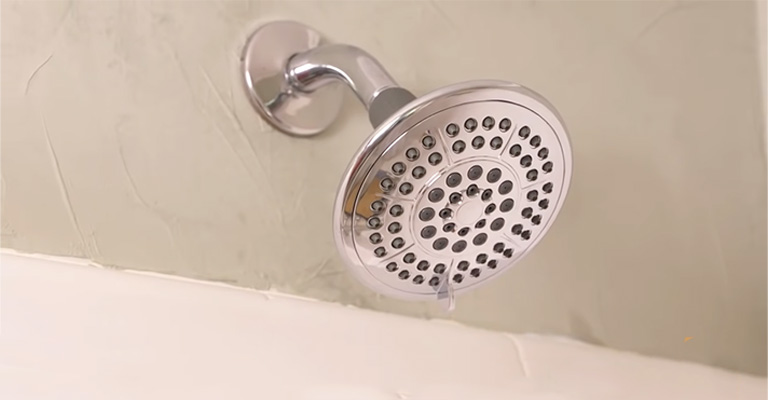
It is more difficult to clean wall/ceiling mounted shower heads than handheld shower heads because they are often not detachable without a plumber’s assistance. The dreaded limescale can still be removed from overhead showers.
Step 1
You may need to take the shower head down if your shower doesn’t have a quick release button.
Step 2
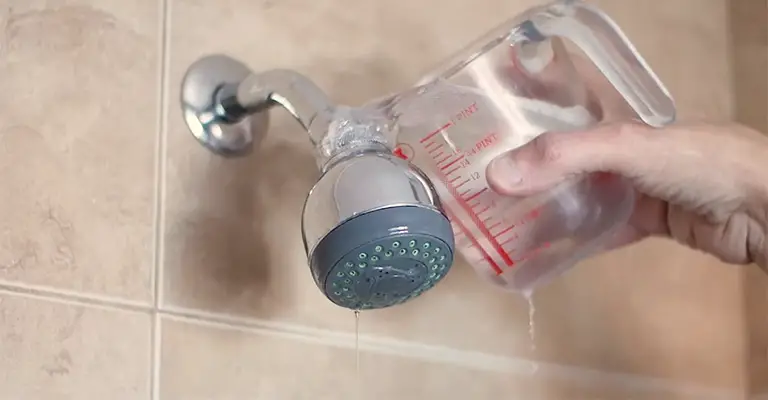
You will need white vinegar (white distilled vinegar) and a strong plastic bag once you have removed the head. You will only need these tools.
Step 3
Put vinegar in a plastic bag. It is important that you use white vinegar and make sure that you submerge the shower head completely with it.
Step 4
Make a string or rubber band tie around the plastic bag and place the fixed shower head in the vinegar.
Step 5
We are almost done with the limescale removal mission. To remove all the limescale, immerse the shower head in the vinegar for 1- 2 hours to allow the acid to break down the limescale.
Step 6
Remove the bag from the shower head by untying it. Scrub away any excess debris with a toothbrush.
Step 7
Reattach the shower head if you detached it.
Step 8
Turn on the shower and let the hot water run for 30 seconds after the head has been reinstalled. The ducts will be thoroughly cleaned this way.
Step 9
A final polish with CIF cleaner completes the process.
How To Prevent Another Limescale Build-Up On Your Shower Head?
You can prevent limescale buildup by following these simple steps:
Take a dry towel to wipe down the shower head, vents, and face. By doing this, you will prevent water droplets from the shower or condensation from absorbing into the head and causing build-ups to form over time.
We recommend repeating our vinegar trick every month or so to ensure that we are keeping our limescale levels in check.
Our shower head maintenance advice will keep your shower head looking like new all year long! I hope these steps will help you solve your dripping rain shower head issue.


