
If you plan to install vinyl plank flooring, it’s essential to ensure that your plywood subfloor is appropriately prepped beforehand.
A well-prepared subfloor is the foundation for a successful flooring installation and can make all the difference in the longevity and appearance of your new flooring.
But where do you begin? What steps must you take to ensure your plywood subfloor is ready for vinyl plank?
In this article, we’ll walk you through everything you need to know about preparing your plywood subfloor for vinyl plank flooring to enjoy a beautiful, durable, and long-lasting new floor. Let’s get started!
Getting Started
Installing vinyl plank flooring is easy, and it can be used in any area of the house, including living rooms, bedrooms, bathrooms, kitchens, and recreational vehicles.
As long as your temperature does not fall below freezing, you can use it on covered porches. Besides being waterproof, durable, and easy to clean, this flooring is easy to keep up with.
This is also a good project for do-it-yourselfers (DIY). You can install vinyl plank flooring over hardwood, tile, or concrete if you have existing vinyl flooring. It will work if the surface is flat and clean.
Laying vinyl over laminate isn’t recommended due to its uneven surface. You should lay your vinyl plank flooring over underlayment regardless of where it will be installed.
As well as providing extra cushion and sound reduction and acts as a moisture barrier. You will need coordinating transition strips at doorways and when switching flooring types for a clean appearance.
Preparing Plywood Subfloor For Vinyl Plank Flooring
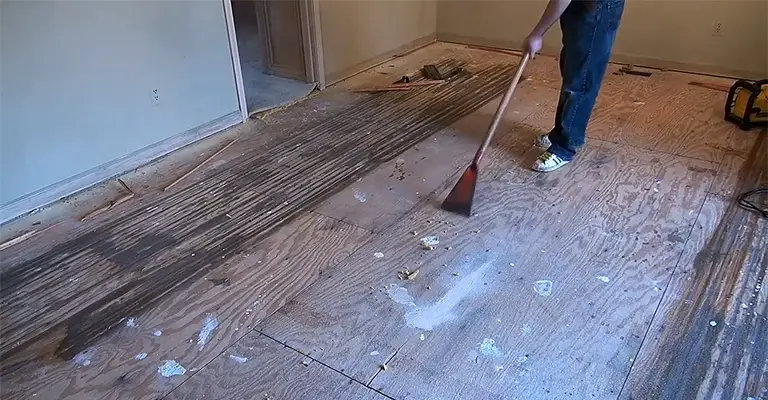
You should begin by removing the baseboards. Cut through the paint and seal the baseboards to the wall with a utility knife.
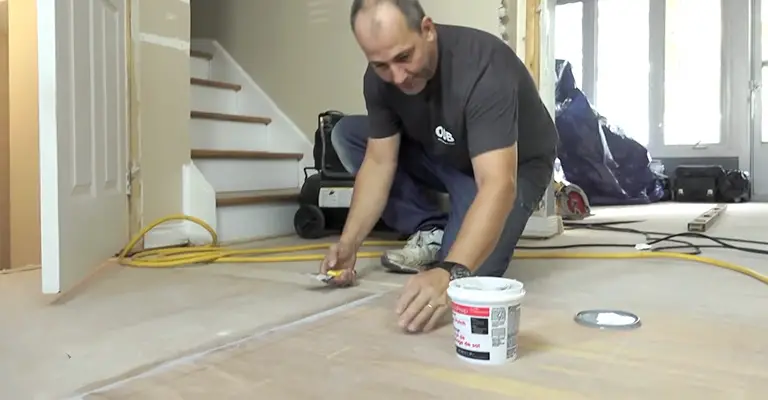
Once the baseboards are loose, use a pry bar to remove them gently. You need to make sure your subfloor is clean, dry, and level within 3/16-inch changes every 10 feet.
You can use a self-levelling compound on low spots, or you can sand the high spots of wood or concrete. Asbestos may be found in vinyl flooring, so do not sand it.
For flooring projects, self-leveler is available in powder and pre-mixed forms, creating a flat, smooth surface.
As strong as concrete, this product is an excellent alternative to concrete. Using a self-leveler requires quick action since it dries quickly.
Can I Install Luxury Vinyl Over an Existing Floor?
Several people choose to install luxury vinyl flooring over existing floors to save time and money.
The most accessible materials to work with are usually the vinyl and tile flooring already in place. New installations without removing your existing floor are possible in many cases, but the process is distinctive.
There are also many factors to consider when preparing a floor, including what type of material is currently on it. Here are a few things to know about installing luxury vinyl flooring over an existing floor:
- You should keep your existing floor as clean as possible. Cleaning household items with an appropriate product is recommended. There may be more than one time you need to repeat the cleaning process.
- The cracks between vinyl flooring materials need to be patched with a patching compound.If you are dealing with existing tile floors, using mixes based on cement is best. Ensure that the surface is smooth, level, and level throughout by sanding them.
- Overlapping luxury vinyl flooring on existing materials is affected by moisture content.In addition to being dry on set floors, patching compound and cement-based mixes must also adhere to moisture requirements. Use a moisture meter or a 72-hour tape test to test the new vinyl flooring for moisture.
How To Prep A Subfloor For Luxury Vinyl Flooring?
Compared to regular, more traditional vinyl formulations, luxury vinyl flooring improves durability and style. Planks of vinyl are even available in looks that mimic these materials.
It is also relatively easy to install, making it an appealing choice for DIY-minded homeowners and businesses.
For luxury vinyl flooring to be installed, the subfloor must be prepared. The process will be different depending on whether you have a concrete or wood subfloor.
Some existing floor materials can also be installed over luxury vinyl flooring. This guide will help you prepare your subfloor for luxury vinyl flooring installation in commercial or residential settings.
In addition to discussing how to prepare your existing flooring, we’ll discuss how you can do so if you don’t intend to take it up.
Preparing A Wood Subfloor For Luxury Vinyl Flooring
While wood subfloors are durable and long-lasting, installing luxury vinyl flooring over them is a little more difficult than laying concrete.
In the end, you can do it yourself if you have a little DIY expertise. This guide will walk you through how to prepare a wood subfloor for luxury vinyl:
Step 1:
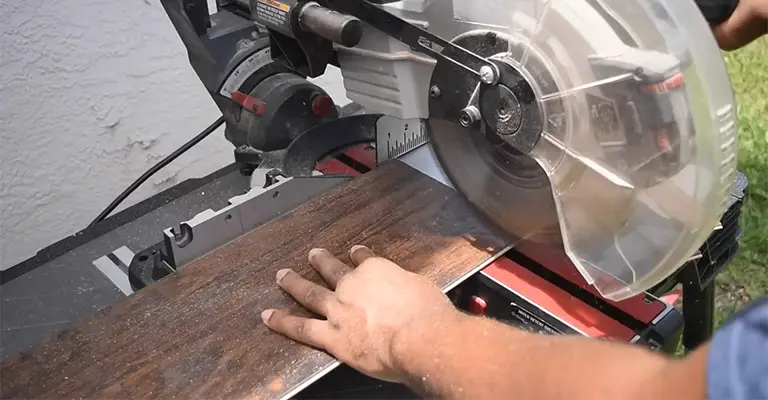
You will need 1/4-inch plywood to cover the existing subfloor where vinyl flooring will be installed.
It is important to measure carefully so that the plywood fits appropriately. Alternatively, you can use a circular saw on location or have them cut by a lumber yard.
Step 2:
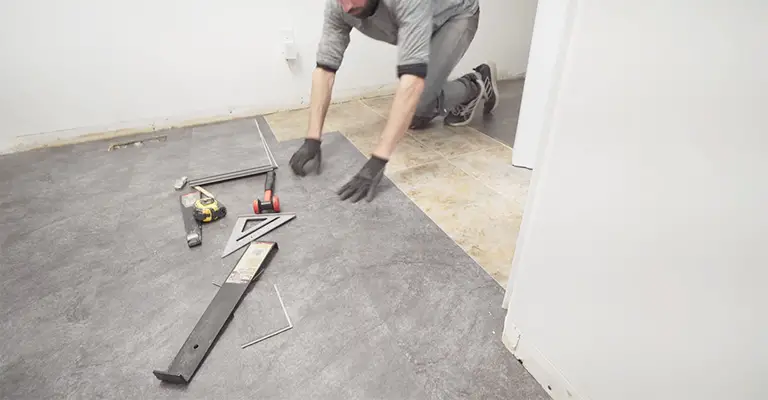
Ensure that the joints of your plywood do not run directly over those of your wood subfloor. Ensure that wall, and joint expansion gaps are 1/4-inch wide.
Step 3:
Place your plywood pieces using 1-inch deck screws. If you want an even work surface, hide your screw heads underneath your plywood pieces.
Step 4:
For filling in the areas over screw heads, use a floor patching compound. After installing your luxury vinyl material, you need to smooth these areas with medium-grit sandpaper to achieve a perfectly level surface.
Step 5:
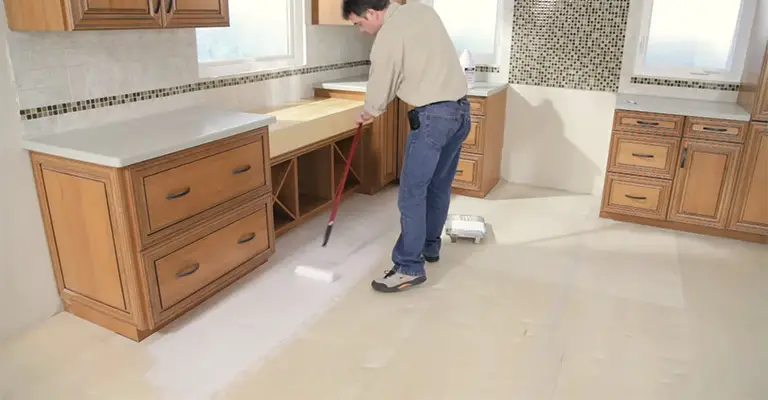
Clean your floors thoroughly to ensure no debris remains. You can use a wet/dry vacuum if you allow time for the wood to dry before you begin the installation process.
Step 6:
You can begin installing luxury vinyl flooring once you have cleaned, dried, and evened out the area.
Preparing A Concrete Subfloor For Luxury Vinyl Flooring
Subfloors typically consist of concrete, and you can install luxury vinyl flooring on them easily.
It is important to allow a minimum of 60 days for your concrete subfloor to cure properly before installing your luxury vinyl flooring.
You can prepare a concrete subfloor for luxury vinyl with these steps:
Step 1:
Ensure your concrete subfloor is moisture-free. Use a moisture meter to check your readings, making sure you do not exceed three pounds per 1,000 square feet during the 24 hours.
If you are able to wait 72 hours, you may tape a piece of your vinyl flooring to the concrete. Dehumidifying the room after the flooring comes up easily is necessary to reduce the moisture content.
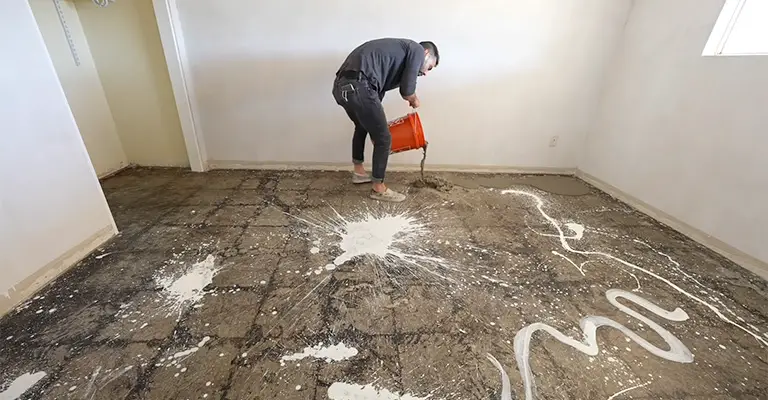
Step 2:
Ensure that your subfloor is thoroughly cleaned. Ensure that any debris has been swept up first. For deeper cleaning, you can use a wet/dry vacuum. You must let your floor completely dry before moving on to the next step.
Step 3:
Make sure that your subfloor is level. Using a large level, check multiple areas. Take note of any low points or high points.
Step 4:
Level low spots on the floor using a putty knife and patching compound. Smooth the area using medium-grit sandpaper, and clean thoroughly when finished.
Step 5:
Use a belt sander to reduce high spots. Clean any debris to ensure a spotless subfloor.
Step 6:
Begin your luxury vinyl flooring installation once your subfloor is clean, dry and level.
Additional Tips For Preparing A Subfloor For Vinyl Flooring
- Ensure that the room you work in is well-ventilated. Make sure you keep the windows and doors open throughout the process. To reduce the amount of water vapor in your room, you may also wish to turn on your humidifier.
- While sanding or applying the patching compound, wear a respirator or facemask. Inhaling dust and fumes generated by the sanding equipment will be prevented. Additionally, you should wear gloves to protect your hands.
- If you are using chemical products or installing them, you should follow the instructions provided by the manufacturer. It will not only help you do things properly, but it may also let you know if special protective gear is necessary. For example, you may need gloves if you are working with patching compounds.
- You should protect the polyethene underlayment from moisture prior to installation. The best way to do this is to not leave it on a patio table during a hot day. Underlayment cannot breathe in the area covered by the underlay, which may cause moisture to get trapped within the underlayment and transferred to your new flooring.
- Before you scrape off residue adhesive from vinyl or linoleum flooring on a subfloor, test for asbestos.
Final Words
In installing vinyl flooring, prepping the subfloor is essential as it provides the floor with a solid foundation upon which to rest or adhere.
For the process to work effectively, it is important that the subfloor’s moisture content is kept below worrying levels and the surface is smooth and clean.
Filling holes and sanding down bumps will provide a level surface for your floor, and adding a vapor barrier will prevent potential moisture problems. No professional will be needed for any of these things.


