
The process of installing a deck post on your deck surface is an essential part of any deck build, whether you are creating a new deck on your home or renovating your outdoor space.
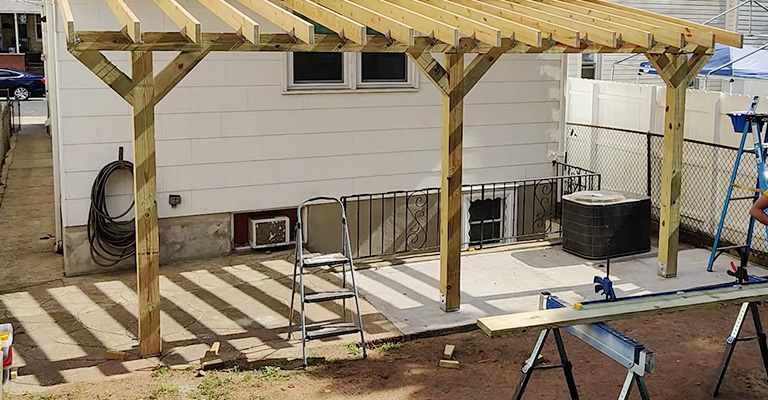
Adding a roof to your existing deck not only expands your outdoor living space but also provides protection from the elements, allowing you to enjoy the outdoors even when the weather isn’t ideal.
One of the crucial steps in this process is securely attaching 4×4 posts to your existing deck to support the weight of the roof structure.
Whether you’re planning to build a cozy pergola, a shaded patio cover, or a more extensive outdoor living area, knowing how to properly attach 4×4 posts to your deck is essential for the structural integrity and safety of your project.
How To Install A Wood Deck Post
Using Titan Post Anchors, you can mount wooden posts, such as 4x4s or 6×6, to existing decks quickly and securely.
Titan Anchors secure your wooden post to the surface below with a solid, powder-coated steel connection point. For a secure attachment to your post, you must have at least 4 inches of substructure or blocking underneath.
Titan Post Anchor
You will need a Hole Saw to cut a hole in the bottom of your wooden deck post before installing the Titan Post Anchor.
Drive the included fasteners through the predrilled openings after inserting the top portion of the post anchor into the opening. Four structural screws or lag bolts should be used to secure your anchor to the deck surface.
A stainless steel structural or lag screw of at least 4 inches length is recommended when installing a deck post anchor onto wood, composite decking, PVC decking, or pressure-treated wood.
We recommend using concrete screws when installing deck post anchors on concrete or stone surfaces.
Before You Begin
Research your local building codes before installing your deck railing, especially the posts. As a homeowner, you may also want to check your homeowner’s association’s rules.
The local building code varies from one location to another, and all locations have different codes. If you want to do any type of construction, you should be up to code, so spend some time digging into the details or hire an expert.
Be sure to check the rules of any homeowners’ association you belong to. Your building code may allow something, but your homeowners association might not.
To install your chosen rail design, you should also have the right hardware. There are anchors that require bolts, and there are anchors that require nails. In general, it depends on how your deck surface is attached to your post.
Purchase a complete railing set, usually as a base kit, that includes all the necessary hardware.
Attaching 4×4 Post To Existing Deck For Roof | Step By Step Guide
Attaching a 4×4 post to an existing deck for a roof can be a relatively straightforward process if you follow the right steps. Here’s a general guide on how to do it:
Materials and Tools You’ll Need:
Before you start, gather the following materials and tools:
- 4×4 pressure-treated lumber posts (size and number will depend on your roof design)
- Post brackets or anchor hardware
- Lag screws or bolts
- Level
- Measuring tape
- Drill with appropriate bits
- Socket or wrench set
- Safety gear (safety glasses, gloves)
Step 1: Plan and Measure
Begin by planning your project and determining the number of 4×4 posts you’ll need to support your roof.
Measure and mark the spots on your existing deck where you want to place the posts. Ensure they are evenly spaced and align with your roof design.
Step 2: Select the Hardware
Choose the appropriate post brackets or anchor hardware for your project. The type of hardware you need may depend on the specific deck and roof design you have in mind.
Step 3: Prepare the Deck
Clear any obstructions and debris from the chosen post locations on the deck to provide a clean work surface.
Step 4: Install the Brackets or Anchors
Attach the post brackets or anchors to the deck surface using lag screws or bolts. Ensure they are securely fastened and level. Use a level to confirm that the brackets are plumb (vertically straight).
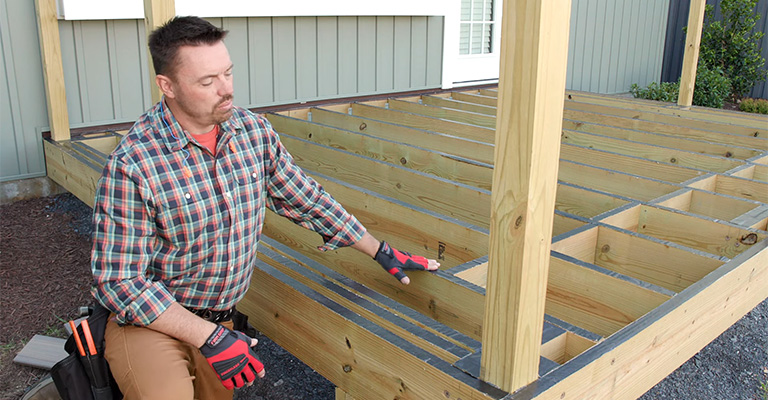
Step 5: Cut and Place the Posts
Cut your 4×4 posts to the desired height based on your roof design. Remember to account for any slope or pitch if your roof will not be flat. Slide or place the posts into the brackets or anchors you installed earlier.
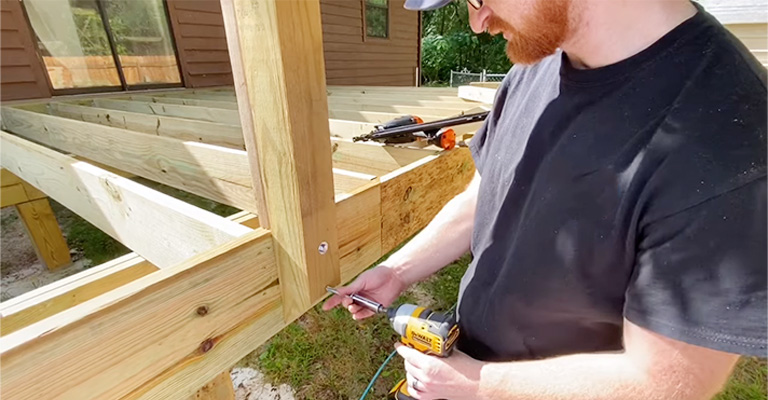
Step 6: Secure the Posts
Once the posts are in place, secure them to the brackets or anchors by driving screws or bolts through the holes in the brackets and into the posts.
Use a level to make sure the posts are perfectly vertical. Make adjustments as needed by shimming under the posts with small pieces of wood.
Step 7: Double-Check for Level and Plumb
Recheck the level and plumb of all posts to ensure they are correctly positioned and aligned. Proper alignment is crucial for the stability of your roof.
Step 8: Roof Installation
With the posts securely in place, you can now proceed with building and attaching your roof structure to the top of the posts. The method for this will depend on your specific roof design.
Step 9: Finish and Secure
Finish your roofing project by attaching roofing materials, such as rafters and sheathing, as required. Double-check the security of all connections and hardware to ensure the safety and stability of your roof.
Step 10: Inspect and Maintain
Periodically inspect your roof and posts to ensure they remain in good condition. Look for signs of wear, rot, or rust and address any issues promptly to maintain the longevity and safety of your outdoor space.
By following these steps, you can confidently attach 4×4 posts to your existing deck to support your new roof, creating a comfortable and sheltered outdoor living area for you and your family to enjoy.
Do I Need a Permit To Put a Roof Over My Deck?
Your deck will need a permit if it’s higher than 2.5 feet above ground level or if it covers more than 200 square feet.
In addition to ensuring residents’ safety and the environment, this permit standardizes decks and roof posts. It doesn’t matter whether the patio (deck) is attached or unattached to your house, the building code governs it.
In some cases, you might not need a permit for your deck if it doesn’t meet these parameters. The consequences of not obtaining a permit if you build a roof over your deck could include:
#1. You’re Missing Out On Professional Eyes
An expert wouldn’t overlook many vital factors that a layman would. For safety reasons, this is crucial. Do you want the roof post to not pull away from the ledger board when you are relaxing under it? Do you?
#2. Deck Demolition
The last thing you want is to build and roof a beautiful deck only to have it torn down by the government for not complying with regulations.
#3. Tax Reversal
When you don’t have a permit, the city will charge you a one-year property tax due to your failure to pay your taxes monthly.
#4. Lack Of Insurance
For your deck to be covered by your insurance company, you will need a permit. In the event that someone gets injured on the deck, and you are responsible for the hospital bills, you may be responsible for covering the costs.
In order to get your permit, you will need to meet some general requirements, which will depend on the laws of your city or state. Among them are:
You should include a drawing of your desired deck and, if possible, a diagram of how it will attach to your home.
- Your compound’s measurements.
- Describe your deck’s height, width, and length, as well as where you’d join the posts.
- The thickness of the roof (4×4, 6×6, etc.) and the space between the roof posts.
- Stair width and location.
- Railing height.
- Materials list.
- Concrete or screw piles — these would be the footings you would use.
In order to obtain a permit, you should contact the reviewer’s office in advance, as sometimes papers must be submitted, and feedback will take weeks.
Furthermore, it helps you plan when the deck footings will be constructed and when you’ll be able to get the materials. However, you should wait until you get your permit before you start building them.
Final Words
Post anchors are an excellent way to attach roof posts to a deck. As long as you use this anchor, your roof post should be able to securely connect to the deck in question. For a better stand, add some significant blockage. Make sure that the fasteners used are appropriate to enhance the strength.


