
Moving can be a challenging and tiring process, and sometimes, despite our best efforts, we encounter unexpected issues.
One common post-move inconvenience is discovering a lump in your mattress. Whether it’s a noticeable bump or an uneven surface, dealing with this newfound discomfort can be frustrating.
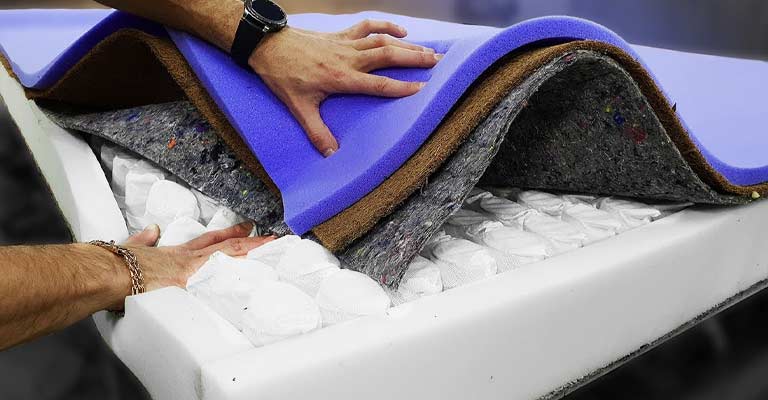
At times, the comfort materials inside the bedding might shift, but a simple solution is to give it a good shake to help them settle back into place.
I often suggest to people to shake the mattress just like they would with a sheet or a heavy quilt. Just grab one end and give it a shake to help it re-settle.
The worst part is if you relocate to a new place and encounter damage, like lumping, the warranty may become void.
How To Fix A Lump In The Mattress After Moving
If you’ve found a lump in your mattress after moving, here are some steps you can take to address the issue:
1. Reposition the Mattress:
Ensure that the mattress is correctly positioned on the bed frame. Sometimes, during the moving process, the mattress may shift or get rotated, causing unevenness.
2. Check for Obstacles:
Inspect the area beneath the mattress for any objects or debris that might be causing the lump. Sometimes, small items can become lodged beneath the mattress during the move.
3. Rotate or Flip the Mattress:
If your mattress is designed to be flipped or rotated, try repositioning it according to the manufacturer’s guidelines. This can help distribute the internal materials more evenly.
4. Allow the Mattress to Settle:
After moving, the mattress might need some time to settle and adjust to its new environment. Give it a few days to see if the lump resolves on its own.
5. Check for Damage:
Inspect the mattress for any visible damage, such as tears or bulges. If you notice any significant issues, you may need to consider contacting the manufacturer or retailer.
6. Use a Mattress Topper:
Consider using a mattress topper to create a more even sleeping surface. This can be a temporary solution while the mattress adjusts or until you can address the underlying issue.
7. Contact the Manufacturer:

If the lump persists and your mattress is still under warranty, contact the manufacturer for guidance. They may provide recommendations or offer a replacement if the issue is a manufacturing defect.
User Dilemma
A user, Canageek, faced a mattress lump conundrum that appeared after leaving it on its side. Speculation arose about whether this flaw prompted the mattress’s “free” status.
Community Feedback:
- Community Skepticism: Some community members doubted that a few days on its side could cause such a drastic issue. Questions arose about whether the lump was the real reason for the mattress being free.
- User Assurance: Canageek insisted that the lump wasn’t present initially, with their girlfriend corroborating the claim.
Potential Solutions:
- Reverse the Mattress: Turning the mattress to the reverse side was suggested. This simple maneuver might help alleviate the issue.
- Whacking Technique: Prop up the mattress, face the former bottom side up, and give the lump a few good whacks. This unconventional method might redistribute internal elements.
- DIY Fix: For the adventurous, a user recommended carefully cutting open the mattress, attempting to rearrange the shifted coils, and then sewing it back together. A YouTube tutorial search was suggested for guidance.
Expert Opinions:
- Wool Pillow Top Shift: One user speculated that the lump might be the result of the wool pillow top shifting. They recommended using a vacuum cleaner’s crevice tool to redistribute the wool through the fabric.
Conclusion
If all else fails, and you’re feeling bold, a DIY approach might be worth exploring. However, for a less hands-on solution, try flipping the mattress, whacking the lump, or redistributing internal components with a vacuum cleaner.
Remember, a lumpy mattress doesn’t necessarily mean the end of its usefulness; it might just need a little TLC to regain its comfort.


