
Are you looking to add a touch of elegance to your baseboards or floors with shoe molding but don’t have a nail gun? Fear not, because we’ve got you covered!
Shoe molding is popular for homeowners who want to add a finishing touch to their baseboards or floors. Installing shoe molding without a nail gun can seem daunting, but it is actually quite simple with the right tools and techniques.
This guide will discuss step-by-step instructions for installing shoe molding without a nail gun, including the tools and materials you will need, how to measure and cut the molding, and tips for attaching the molding to the wall or floor.
How To Install Shoe Molding With And Without Nails?
As with most carpentry tasks, shoe molding can be installed with a hammer and nails. Of course, a nail gun can be used to place shoe molding around doors and inside tight corners instead of hammers.
Check out more options for installing shoe molding, including the possibility of installing it without nails!
Materials Needed For How To Install Shoe Molding:
- Molding
- Caulk Gun
- Glue for Construction Purposes
- Sand Paper
- Miter Saw
- Liquid Nails
- Hammer
- X-Acto Knife
- Nail Gun
- Measuring Tape
- Nails
Prep Before Installing The Molding
Make sure the molding is clean before you begin the installation process. As well as cleaning the area where you will install it, clean around it. For best results, the molding should be primed and painted beforehand if that’s what you want.
Paints like Sherwin Williams Duration Home Interior Acrylic Latex Paint are great for shoe molding or trims.
Besides blocking stains, it is excellent for areas that are going to be subjected to heavy wear and tear. It is best to use lightweight molding when you are using construction glue instead of nails.
Measuring and Cutting Shoe Molding to Fit
Installing shoe molding begins with measuring the area that will be covered with the molding. Mark the length of the molding on the molding and place it flat in front of the miter saw, face up.
To make shoe molding smoother, you may need to sand the edges.
You need to dry-fit the shoe molding to ensure it will fit correctly. Check it will fit up to the butt by putting it against the wall and cutting pieces up to it.
How To Install Shoe Molding With No Nail?
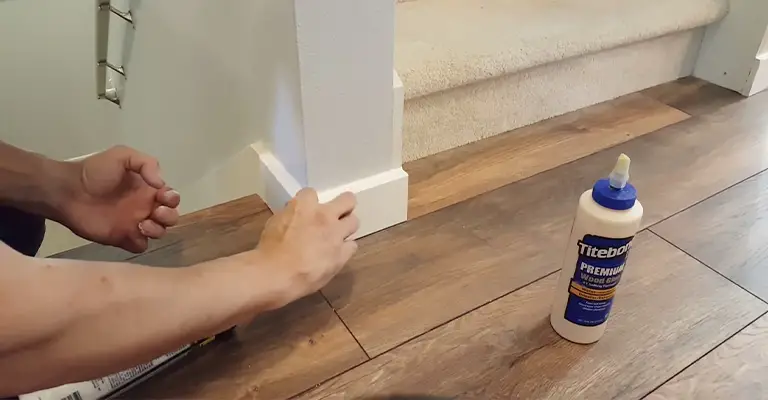
Caulk gun cartridges need to be filled with liquid nails. It is best to cut the tip about 1/4 inch long. The seal around the canister needs to be punctured.
Lay the shoe molding face down on the work surface and place a bead of liquid nails in a zigzagging pattern around the molding.
The adhesive side of the molding should be facing the wall. Press it firmly into place against the wall. You will need to make sure all the pieces are aligned carefully.
How To Install Quarter-Round Molding Without A Nail Gun?
A nail set looks similar to a pencil but is metal instead of wood. Finishing nails should not be driven into the moldings, which would result in a hammer-shaped dent, so hammer them almost all the way in first, then use a nail set to complete the job.
Step 1: Cut Molding
To cut quarter-round molding, you can use any saw you are comfortable using; since it’s pretty easy to cut by hand, I used a hacksaw.
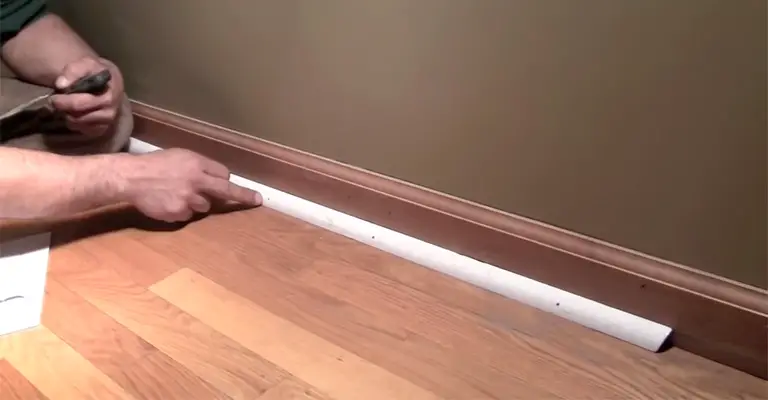
Step 2: Lay Molding Against The Wall, Flush With The Floor
There will be some gaps between the molding and the wall; they will be filled in later with sealant. Be careful when laying the molding against the floor to ensure it is nice and flat.
Step 3: Hammer Your Finishing Nail Almost All The Way Into The Wall
Baseboards must always be nailed to the wall rather than the floor. A slightly downward angle makes hammering nails easier than striking them straight in.
Hammer it with confidence! Taking a few good, solid hits versus a dozen tiny ones will reduce your chance of denting your baseboard. As I have yet to master it, this takes practice.
If the nail still sticks out of the wall after 1/8 inch, you should cease hammering.
Step 4: Use The Nail Set To Drive The Nail The Rest Of The Way In
Set the nail set so that its tip lines up with the top of your nail. You need a nail set a little bit smaller than your nail head because nail sets come in different sizes.
Drive the nail the rest of the way into the wall with the hammer on the nail set. Your first attempt will probably be unsuccessful, so give it some practice! You may want to practice on a spare piece of plywood until you get the hang of it.
You’re done when you’ve driven the nail just beneath the surface of your baseboard. On the length of the baseboard, continue to drive nails about two feet apart.
Step 5: Finish With Sealant
Seal the gap between the baseboard and the wall with basic indoor/outdoor sealant or caulk. Your finger is your best tool for getting a smooth, perfect seal, so don’t worry if it comes out sloppy in the tube.
Smooth the sealant once it has been applied with your (clean) finger. Paper towels can be used to get rid of any excess.
Step 6: Cover Nail Heads
You’ll barely be able to see your nail heads if you’ve done an excellent job setting your nails. You still need to add a dab of sealant over the top of them to make them even more invisible.
Once the sealant dries, it can be sanded down if it’s a bit messy. It would be easiest to use white baseboards and sealant, as everything will blend perfectly.
Other than that, if they’re not the same color as each other (for example, natural wood baseboards), you’ll have to paint them all to match.
“Traditional” Shoe Molding Installation
The shoe molding should be securely fixed to the wall either by using a nail gun or by hammering and nailing. Ensure that they are 9 inches apart from one another without being too close.
For answers to the question “What nail should I use for shoe molding?” the answer is 2″ brad nails for the nail gun. Try to find smaller finishing nails for your hammer, so they’re not so noticeable on the shoe molding.
Install Shoe Molding Along The Edge Of Your Baseboards With These Tips
Installing shoe molding is a relatively straightforward do-it-yourself project, but you will need to create a “coping joint” (discussed below). The following tips will help you achieve a professional look.
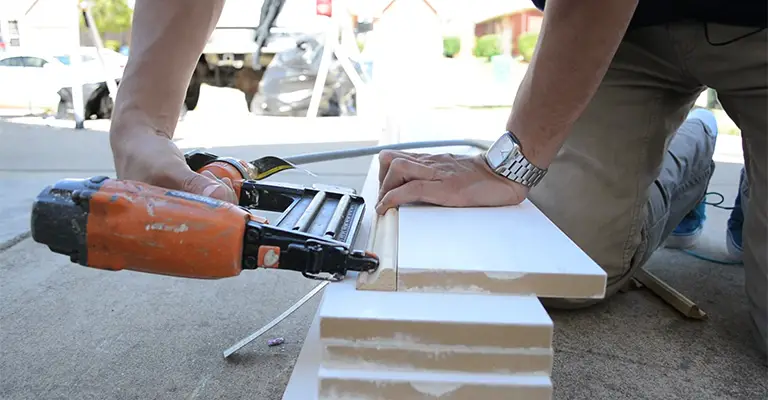
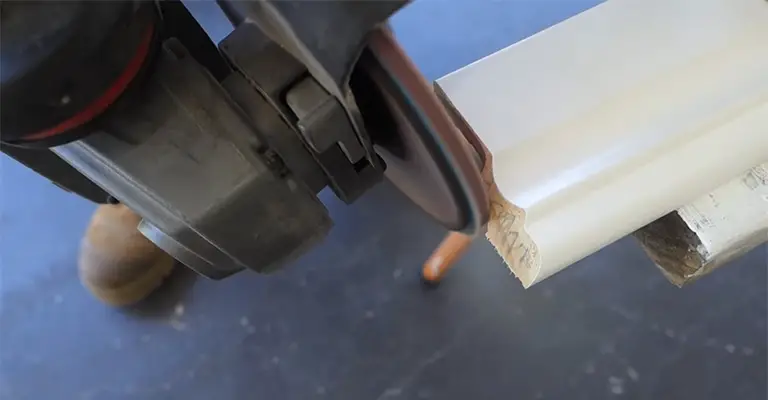
- Use the right tools. There are several different tools that you can use to prepare the shoe moldings, such as a miter saw for cutting the molding; a coping saw to cut the inside corners and a finish nailer for attaching the moldings. A finish nailer or pinner will be more effective than a hammer and nails in this case since shoe molding is small and easy to damage.
- Start in a corner and work your way around the room in one direction. Cutting the inside corner coping joints is easier this way.
- Press shoe molding firmly against the floor and against the baseboard as you nail it in place. The flexibility of the molding makes it easy to do this.
- Insert one finish nail approximately every 12 inches along the baseboard. Nail up the baseboard; be careful not to insert the nails into the gap beneath the baseboard, or the molding will not be properly secured. If you’re worried about hitting wall studs, shoe molding only attaches to the baseboard.
- Miter and glue outside corners. Corner mitering means cutting two pieces of baseboard at 45-degree angles and meeting them together to form a corner. You should dab a small amount of construction glue on each end of the molding before installing it. To ensure snug corners, glue acts as an extra layer of protection over the nails holding the molding in place.
- Cope inside corner joints. While you may be tempted to create another miter joint to compensate for these inside corners, mitered joints in inside corners tend to gap. Rather than using a face joint, try a Cope joint, which is also known as a “back beveled” joint.
To create a cope joint, first cut the trim at a 90-degree angle and install it so that it angles tightly towards the corner. In the next cut, the wood behind the edge is manually removed with a coping saw, which is set at a 45-degree angle.
This way, a second piece of trim can be positioned (overlaid) over the first without leaving a gap. It takes practice to create beautiful, professional-looking joints, but once you master the skill, you can create them easily.
Watching a carpenter before you go through the process on your own is advisable. The steps of the process can be outlined in instructional videos on YouTube.
- Paint or stain shoe molding before you install it. Inspect the area for nail holes and fill them if necessary before applying touch-up paint. If you decide to paint or stain small molding along the floor, you may be able to do it without getting paint or stain on the floor.
Final Words
Installing shoe molding without a nail gun is achievable with the right tools and techniques.
We hope that this guide has provided you with a clear understanding of how to install shoe molding without a nail gun, from measuring and cutting the molding to attaching it to the wall or floor.
By following our step-by-step instructions, you’ll be able to achieve a professional-looking finish that will add a touch of elegance to your home.
Remember, practice makes perfect, so don’t be afraid to experiment with different techniques until you find what works best for you. Good luck, and happy molding!


