
Are you tired of seeing that unsightly gap between your brick wall and ceiling? Whether it’s in your living room or bedroom, that gap can make a room look unfinished and unkempt.
But don’t worry! Closing the gap between a brick wall and the ceiling is a simple and easy task you can do on the weekend.
In this guide, I’ll walk you through the steps of how to close that gap and give your room a polished, finished look. From gathering the right materials to applying the perfect finish, I’ll guide you through every step of the process.
So, whether you’re a seasoned DIYer or a first-time home improvement enthusiast, this guide will give you the tips and tricks you need to get the job done right. So, let’s get started!
Closing The Gap Between A Brick Wall And The Ceiling | Step By Step
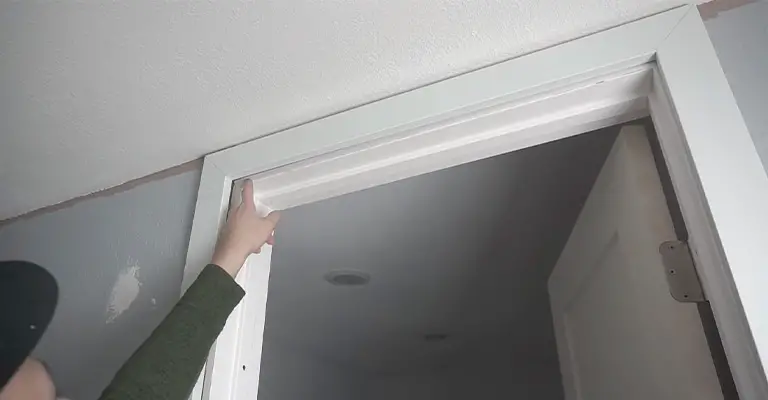
It is common for a gap to form when two different building materials meet along a joint because their edges are not flush. You can find an example of this in your home if you have bricks or brick veneer walls.
A tight joint between the brick and the ceiling drywall is almost impossible due to the rough edges of the brick.
Your home can be less energy-efficient if you have this, as it can be unsightly to look at as well as cause drafts. Even a novice do-it-yourselfer can complete the task of closing this gap.
Materials Needed
The first step in closing the gap between your brick wall and ceiling is to gather the necessary materials. You will need:
- Filler (expanding foam or silicone caulk)
- Adhesive
- Putty knife
- Sandpaper
- Paint or stain (to match the color of your wall and ceiling)
- Measuring tape
- A saw or utility knife
You can purchase these materials at your local home improvement store or online. The cost of materials should be relatively low, but it will depend on the type of filler you choose and the size of the gap you’re filling.
Step 1: Preparing The Surface

Before you begin filling the gap, it’s important to prepare the surface. Start by cleaning the brick wall and removing any existing caulk or sealant.
Use a putty knife to scrape away any old caulk or sealant and wipe the wall down with a damp cloth to remove any dust or debris.
Next, check for cracks or damage in the wall or ceiling. If you find any, you will need to repair them before you can begin filling the gap.
Step 2: Measuring And Cutting The Filler
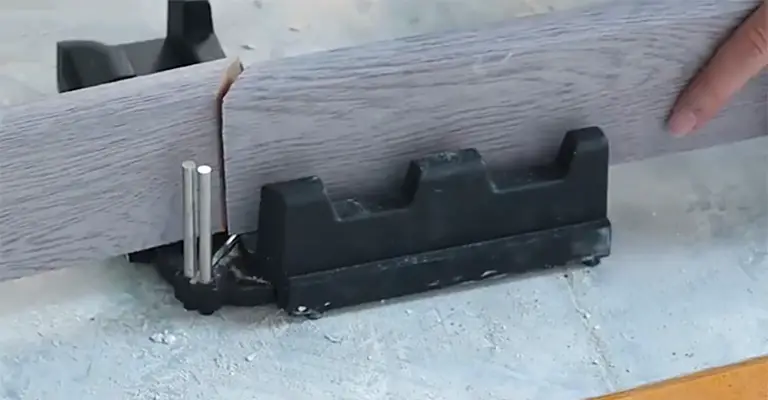
Measure the gap between the brick wall and the ceiling to determine the amount of filler you will need.
The most common fillers for this type of project are expanding foam and silicone caulk. Both are easy to use and can be cut to size with a saw or utility knife.
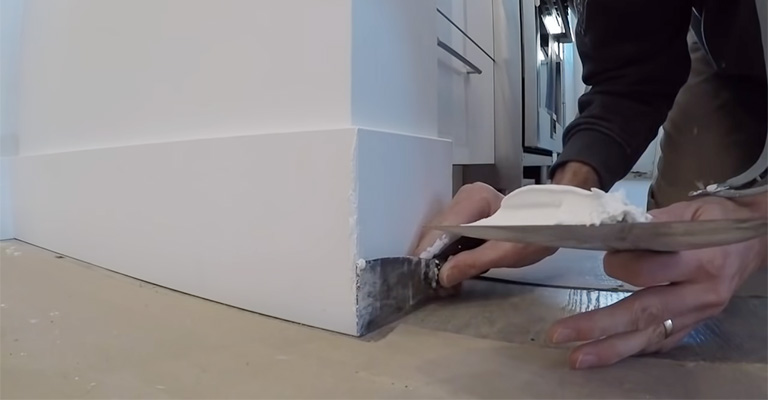
Step 3: Applying The Filler
Once you have your filler cut to size, it’s time to apply it to the gap. Start by applying adhesive to the wall and ceiling.
Then, press the filler into the gap and smooth it out with a putty knife. Make sure to fill the gap completely and shape the filler to match the contours of the wall and ceiling.
4. Finishing The Job
Allow the filler to dry completely before sanding it down to a smooth finish. Sanding will remove any excess filler and make the surface smooth and even.
Once the filler is dry and sanded, it’s time to paint or stain it to match the color of your wall and ceiling.
Frequently Asked Questions
1. Can I use caulk instead of filler?
Caulk can be used to fill small gaps between a brick wall and ceiling, but it may not be the best option for larger gaps.
Caulk is typically more flexible and is better suited for areas that may experience changes in temperature or humidity.
For larger gaps, a filler such as joint compound or spackling paste may be more appropriate.
These fillers are typically firmer and can help create a more level surface. However, it’s important to note that these fillers are not ideal for outdoor projects or for areas that will be exposed to water.
2. What are the common causes of gaps between brick walls and ceilings?
Gaps between brick walls and ceilings can be caused by a variety of factors, including settling of the foundation, improper construction, and changes in temperature or humidity.
3. Can the gap between my brick wall and ceiling be a structural issue?
A: In some cases, the gap between a brick wall and ceiling can indicate a structural issue. If the gap is large or seems to be getting bigger, it’s best to consult with a professional to determine if there are any underlying structural problems.
3. Is it necessary to remove the old caulk or sealant before applying new material?
Yes, it’s important to remove any old caulk or sealant before applying new material. This will ensure a smooth and even application and will help the new material adhere properly.
4. What type of caulk or sealant is best for closing the gap between a brick wall and ceiling?
A silicone-based caulk or sealant is best for closing the gap between a brick wall and ceiling. It is durable and flexible, which makes it ideal for use in areas that may experience changes in temperature or humidity.
5. How long should the caulk or sealant take to dry before painting?
A: The drying time for caulk or sealant will depend on the specific product you are using and the humidity and temperature of the room. It’s best to consult the manufacturer’s instructions for an estimated drying time.
6. Can I use paint to close the gap between a brick wall and ceiling?
A: While paint can be used to close the gap between a brick wall and ceiling, it is not recommended as it is not as durable as caulk or sealant. It is also not as flexible, so it may crack or peel over time.
7. Can I do this project on my own, or should I hire a professional?
Closing the gap between a brick wall and ceiling is a relatively simple task that a DIYer can do with basic home improvement skills. The process involves:
- Cleaning the surface.
- Removing any old caulk or sealant.
- Applying new caulk or sealant.
However, if a structural problem causes the gap, or you are not comfortable doing the work yourself, it would be best to hire a professional.
A professional contractor will be able to determine if there are any underlying structural issues and will have the necessary tools and experience to complete the job correctly and efficiently.
Conclusion
Closing the gap between a brick wall and ceiling is a simple and easy task you can do on the weekend. With the right materials, a little bit of patience, and the steps outlined in this guide, you can give your room a polished, finished look.
Remember to clean the surface and check for cracks or damage before beginning, allow the filler to dry completely before sanding, and use paint or stain that matches the color of your wall and ceiling.
With these tips in mind, you’ll be able to close that gap like a pro and enjoy the beautiful, finished look of your newly renovated room.


